(Disclaimer: English is not my native language, I have probably made some mistakes. I have done my best)
I was impressed by several threads about guitar building I read on internet forums, especially on an American one, TDPRI, where the luthier Gil Yaron built an exact replica of a standard ’59 LP. I think I have good hands, I’ve been a goldsmith for many years. And I’ve always made the adjustments to my instruments (and those of my mates). I’ve rebuilt and re-fretted a tenor banjo, made my nuts, my violin bridges, changed my flute pads, made a couple of guitar kits… I thank all those people who, by reading them, made me take the next step, to make a guitar from scratch.
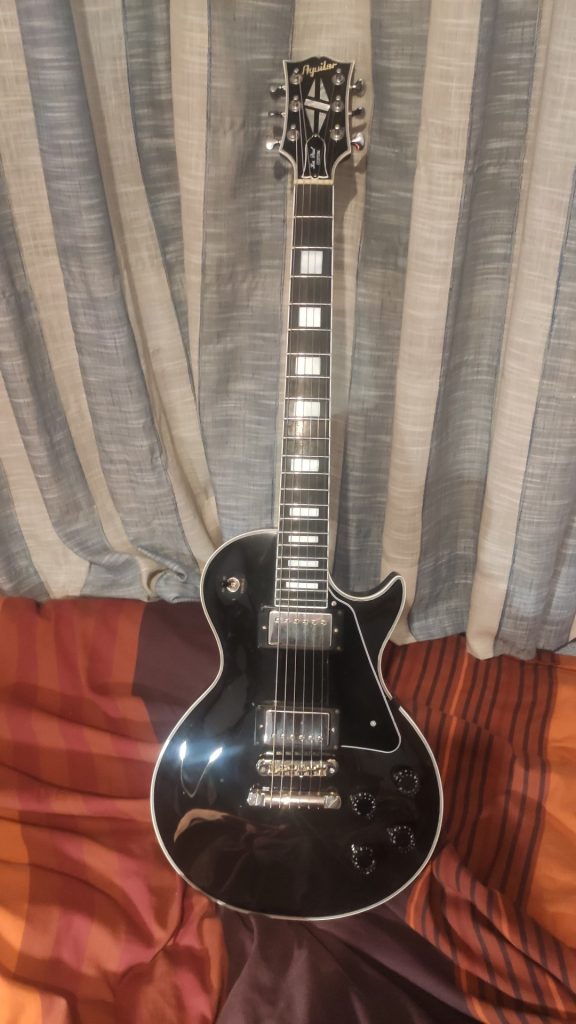
I wanted the look of a custom LP, the jewel in Gibson’s crown. With its mother-of-pearl inlays, its ebony fingerboard, its five-ply binding, its black beauty! (but no golden hardware), and its beautiful diamond pattern on the headstock
But I also wanted its internal structure to be the standard ’59 model, because, isn’t that the holy grail of Les Pauls? There are less than a thousand of them preserved, about 1,500 if you add the ’58 and ’60s, and their price, nowadays, is closer to that of a house than that of a guitar. Jimmy Page, Duane Allman, Bonamassa, Peter Green (Fleetwood Mac) and so many others marked an era with their sound.
So it should have a maple top on a mahogany body, 17 degrees of headstock angle, his typical neck, which is neither slim nor a baseball bat. Also, I wanted almost one millimeter more nut width, stainless steel frets, locking tuners, ABR bridge with long screws as used in those days, no weight relieved (internal hollow chambers to relieve weight). Body and headstock finished in nitrocellulose and neck in oil (tru oil or tung, we’ll see). I won’t put inlay on the first fret, who needs the first fret pointed out to them? I want a small and light double action truss rod, for a four millimeter allen key, not the typical Gibson one. Every house in Europe has a 4 mm allen wrench. I don’t want to mess around with imperial hex keys. Besides, the gap the nut needs weakens the head enormously, which is the weakest point of an LP.
I got several plans of a 59, none of them exactly the same as the other. Logical, since they were almost handmade at that time and none would be the same as any other. From these I made my own. I also got some of the custom model, which I used only for the shape of the headstock (wider than the standard LP), inlays and binding.
Let’s start.
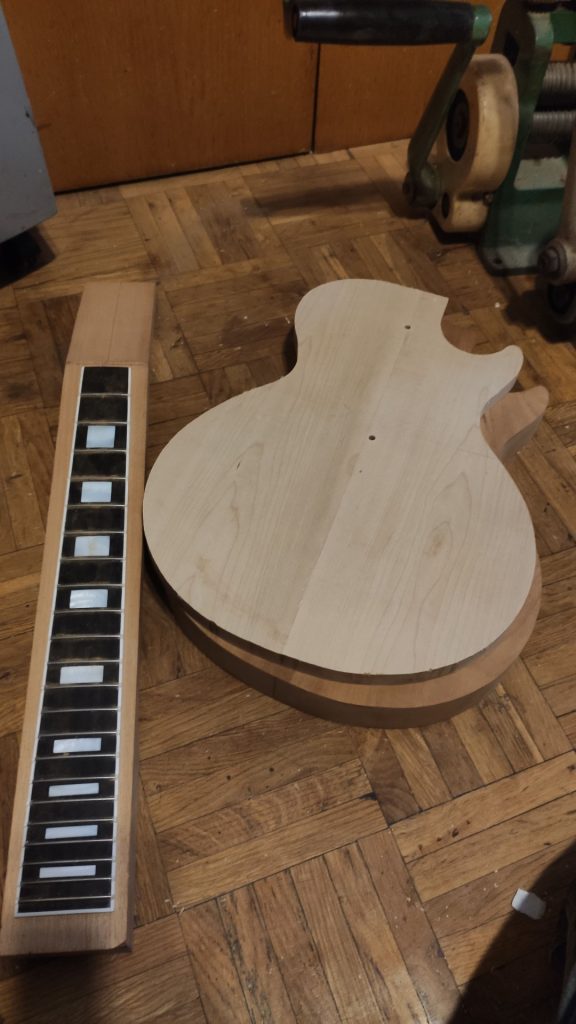
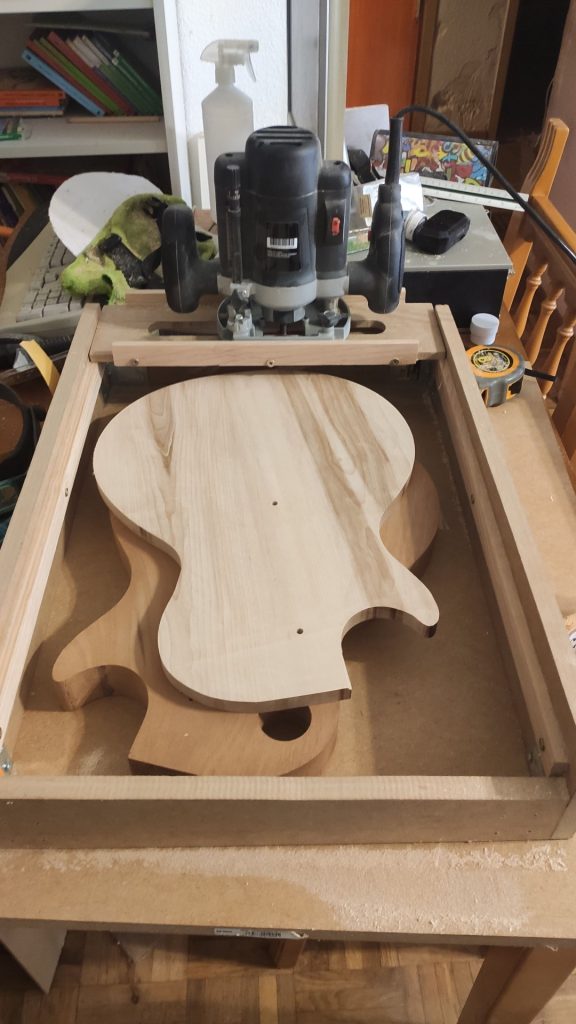
The base.
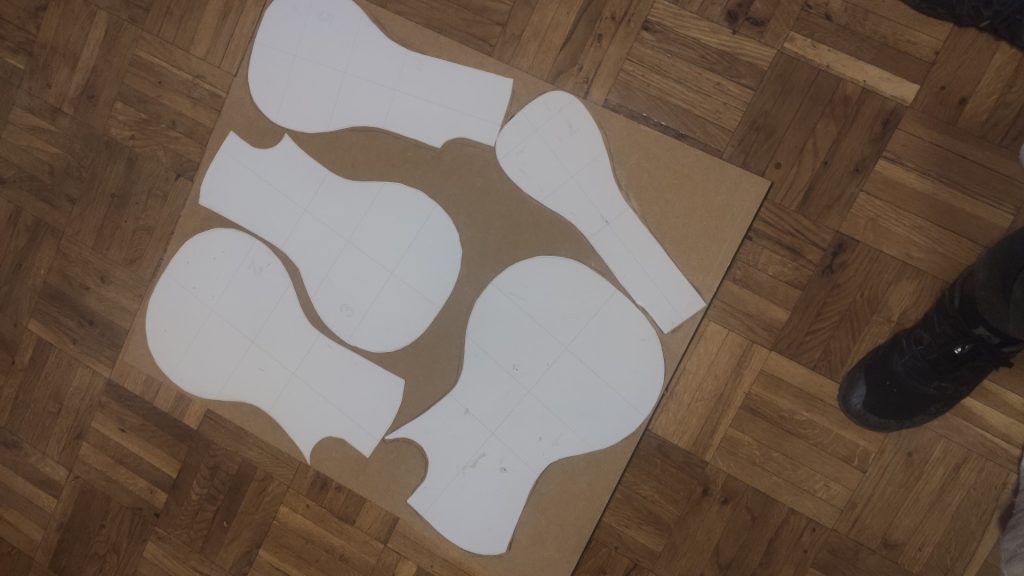
The top has a nice grain, but not flamed, (it is going to be black after all). Hard maple (very hard, I can attest) for the top and two-piece Honduras mahogany, quite light and very resonant, for the body. I loved the mahogany plank. Before receiving the wood I have already cut several templates in 19 mm wide MDF. Body and neck. There’s no picture of that, it’s something you can see in lots of threads. But basically I make a final version of the plans on the PC (with rhinoceros), print them on cardboard, glue them to the board with glue stick and separate the pieces with a jigsaw, without sharpening the cut too much. Then I run them through the band saw, as close to the line as I can, and finish them with a file and a sanding drum. For straight lines I mill them using rulers as a guide and for some other small shapes I first cut them out in methacrylate and transfer them to the template with copying cutters. The final result depends on the accuracy of the templates.

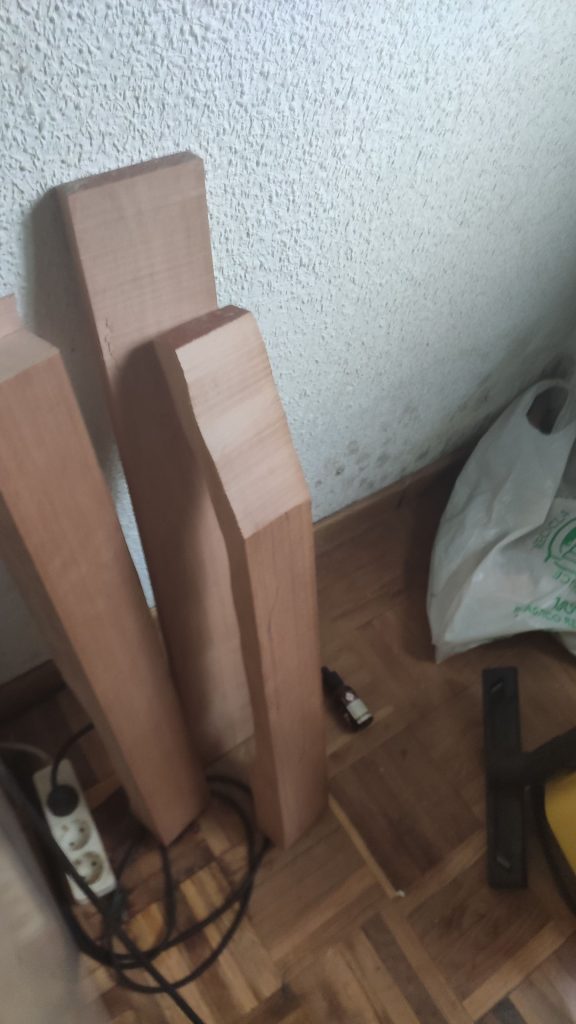
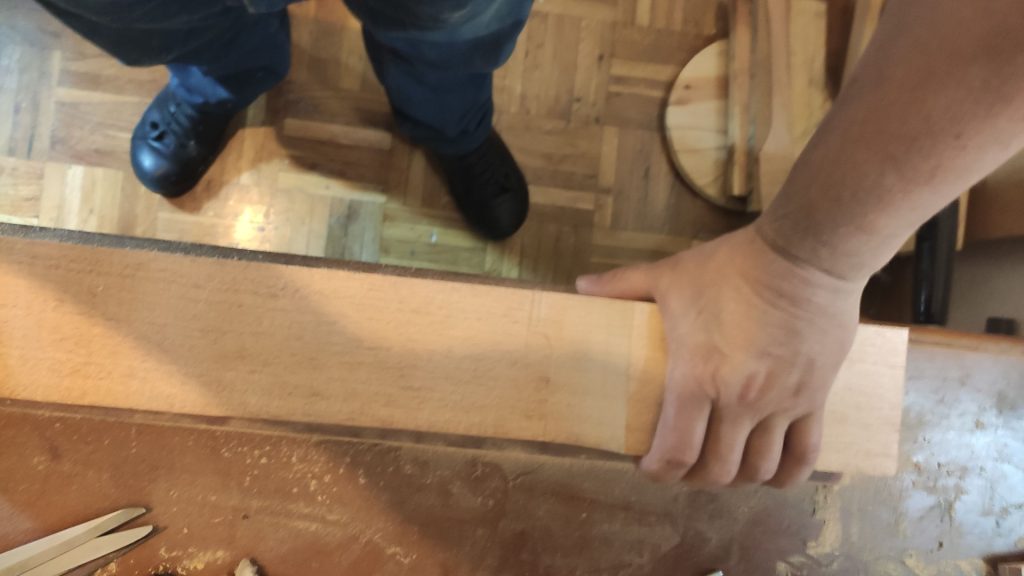
The neck is taken from a Honduran mahogany block. I have to study how to cut it so that the grain runs perpendicular to the mast (quarter saw). I split approximately two parts for two one-piece necks, and there is still one board left over that could be enough for another one of several pieces.
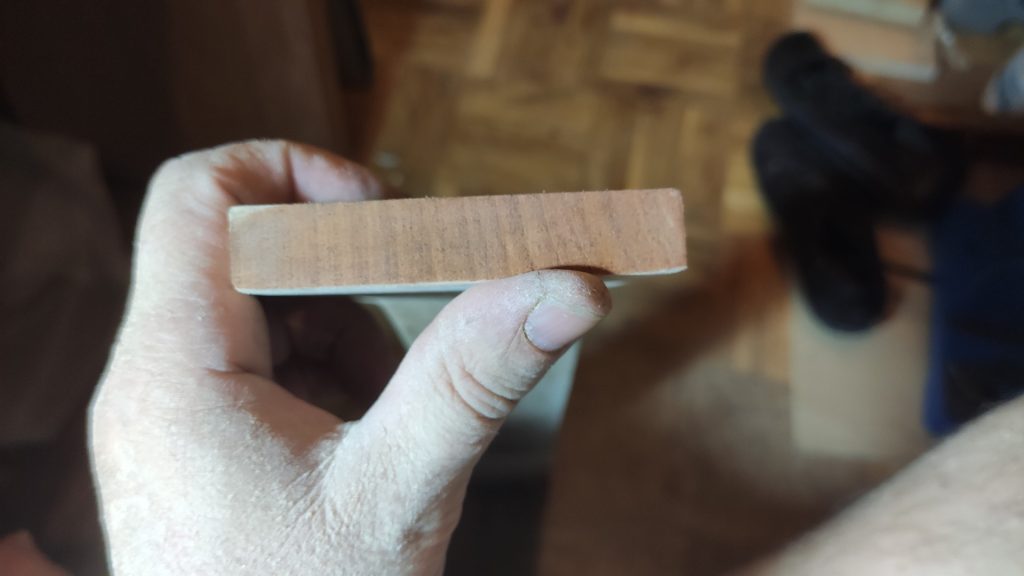
I make sure I have the side that goes to the fingerboard, which I will use as a reference, as flat as possible and square to the sides. I have made myself a sandpaper by cutting a strip and sticking it to a thick piece of glass on the table. I check its flatness twenty times before using it. And I start exercising:
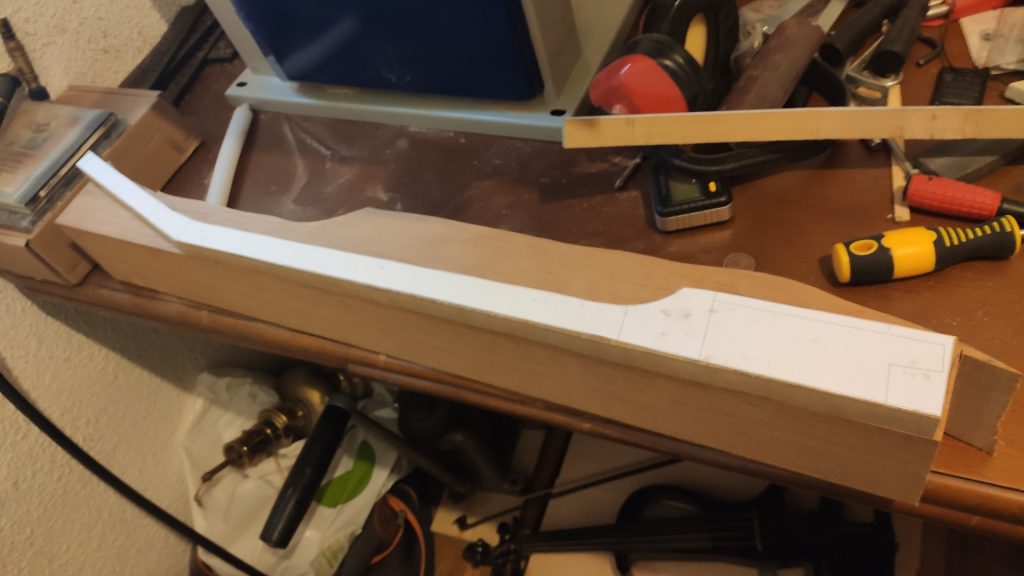
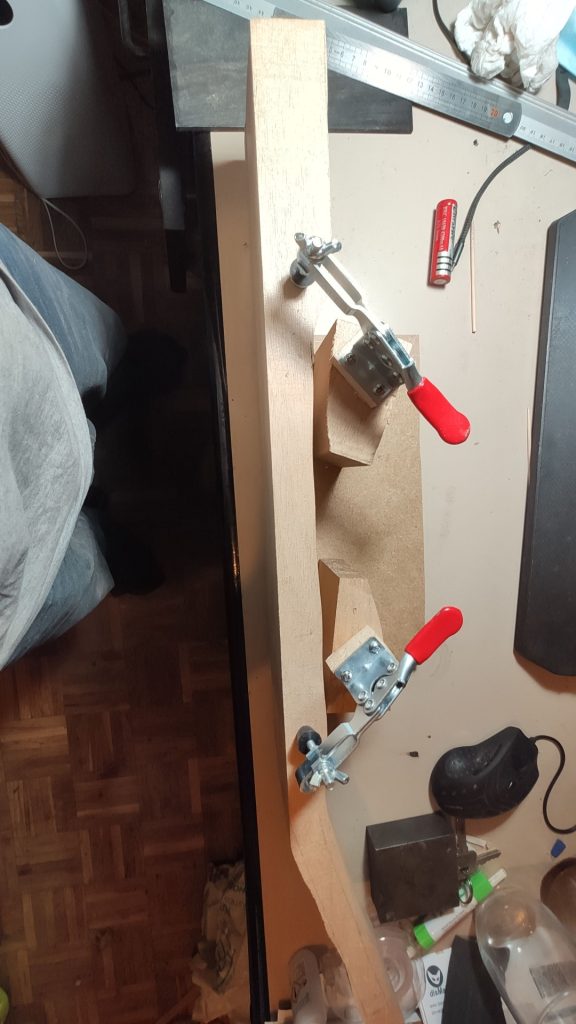
I make a jig (homemade invention to make the work easier) to copy the shape of the neck template.
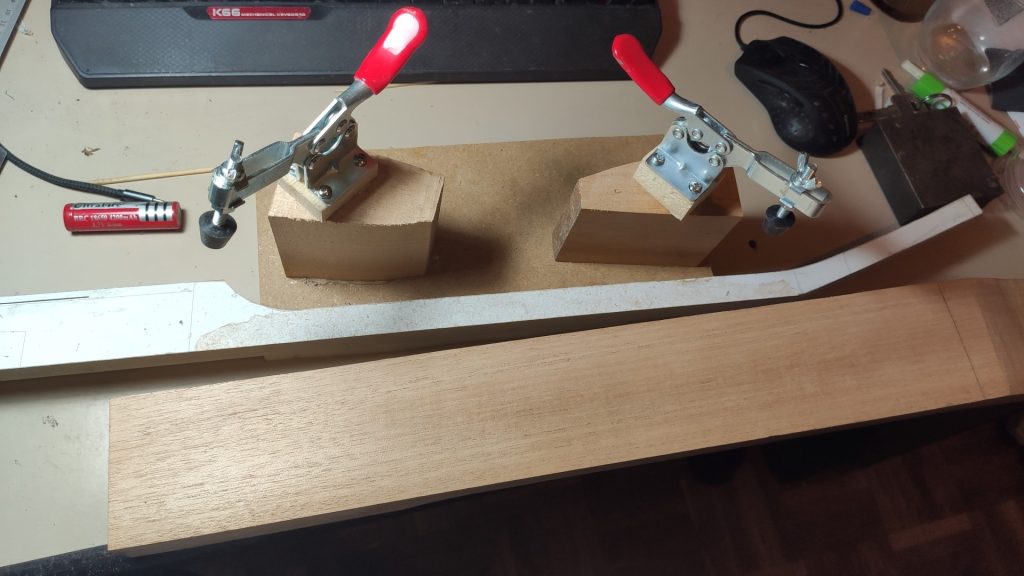
If anyone wants to do something like this, don’t be as miserly as me and make it longer and with three pivots instead of two. It worked for me, but I had to put a lot of pressure on it to keep it in place.
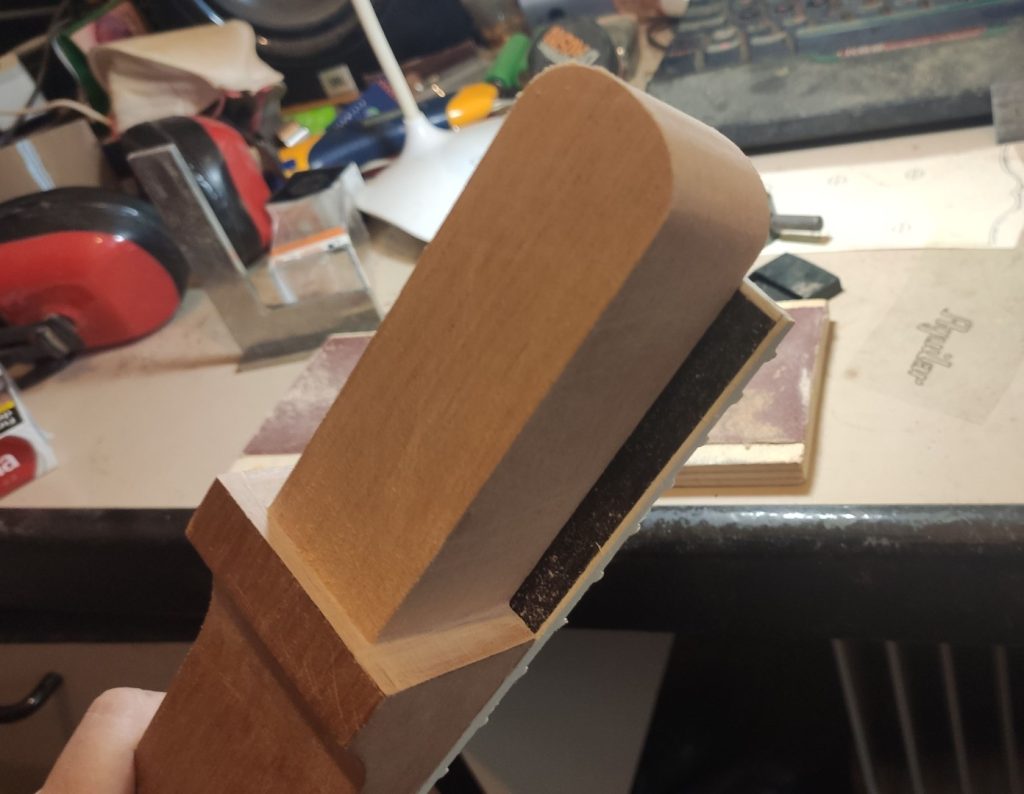
It consists of fixing the template to the jig, placing the future neck perpendicular to the jig to copy the shape of the template with the sanding drum. The ready-made reference side that goes to the fingerboard is not touched, it is perfectly aligned to the jig. The jig is used on that side only to attack the headstock part. Then the jig and neck are turned over and the process is repeated on the other side, this time all the way around. First I made a handmade “robosander” with a threaded rod and a bearing. The wooden wheel has a slight play, but the important thing is that, when it rests on the template, it is flush with the sanding roller.
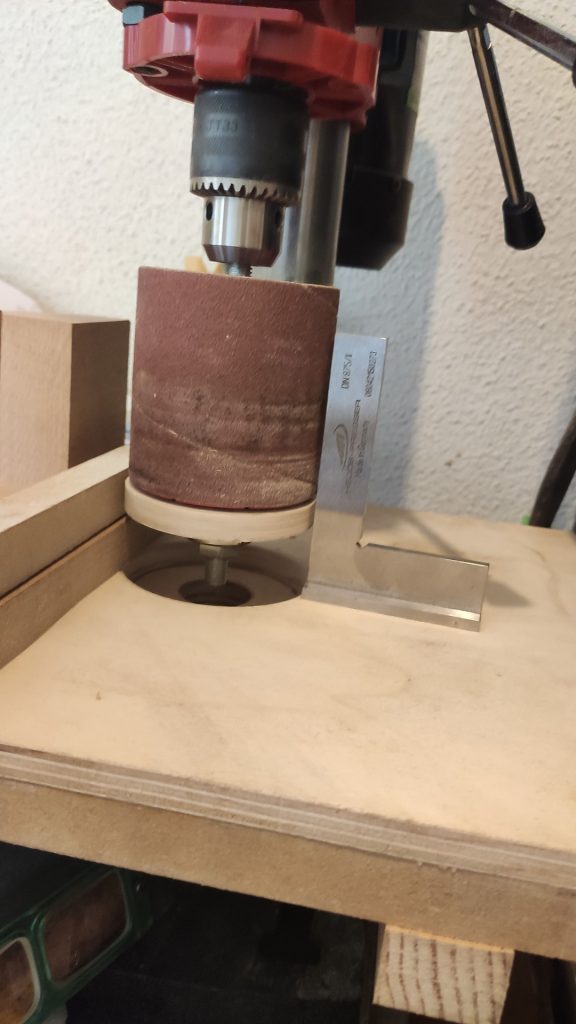
I prepare the template with the pieces. Check the verticality and that the wood always protrudes a little from the shape of the template (except on the flat reference face).
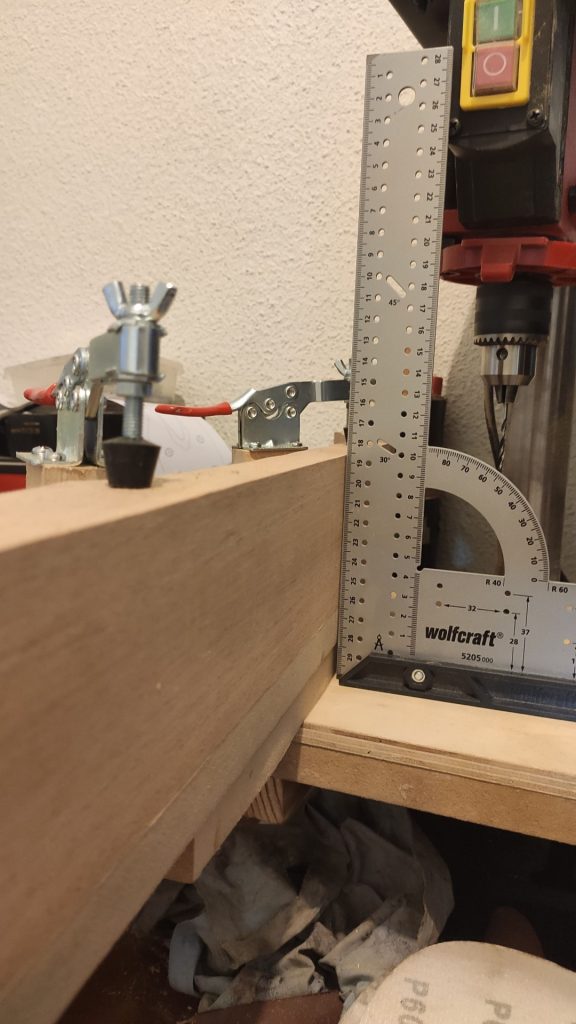
It is then passed through the roller. The piece of wood with the bearing rests on the template and the sanding part goes eating the neck until it copies exactly the shape of the template. When I made the back part, a knot appeared. But it is very superficial, it will disappear when the neck is rounded.
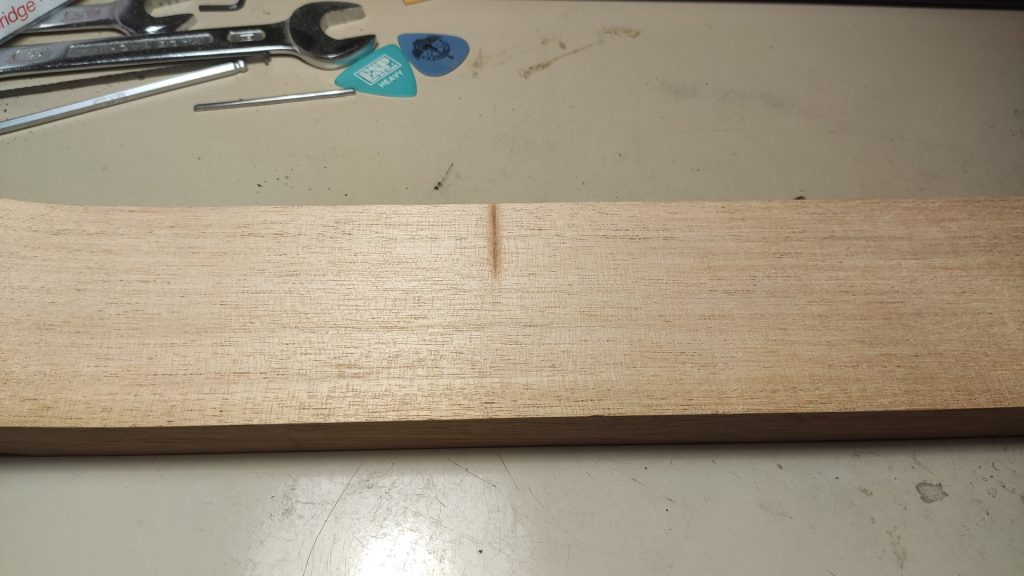
And we let it sit for a week in the air before we finished tuning it, in case the wood moved. But it remained perfectly stable.
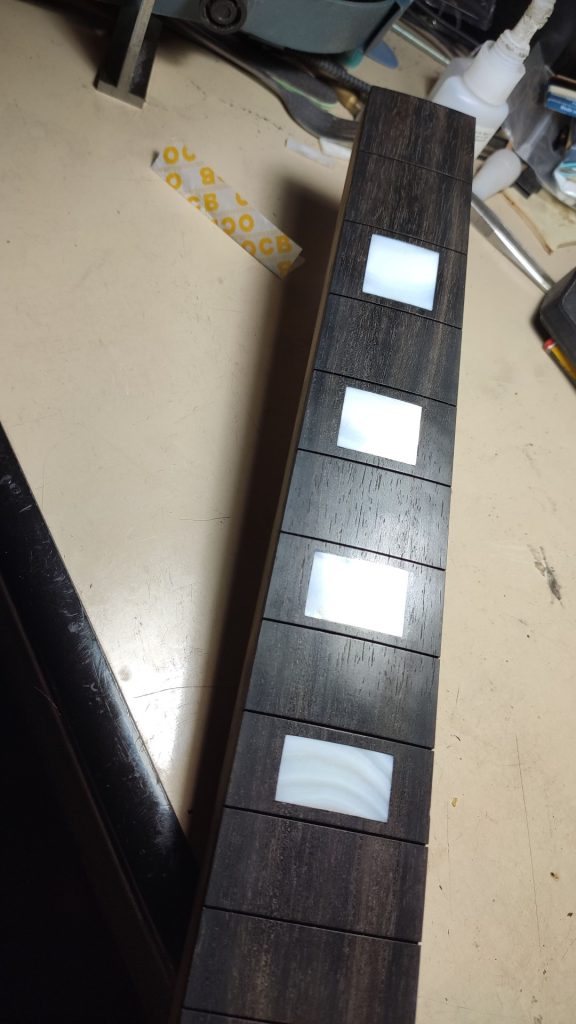
I’m cutting the mother-of-pearl of the inlays to size and then carving the holes in the fingerboard (Disclaimer: I had left my nails long to practice arpeggios on the spanish guitar).
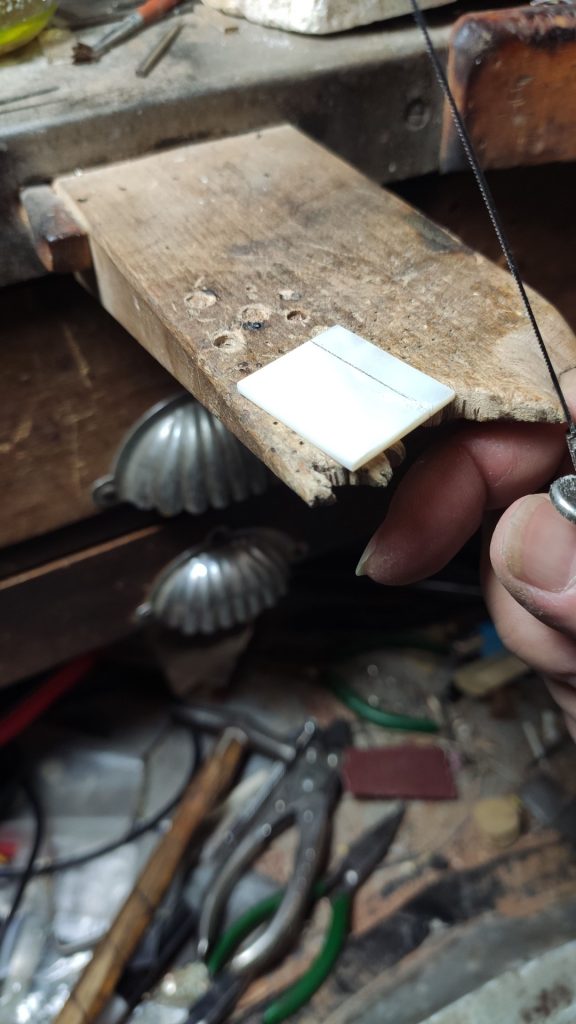
And I present them. I don’t know if it is the exact word in English
I bought the fingerboard already radiused and slotted. Radiused means that the top face is not flat, it has a curvature, in this case the correct one that has always been used in Les Pauls, 12 inches radius. To carve the holes of the inlays I have to make a flat surface to save the curve. If it were a standard LP I could mill directly, because the inlays are made of acetate or plastic and bend, but the mother of pearl needs a flat floor.
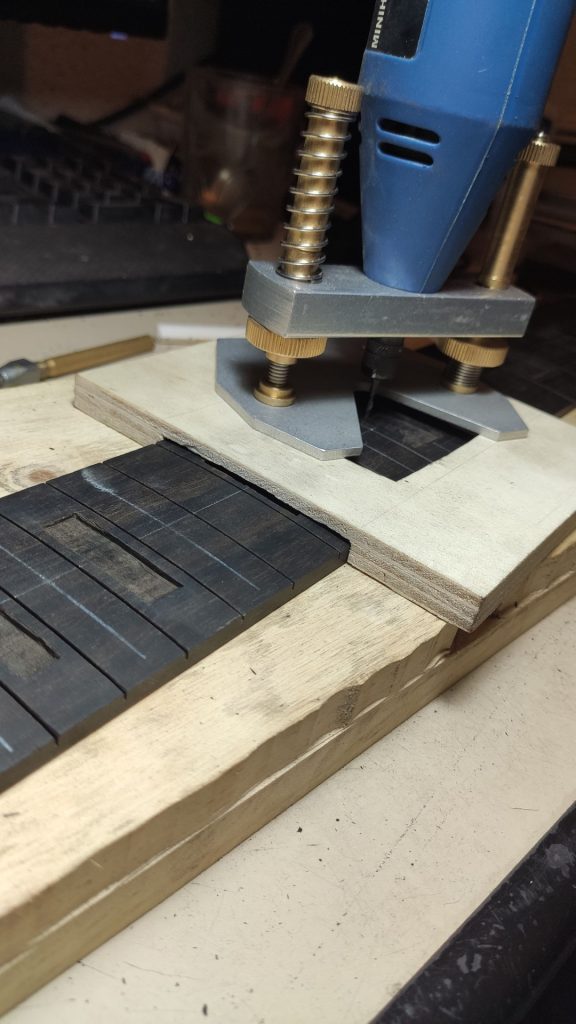
It is glued and sanded. I use a block with the same radius as the fingerboard.

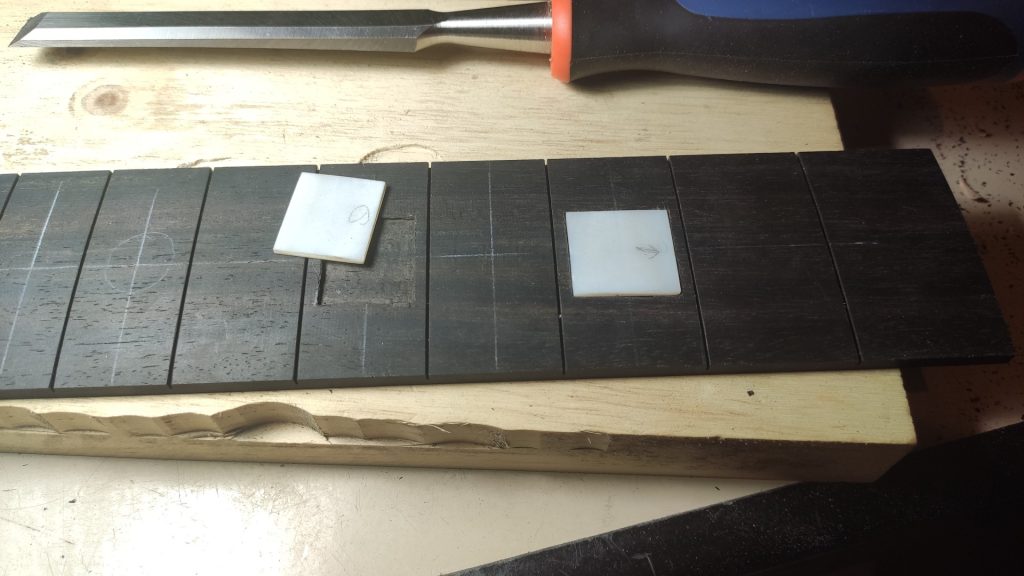
It turned out great, but there are a couple of small imperfections in the carving, which form a gap between the wood and the mother-of-pearl. Although they are minor, I’m quite proud of the result. I’ll get a CNC one day.
We add fine ebony sawdust in the joints, pressing it to penetrate and then a drop of cyanoacrylate (super glue) is deposited in those little mismatches, forming an artificial ebony that seals everything. We sand it again, and it’s perfect. Then I leave the fretboard in its planned dimensions of width and length using its template on the milling table.
Now it’s time to fretting. I check that the grooves are clean and have the right depth, and then I get down to business.
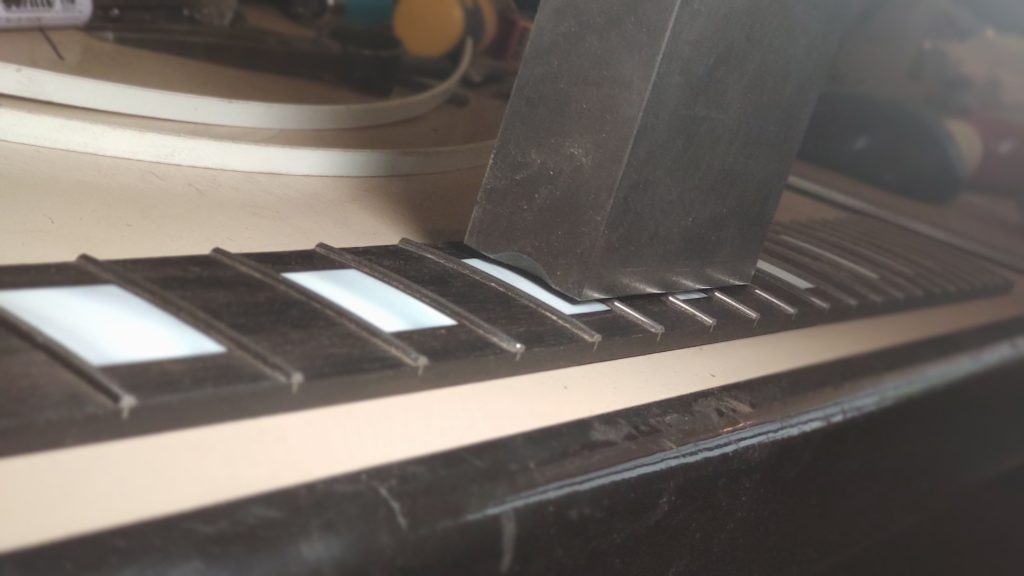
First I open the edge of the grooves a little with a triangle file.
And I start to press frets.
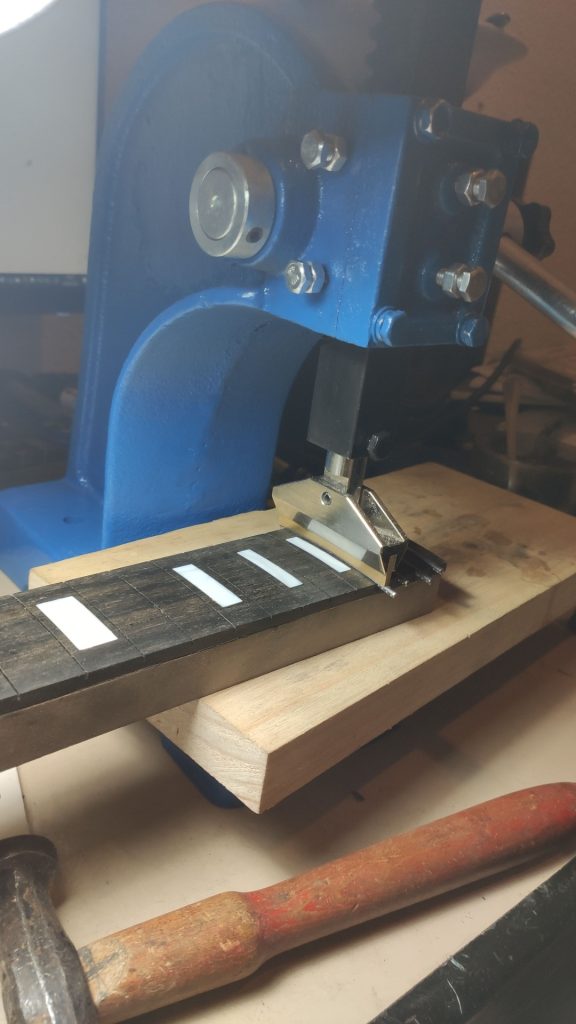
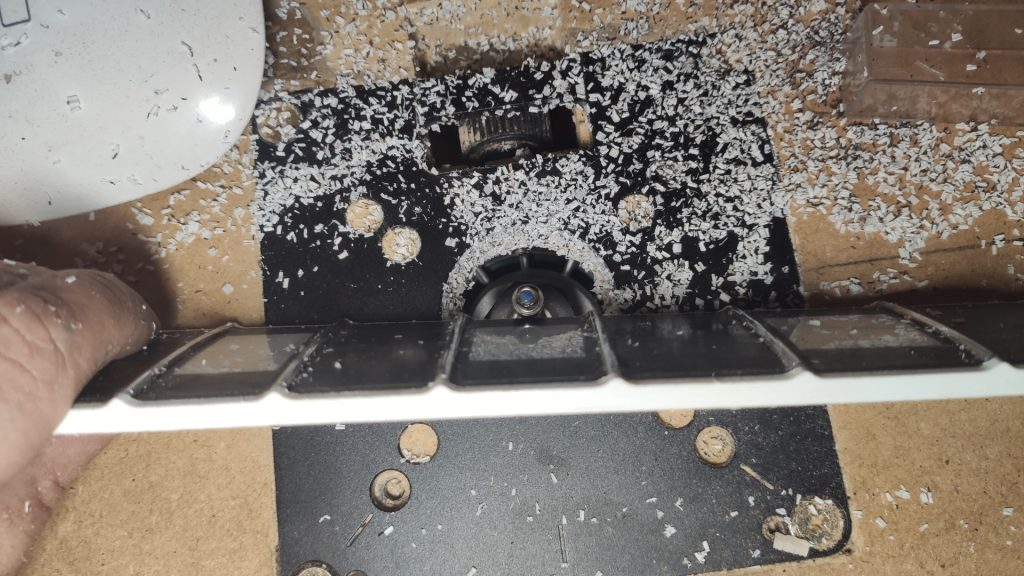
No, I didn’t hammer the frets with that hammer. I don’t remember why it was there, but it’s not part of the project. I have a nylon one for that, but I didn’t need it. I check that all the frets fit well, with no irregularities, and I flush them to the sides of the fretboard, first with pliers and then on the sandpaper glued to the glass. Now it’s time for the binding of the fingerboard.
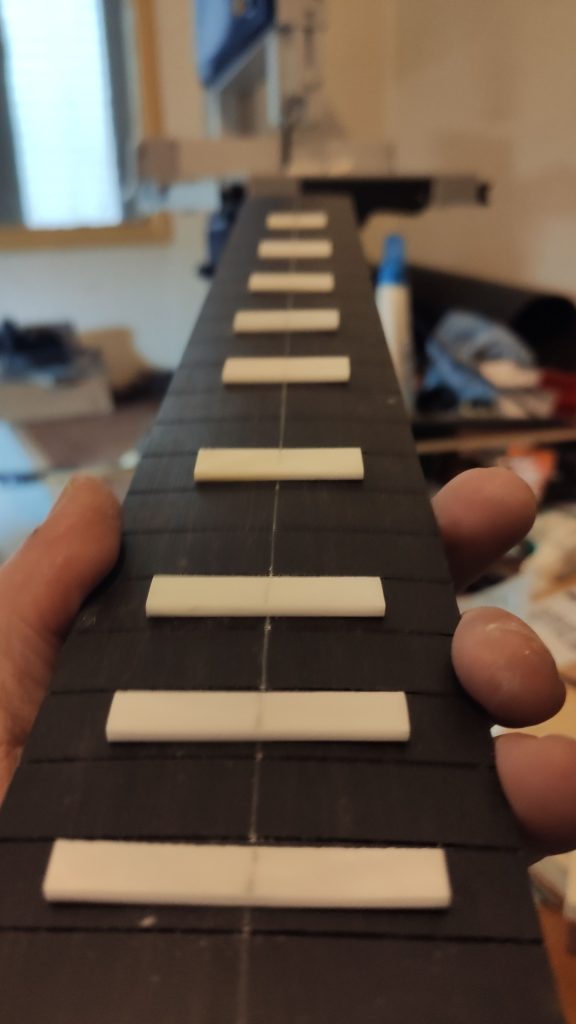
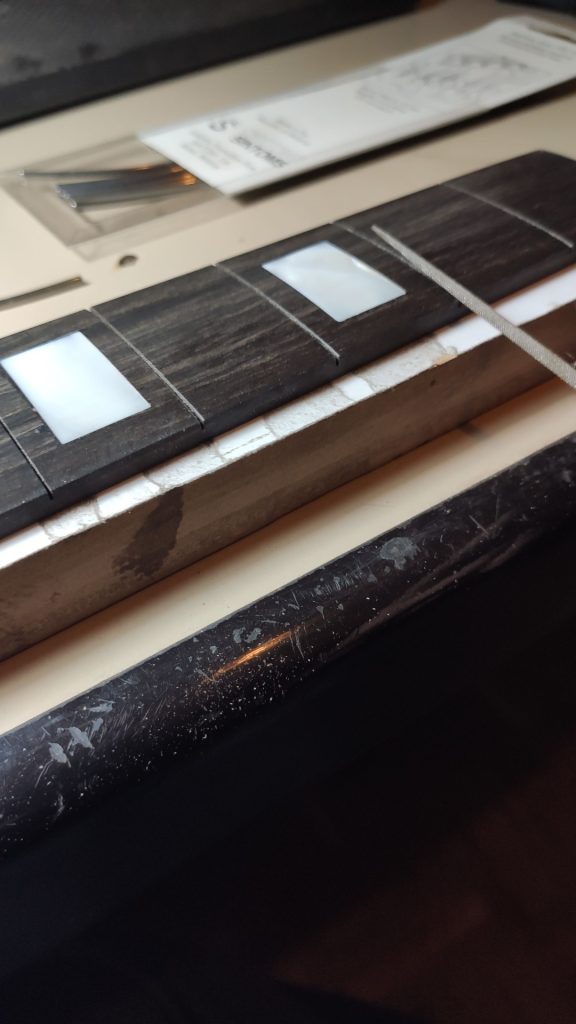
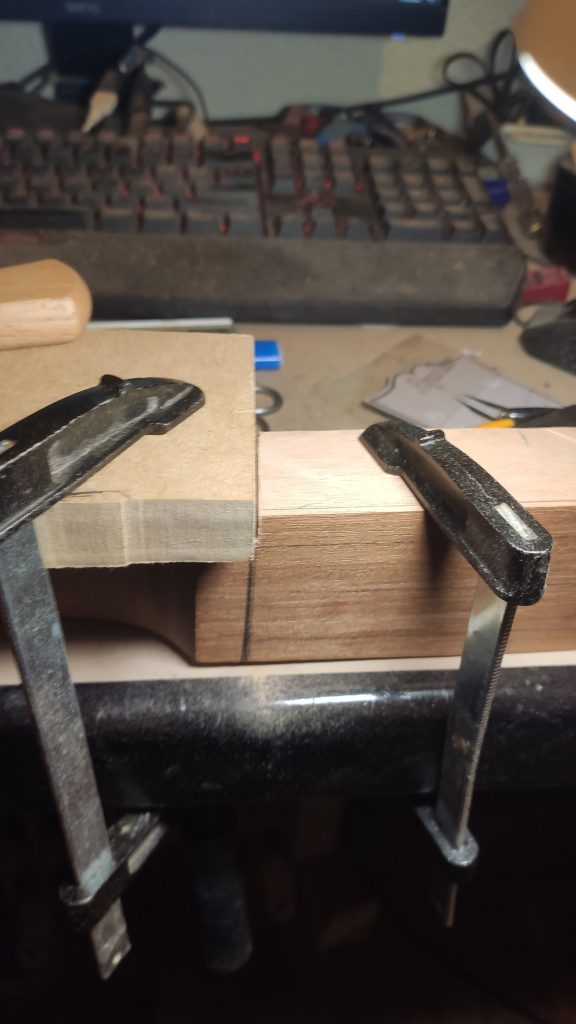
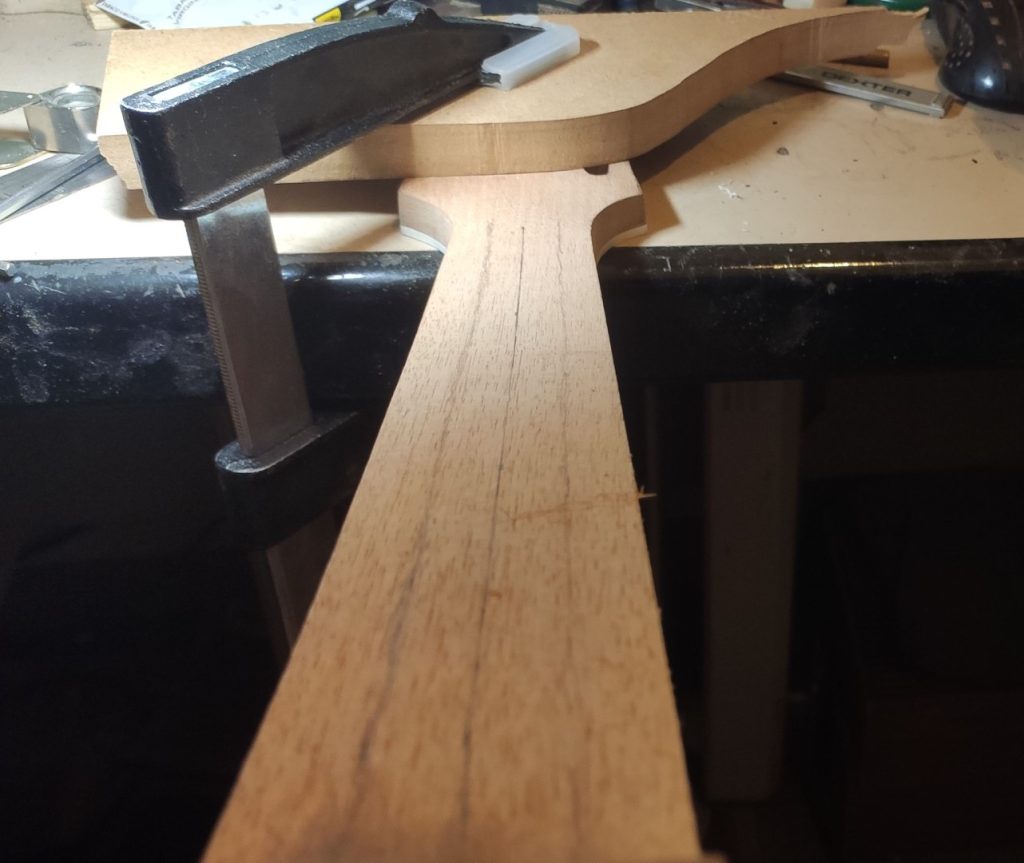
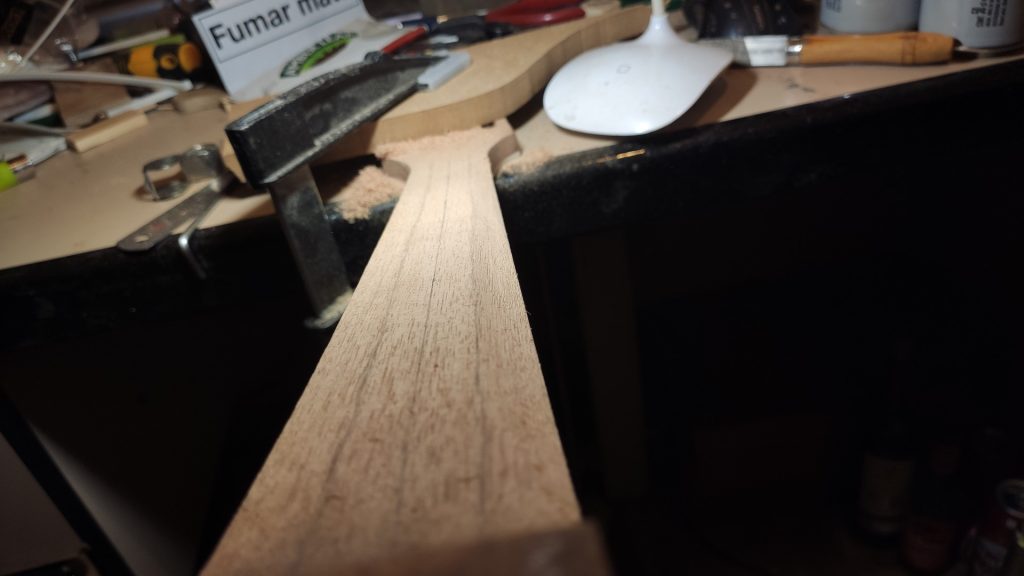
If I wanted to glue the binding strips now, I would see that on the one extreme I have enough height above the frets and on the other I’m a few tenths short of covering them. The fingerboard is narrower at the nut side than at the junction with the body. That’s why the curve of the radius goes down less in the nut part, leaving the edge of the fingerboard higher than at the end. Before we start with the binding we have to lower it so that it looks the same thickness all the way around. I was thinking of doing it on the curved part, with a sanding block, but I have already put the frets, so I have no choice but to tune it at the base. I draw the lines that delimit the “wedge” on both sides and I spend a long time sanding. A GOOD while. Now it looks the same thickness, but I look like a miner in a coal mine, I’m up to my eyes in ebony dust. I put a weight on the photo because it was in the heat wave and it arches a bit, ebony is very sensitive to humidity. But it will be glued under pressure, no problem.
Now I glue the strips, I start with the bottom one and cut it flush, then I glue the side ones. I use cyanoacrylate and immediately “paint” the joints with a brush with acetone, to fuse the plastic to the wood. Then I put some small boards with clamps to make pressure. To take a lot of the work out of cleaning the material, I use a very narrow copying cutter with a ball bearing at the tip. The router bit is pulled out of the router table just high enough to eat the binding, without rubbing the wood or frets if you miss the angle. It should just rest the bearing on the ebony.
It doesn’t look too bad, for a first approach. Well, glue residue aside…
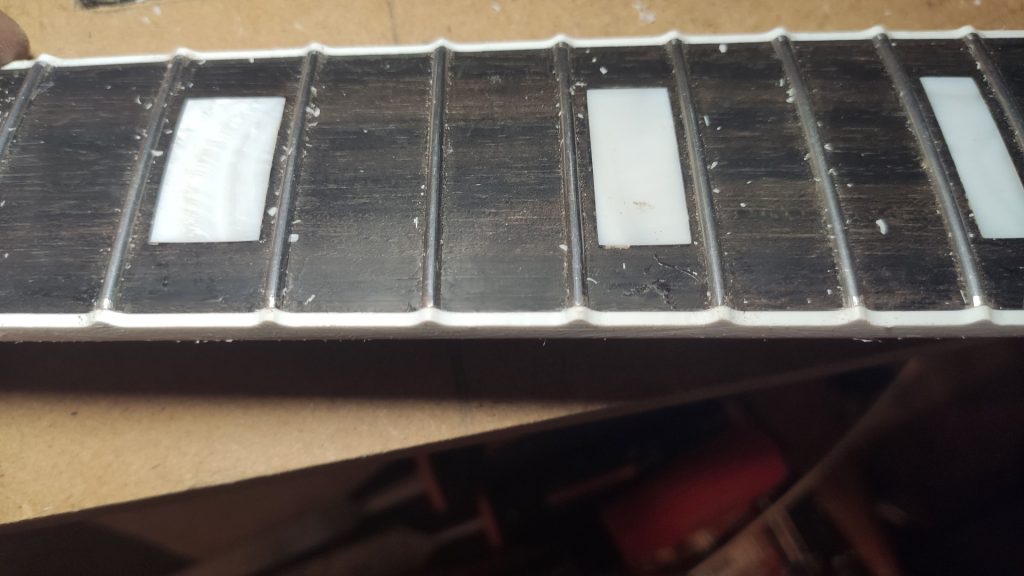
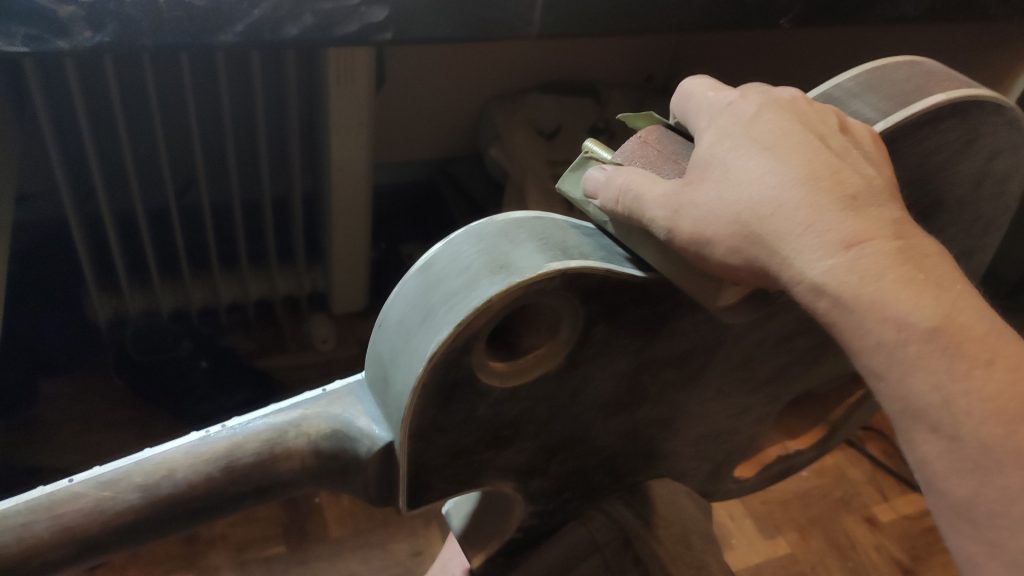
Then, with a sword file, it is shaped. Little by little, without haste…
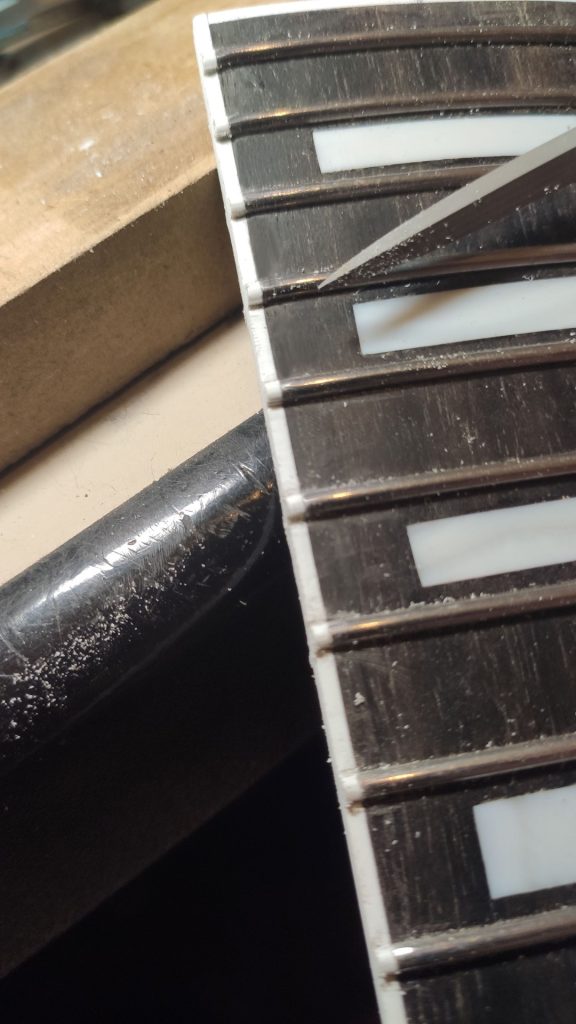
For the moment it is left as it is, it will be finished after of the fret levelling process. A file or sandpaper will be used to make a bevel with the edge of the fretboard, the fine finish will be given and the frets will be polished. As you can see, on this type of guitar, the end of the frets are made from the binding material itself. These ends are called “nibs”, and it is the first thing to look for to distinguish a genuine Les Paul, very few Chinese fake guitars do that job.
In the meantime…
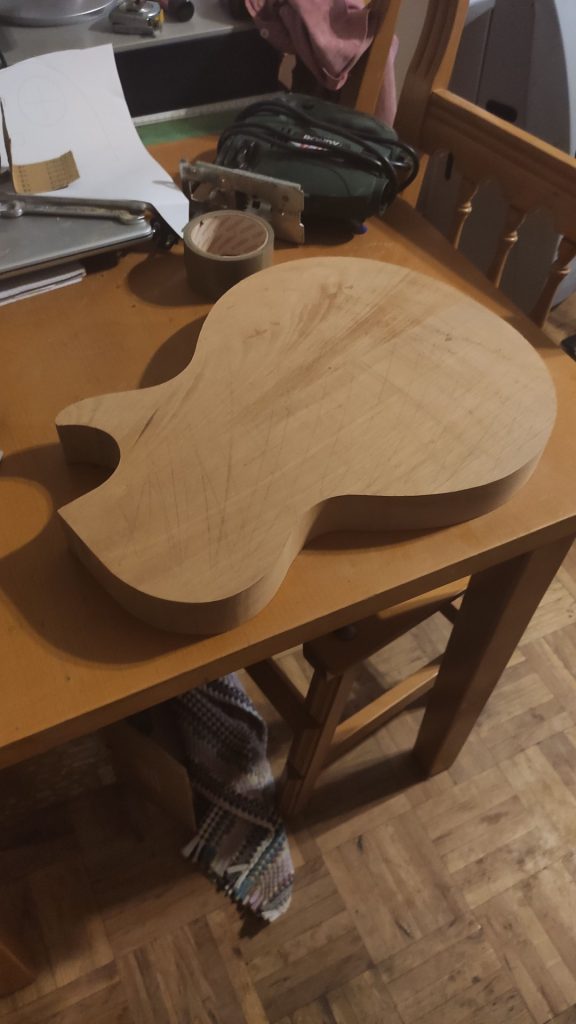
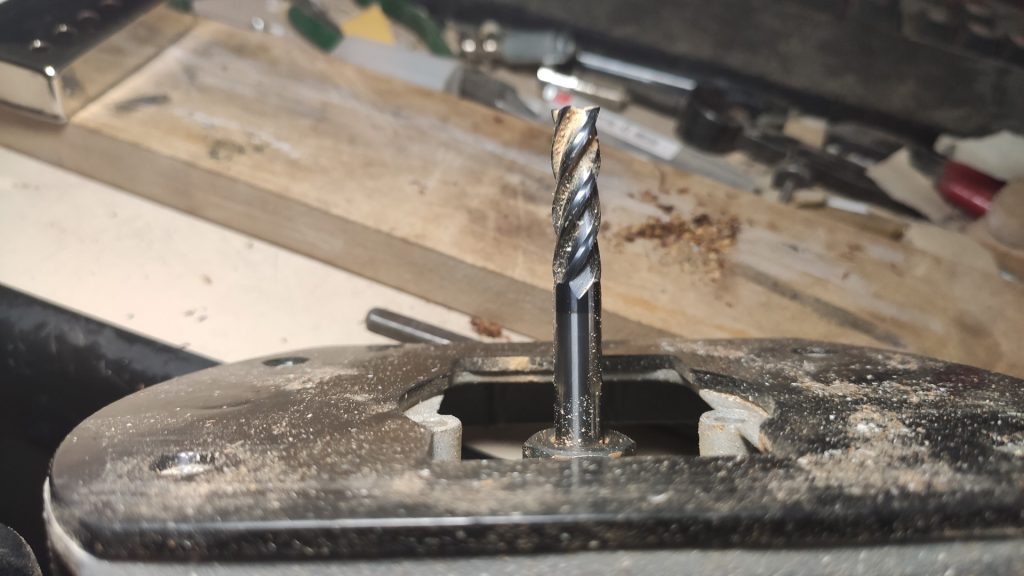
The top is not yet the final shape, I will match it to the body when I finish with the first phase of the doming, so I will have to sand less maple. By the way, a terrible accident happened with this top. My fault, using bad cutters. There are good Chinese cutters and bad Chinese cutters. There are very good Chinese cutters and above all, there are terrible ones. When I started milling for the doming, one of them tore off a piece of wood, separating it from the body. It could have been repaired, and you wouldn’t see it later, but I would know it was there, and I make this guitar to fall in love with it. It was glued with hide glue, (animal glue), so with a lot of heat and patience I managed to separate the top and put another one on. The next thing I did was to throw away that cutter and buy a good one of those dimensions to carve the top.
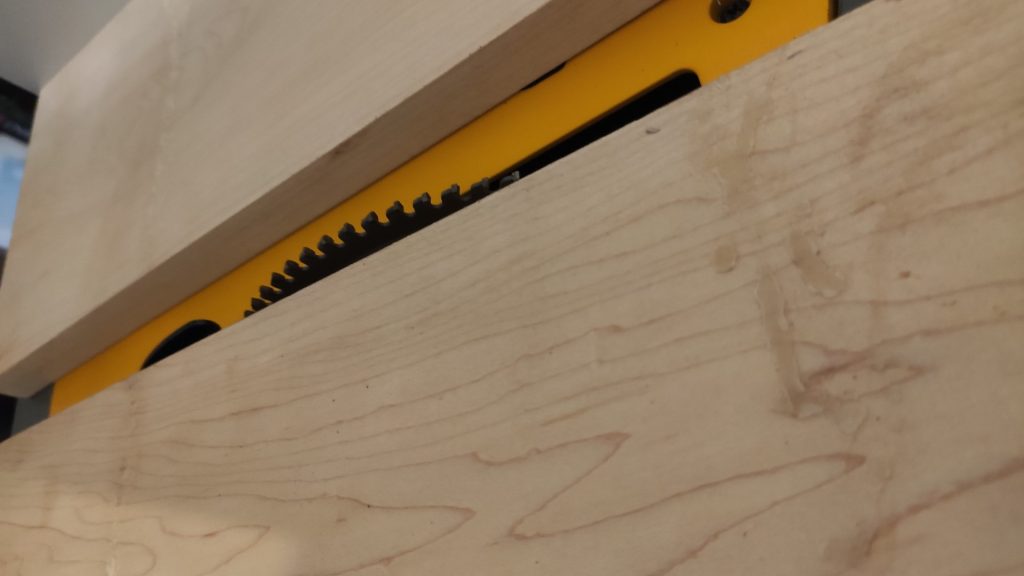
The second maple boards were a bit uglier on one side, but the good one is fine. The worst thing is that they were badly edged. I had ordered a Stanley planer, but it hadn’t arrived yet. So I used an old trick that a carpenter taught me for edging. You put the boards together, barely half a millimetre apart, and join them with some slats that act as crosspieces. Then you run it through the disc saw with a clean-cut blade right between the two: Et voilá!
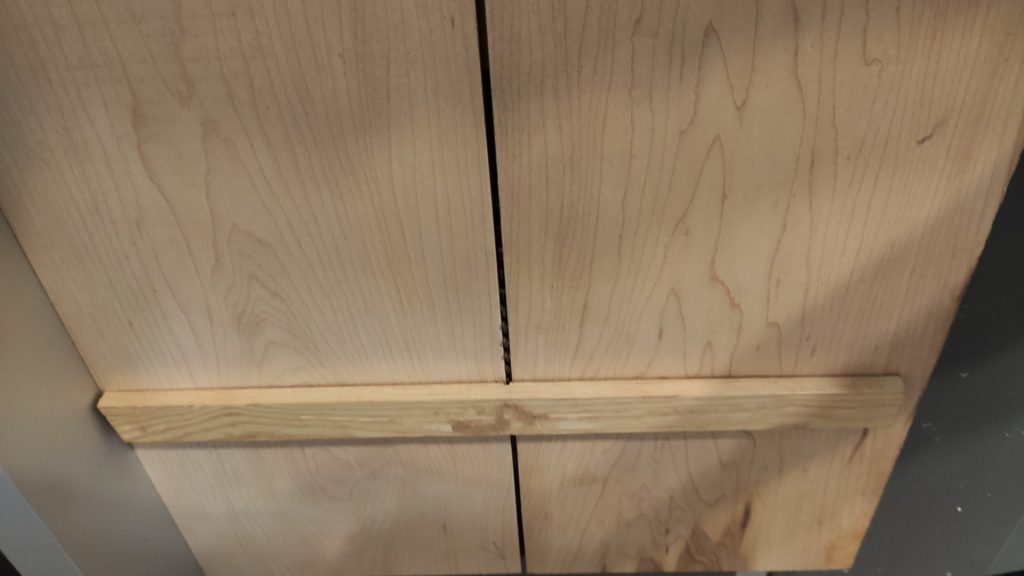
The result is optimal. I didn’t take a picture of when I joined the boards at the edges (no time with that glue), but I used hide glue, three big clamps to give lateral pressure and two small ones to keep the ends at the same height, and about twenty kilos of weight in the middle so that nothing would lift up. The joint is more visible because of the colour change than anything else. After the carving of the vault it will be very difficult to see it.
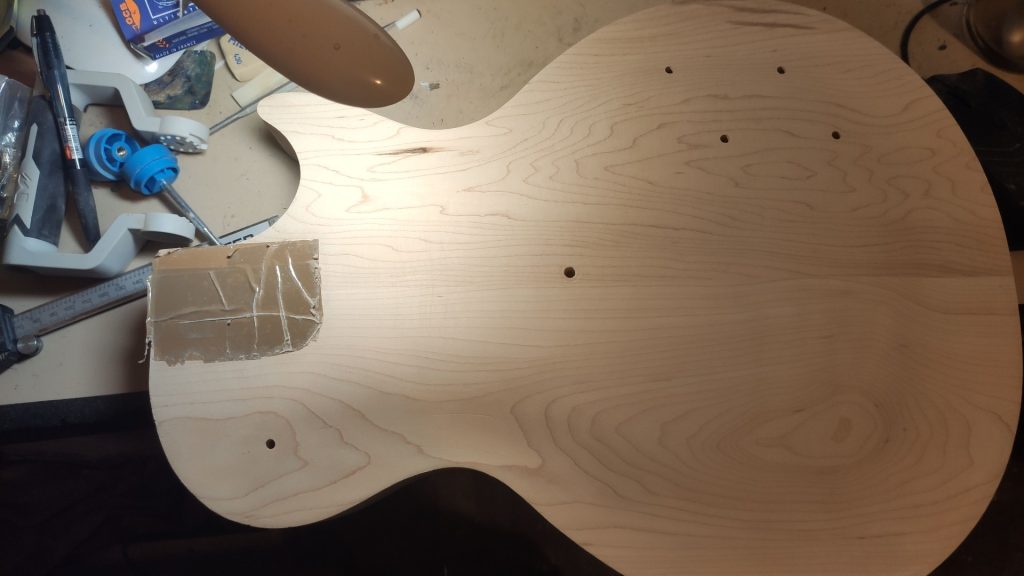
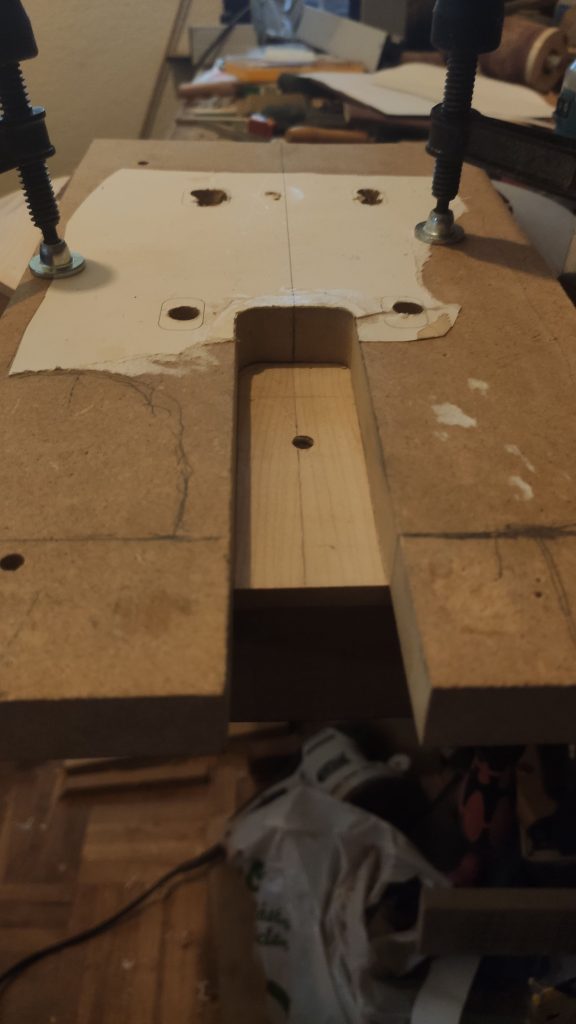
I prepare more templates and lighten the wood to make the router work less.
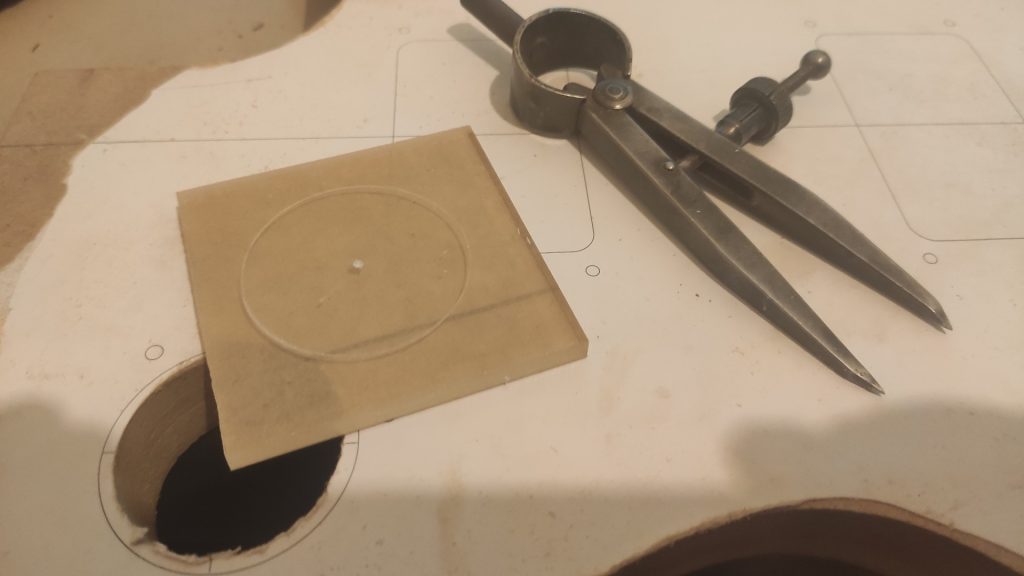
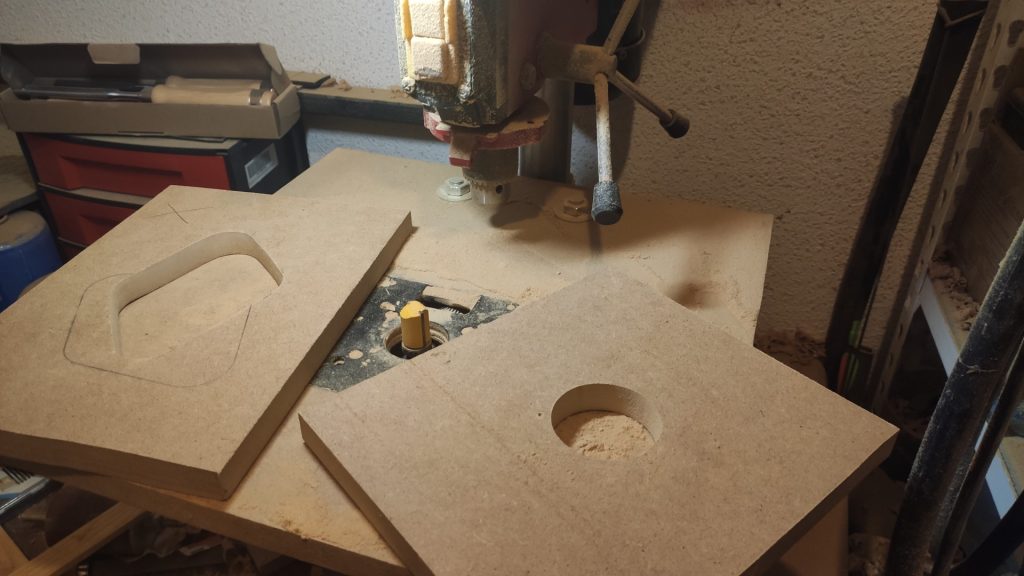
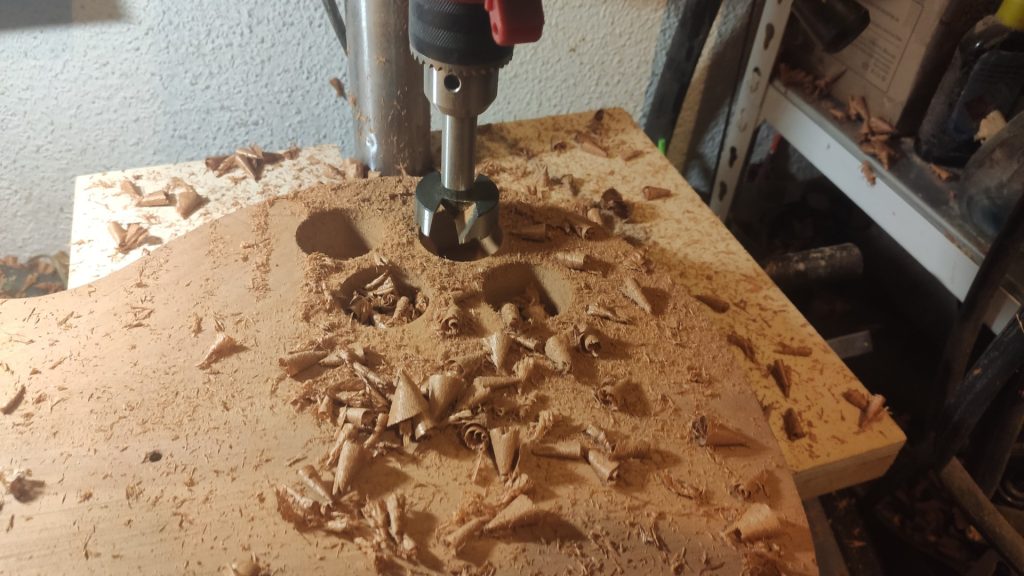
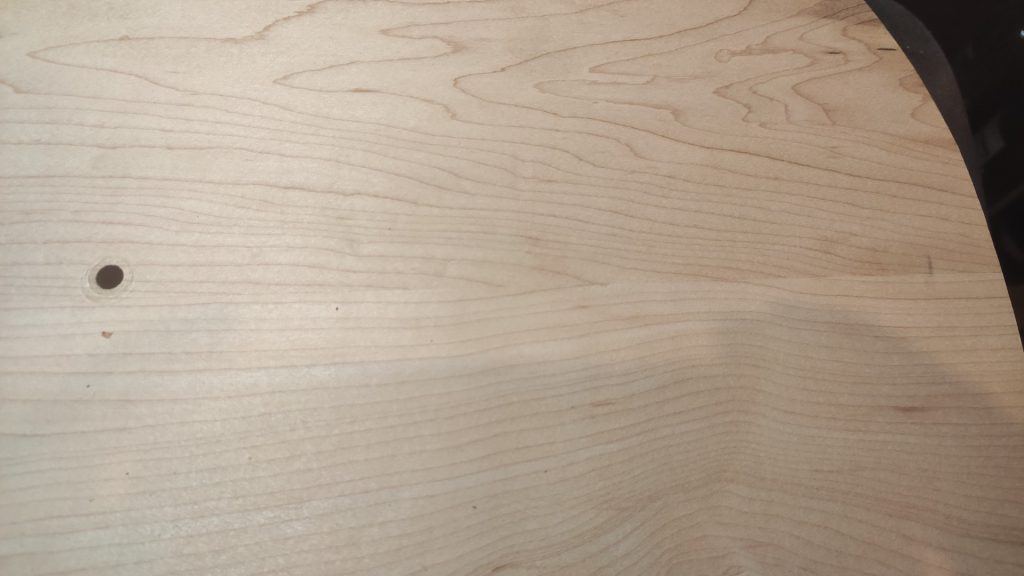
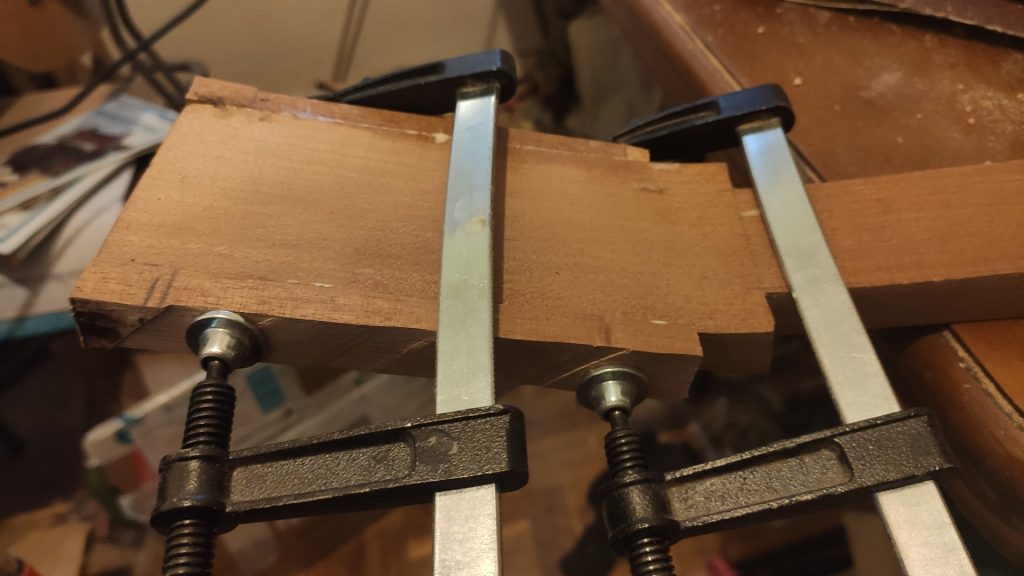
The two small holes you can see are to screw the body and top together always in the same way, and also to give pressure when I glue them. Naturally, they are in places that need to be milled later, a pickup cavity and the neck tenon socket. I make the millings in the mahogany.
I have to adjust the thickness of the top to its correct height, for which I use a sledge for the milling machine, perfectly level with the bottom. First, the back side of the top is cutting, having fixed the piece well with a hot glue gun so that it doesn’t wobble. Then, with that side completely straight, it is turned over and the correct height is reached. Here I’m still calculating heights, I haven’t fixed anything.
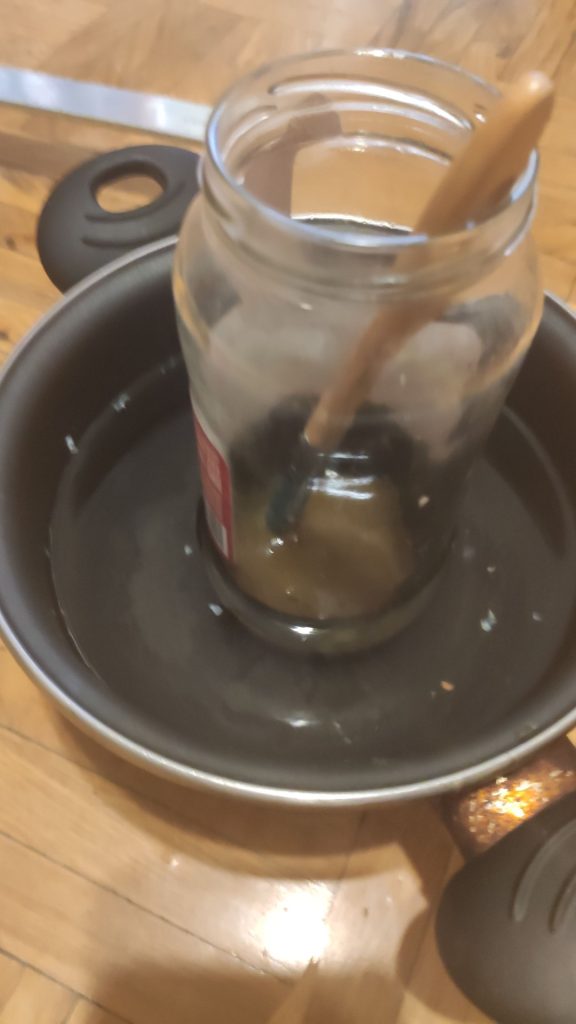
I give them a sanding with the help of a board to smooth them, I leave them without any burr marks. And I prepare the glue. Don’t overdo it with the bain-marie, if it gets too hot and foaming, throw it away.
Well, and I paste them. All too fast for photos. I heat up the parts a bit with a hairdryer (I hadn’t bought a hot air gun yet), use a wide paintbrush and glue the parts together. While I insert the two screws in seconds my son is already putting two of the templates up and down and we start to put in the clamps and tighten them like mad.
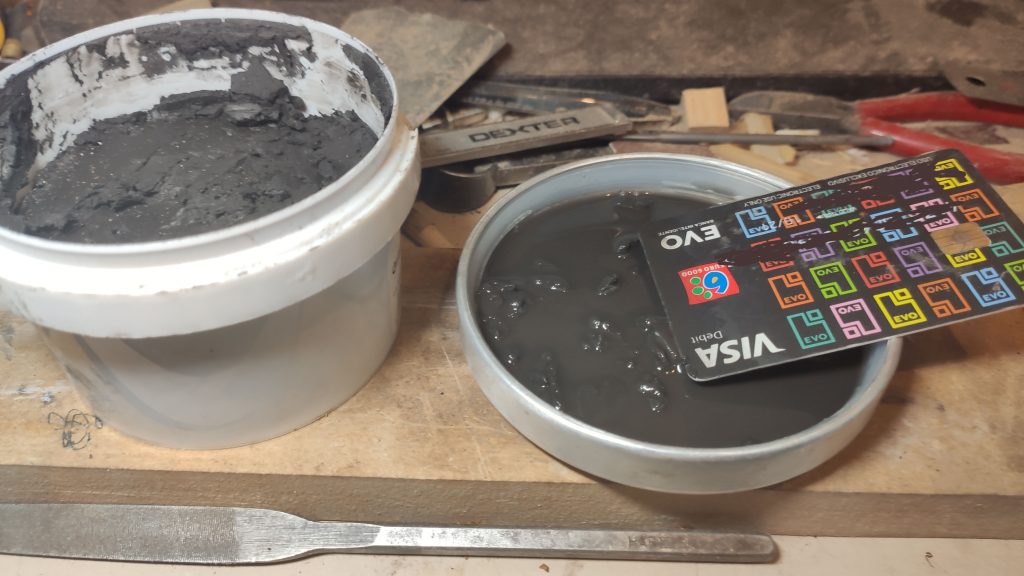
I suppose many of you know hide glue, but for those who don’t, I’m going to talk a bit about its characteristics and the reason for using it.
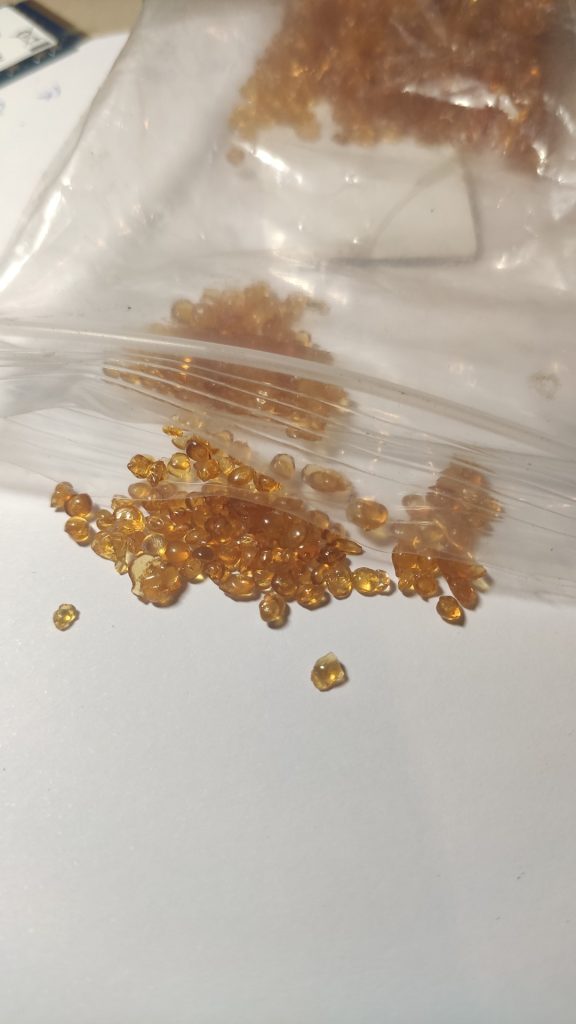
It is made from animal hides and connective tissue. It is left to rehydrate in its own volume in water and then heated in a bain-marie. Depending on its use, more or less water may be added, or salt to slow the curing process, or even some aniline to dye it. It has been around for thousands of years and is still preferred for high-end classical instruments. You will never see an expensive cello or violin with any other glue. One reason is that it is extremely resistant (at normal temperatures), some say it even outperforms epoxy when properly cured. But that’s not the only reason. When it dehydrates, it crystallises and becomes a completely rigid structure, with zero elasticity. This is ideal for good vibration transmission without any damping, making it perfect for instruments. Normal carpenter’s glue is very elastic even when dry, and would form a “barrier” between the parts for vibration transmission. Of course there are already modern glues that crystallise when dry, but hide glue is especially stiff. And it still has a hidden advantage (as the name suggests, hehehe).
It is, to a certain extent, reversible, by applying heat. A good luthier can heat the heel of a neck, even if he has to drill a small hole under the fingerboard where to put a resistor or introduce steam, and separate the neck from the body. Or disassemble the case of a violin to repair it. Very few modern glues have these three characteristics
So why isn’t it always used? Because it would be expensive to use it industrially, it is very affected by high temperatures (at 60 degrees it is not advisable to use the slightest force on your guitar or things will move) and, above all, its application time before curing is very short, you have to be very fast. Also, in very humid environments, the parts exposed to the outside could be affected by microorganisms, although this is rare.
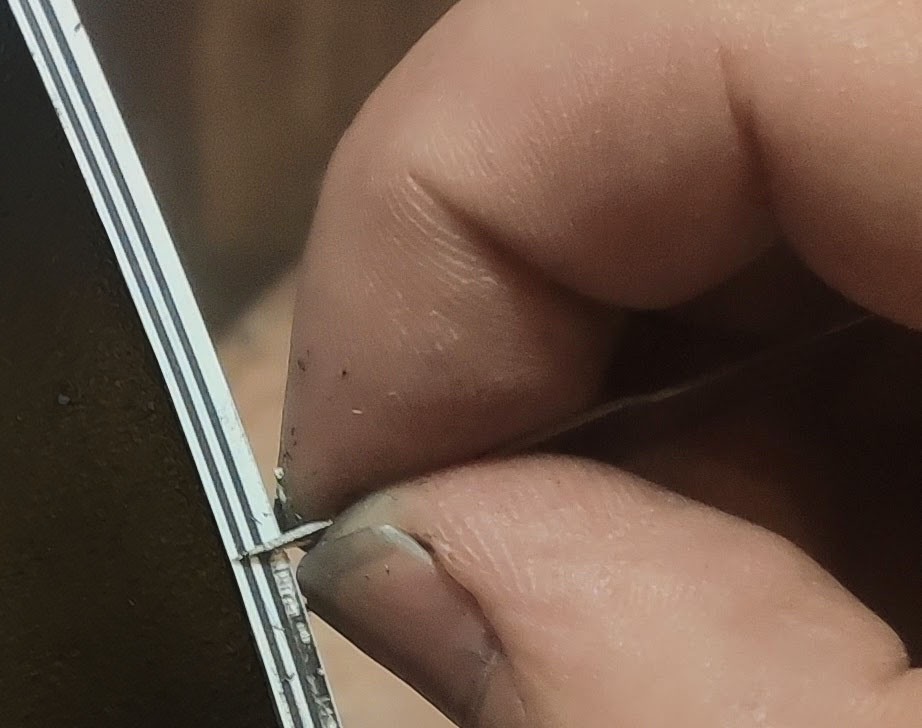
But I actually use it for the magic, the famous “tone”. Gibson in ’59 used it at the junction of the neck to the body and fingerboard, which are the “key” points. As one operator made the body and the other the neck, they used to pour a lot of glue to fill any possible gaps, and hide glue does that very well. That’s why on Les Pauls of that era the fingerboard has a little extra “height” above the body, maybe half a millimetre, it’s not glued directly flush, you can see a dark line between the binding and the body. Because of the amount of glue they put in. And some people say that’s a factor in the sound of those guitars. It’s curious that it wasn’t used for the joint between the maple top and the body, they used a modern aliphatic one. The reason for this is the short drying time of the hide glue. If you weren’t very fast, the pieces would be misaligned, and you had to heat everything up and waste a lot of time, it wasn’t profitable. But they did use it where they really felt it was important. And I have all the time in the world, so I used it in that part too. Everywhere.
So in this project hide glue was indispensable.
We let the body and the top gluing for 24 hours and we go back to work a bit on the neck.
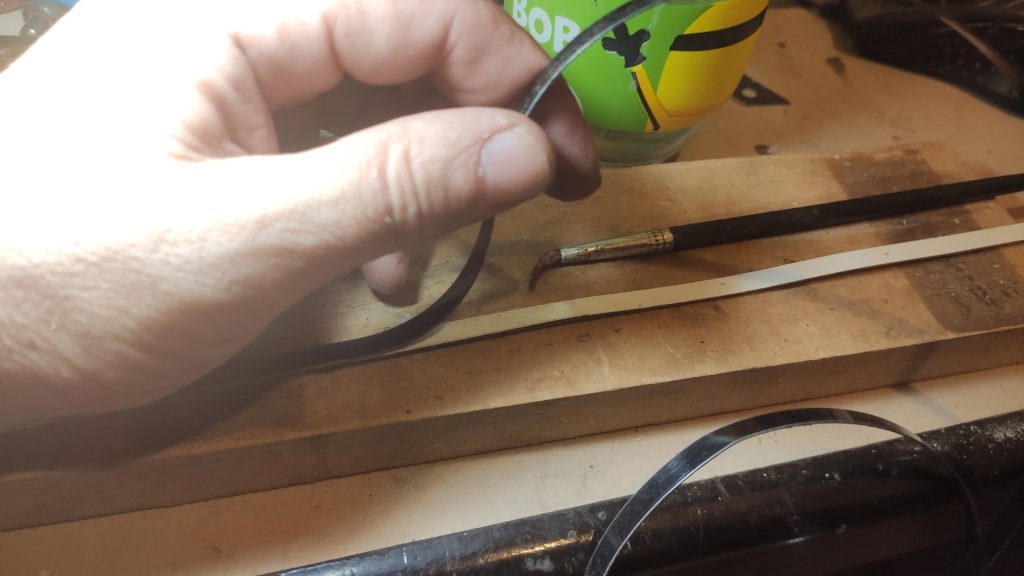
We start with the truss rod. This is a piece of metal along the length of the neck that can alter its curvature. It was invented to counteract the enormous force of the metal strings when tensioned, which can bend the neck. This is not necessary with gut or nylon strings. The simpler ones can only bend the neck in one direction, the modern ones in both, depending on how you turn the nut or allen key. Even though I’m following the plans of a standard ’59 LP, I’m not a big fan of the historically correct truss rod. Aesthetically it is beautiful, with the barrel nut and the elegant access. But it is a single action, actually a solid iron rod with a stop on one side and a thread on the other, where the nut goes. You have to cut a hole in the wood of the headstock not only to fit the nut, but also to allow access for the spanner that will tighten or loosen it.
I guess some of you have seen this photo of the longitudinal section of an LP neck. The cut goes right through the access hole to the truss rod.
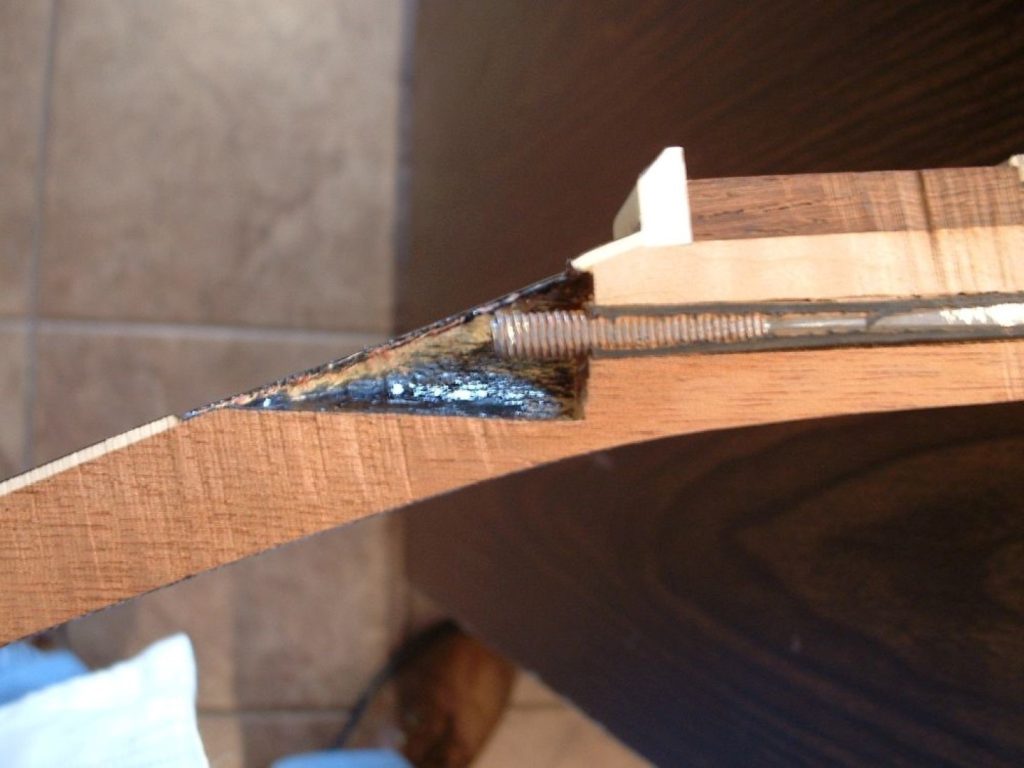
It’s a bit scary, isn’t it? The typical breakage of LP’s is that the headstock breaks in a fall, and I’m not surprised. With an allen key truss rod, on the other hand, you only need an access hole of a little more than six millimetres, so you don’t have to eat so much wood where the guitar is weakest and where it breaks the most. In addition, they are double action, concave or convex depending on whether you loosen or tighten them. Not to mention how easy it is to find a four millimetre allen and how difficult it can be to get in Europe a 5/16 inch hexagon socket spanner in an emergency. I could put the nut in metric, but I prefer a modern truss rod, which is lighter and less intrusive.
But when we see a Les Paul with an Allen key core we immediately think of a cheap oriental copy. It doesn’t have to be. It can be done badly, with just a channel for the truss rod, no retaining strip and a huge gap between the truss rod head and the fretboard, as I’ve seen on cheap guitars, or it can be done well.
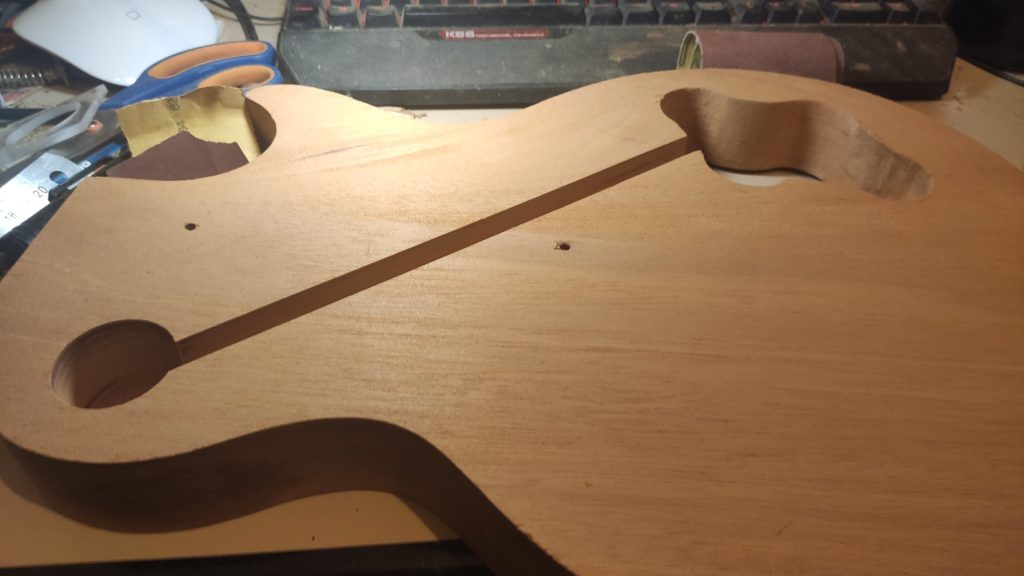
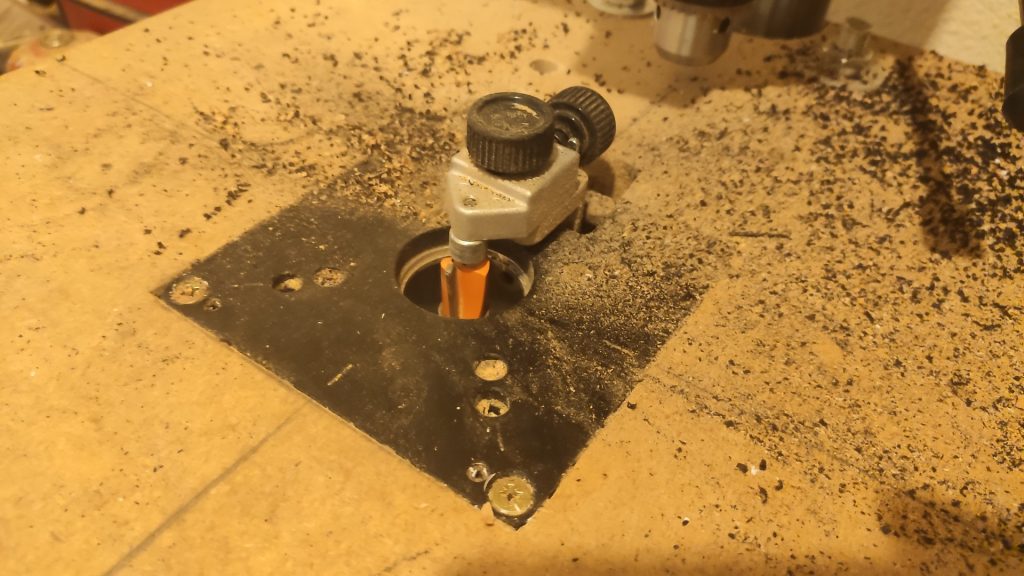
I put a ruler on the milling table so that the cutter passes through the right half of the neck. I draw a line on the table so I know how much I’m milling, because I won’t be able to see the cutter. Also on the side of the neck (not yet in the photo) at the point where I have to finish. I make several passes to the depth I want.
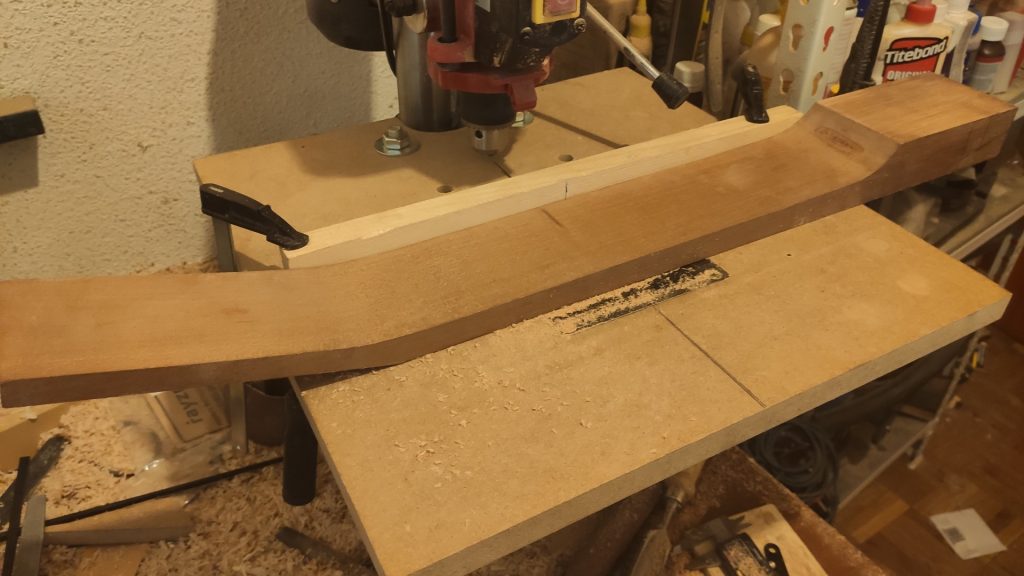
And that’s it…
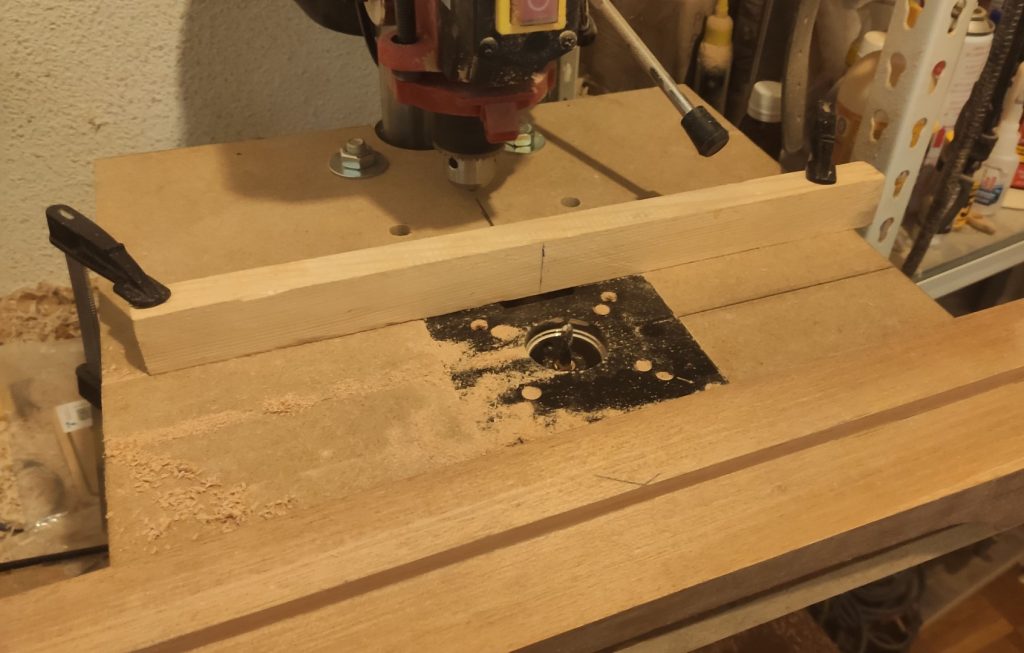
I use a 6mm ball end cutter, to create a curved bottom channel. One thing I don’t understand is why you see in many places that they make the bottom of the milling flat, when the truss rod is rounded on that side. Even at stewmac, maybe the most famous luthier’s shop in the world, the milling cutter they sell to carve the truss rod channel is straight-headed. I think it adapts and works better in curve, while more integrated the truss rod is better. On several sites I’ve seen, they recommend using a gun to apply a bit of silicone to avoid unwanted vibrations. Silicone, really? The way I put it there can’t be any vibrations. In the following pictures it still doesn’t touch the bottom, it will do it when the strip that imprisons it is in place.
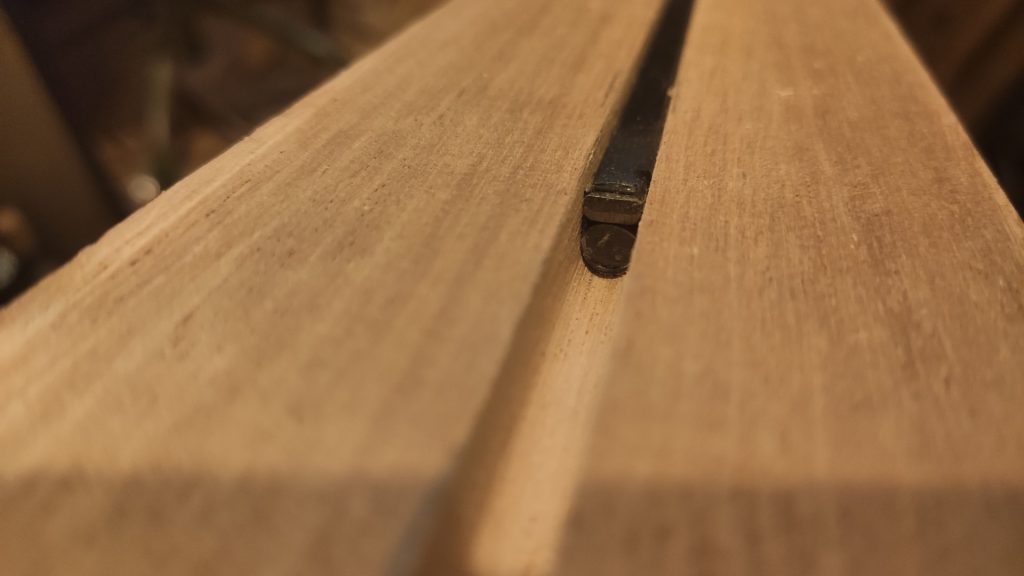
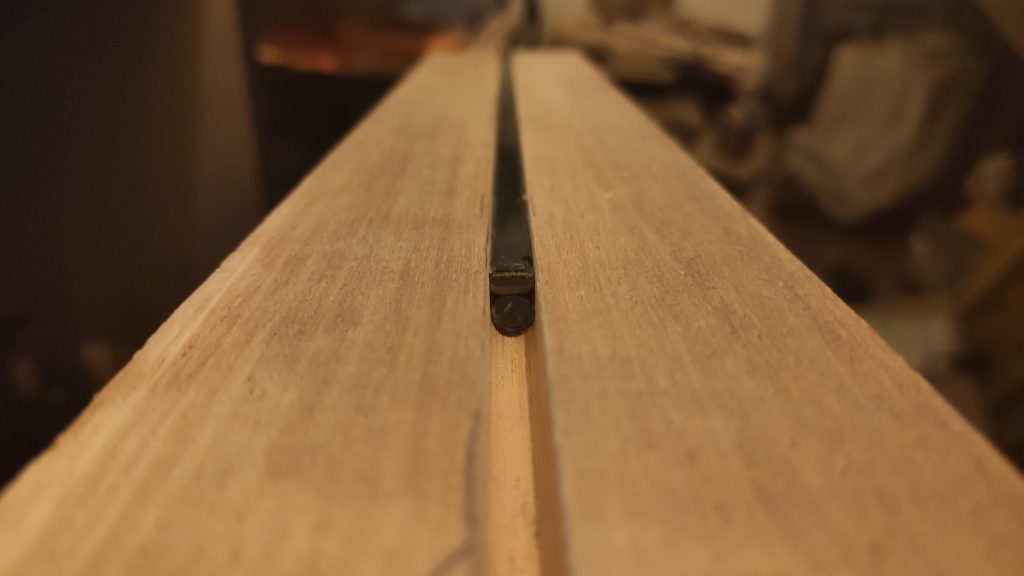
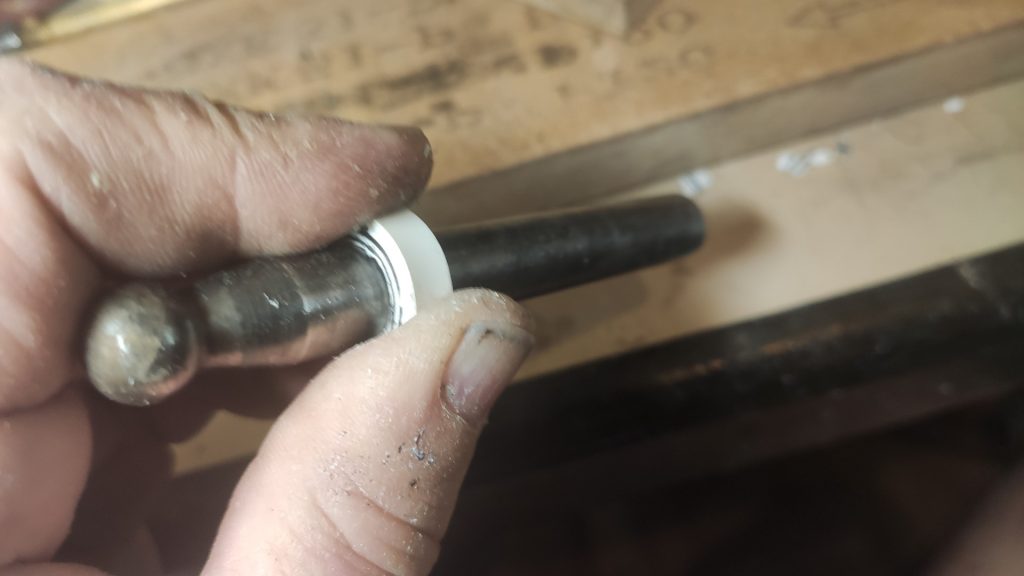
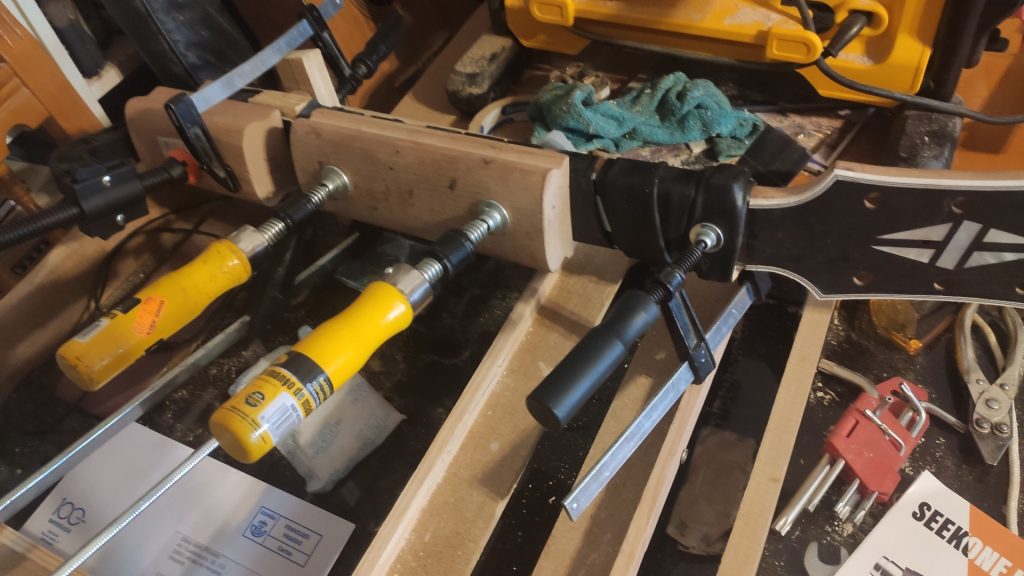
The channel must be widened at the head of the truss rod to allow it to enter. This is done with a chisel. Then I cut a strip of maple to fit into the channel and put the truss rod in place. I don’t have such a long piece of maple, so I do it in two parts, one up to the flare and the other the rest. My planer has arrived, I use it for the first time to trim the maple excess to the level of the neck.

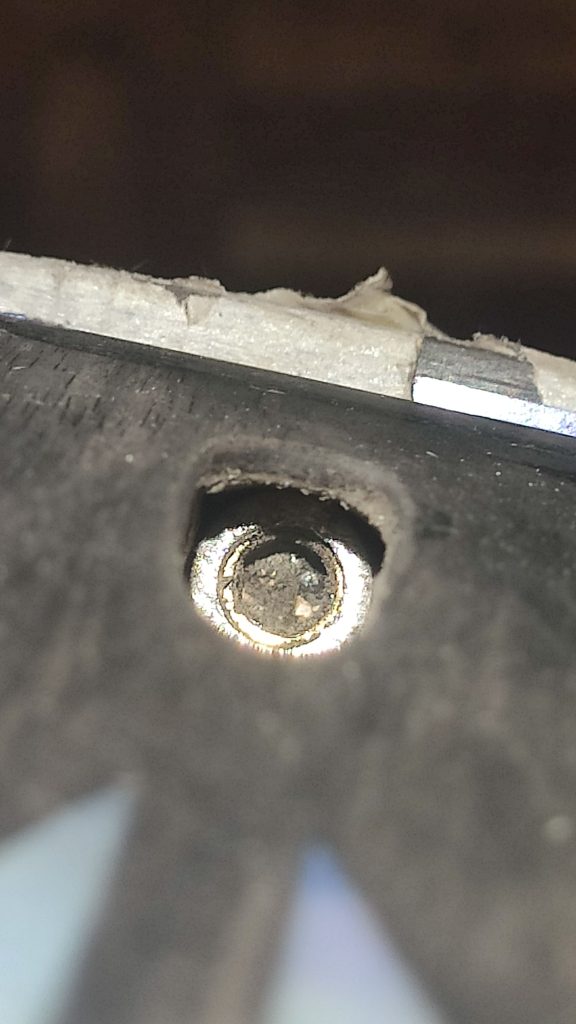
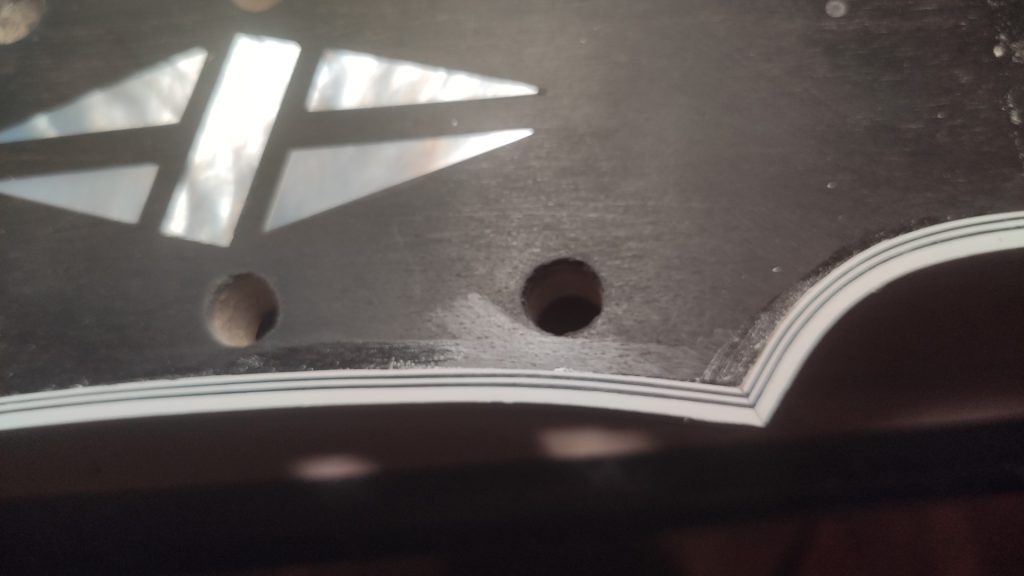
I didn’t take a picture of the access at the time, but I’m doing it now (some of you will notice that the work is much more advanced). Naturally, I gave the maple strip a rounded ribbed shape at the bottom end so that it rests perfectly and without gaps on the cylinder of the head of the truss rod, although it is difficult to see it and even more difficult to photograph it. Well, it’s impossible with the top of the headstock already glued, nor with flash, but the whole cylinder of the head is surrounded by the neck wood below and the maple strip above, as well as the rest of the truss rod. The ebony top of the headstock doesn’t touch it. I can see that the hole needs to be reworked, now that the light is shining in. And that a lot of shit accumulates there… Normal, I’ve been giving the grain filler and that makes it all muddy (spoilers).
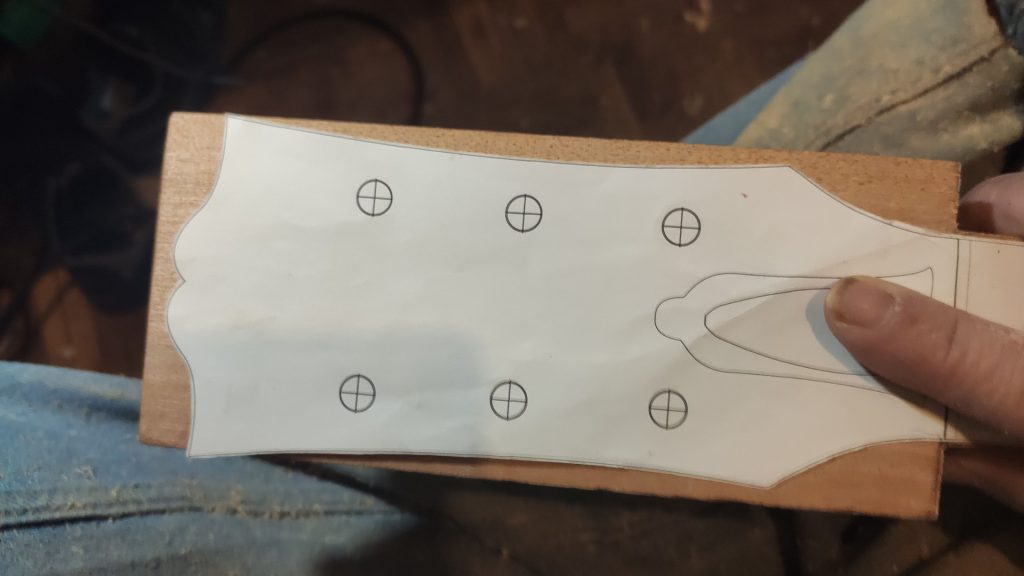
The headstock is not wide enough. Not even for a standard LP, which is the one I’m testing in the picture, and the custom model is wider (I hadn’t printed it yet), so I have to put ears on it, exactly as it’s still made in the Gibson factory. I don’t use hide glue here, because in the end there will only be a few strips left after cutting out the shape of the headstock. Titebond will be enough
Like that. I found in “the bag of bones” a raw nut that could be useful, it has the perfect thickness. We’ll see about the length, especially because I have to remove a lot of the width of the binding. In the 59’s there was more wood and less binding than in the current ones, in many guitars the width of the binding barely reached 0.8 mm, and in the photo it has more than two. I give some shape to the headstock, leaving some margin and join the whole thing to see the effect… Ooohhh, this is starting to look like a neck!
Now I print the plan of the headstock of a custom model on cardboard and glue it to an ebony top that I’ve already thicknessed. I cut it out on the band saw very close to the line.
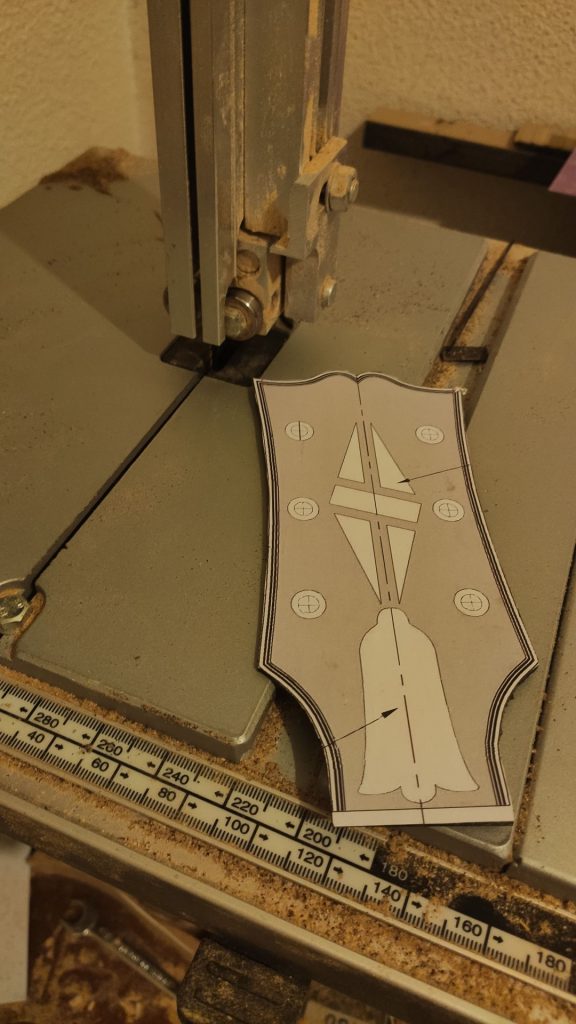
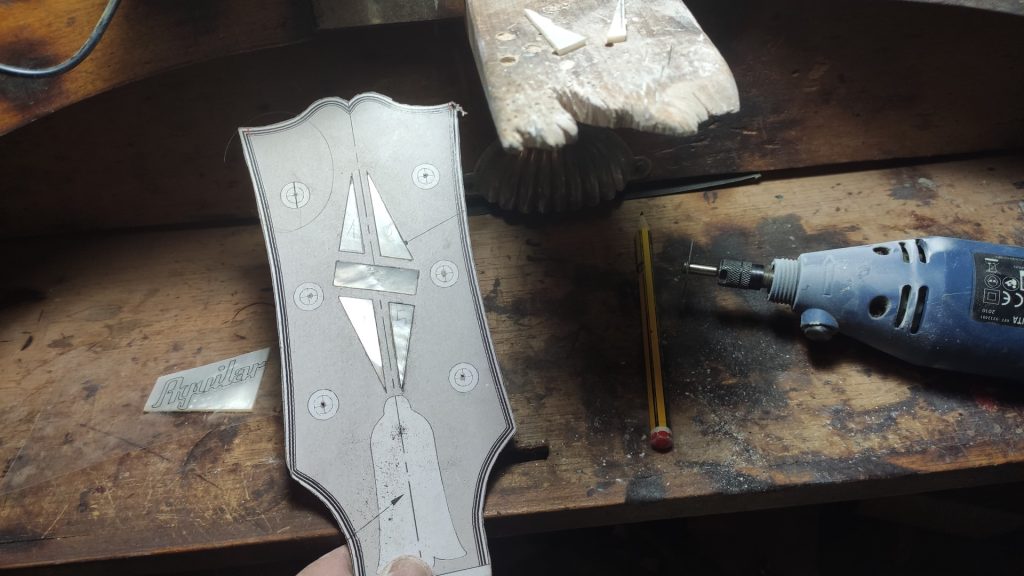
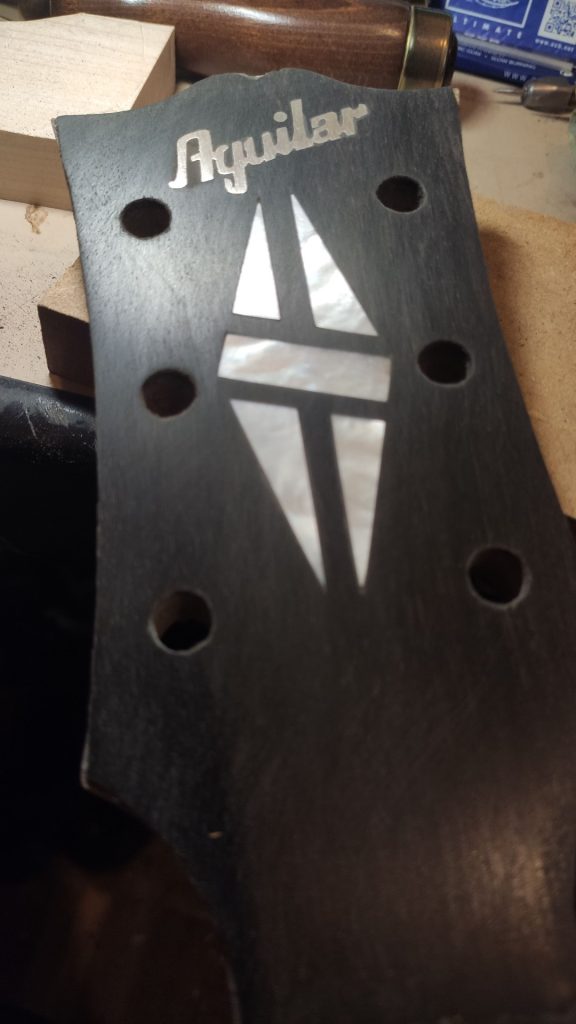
And I start to work on the famous custom rhombus

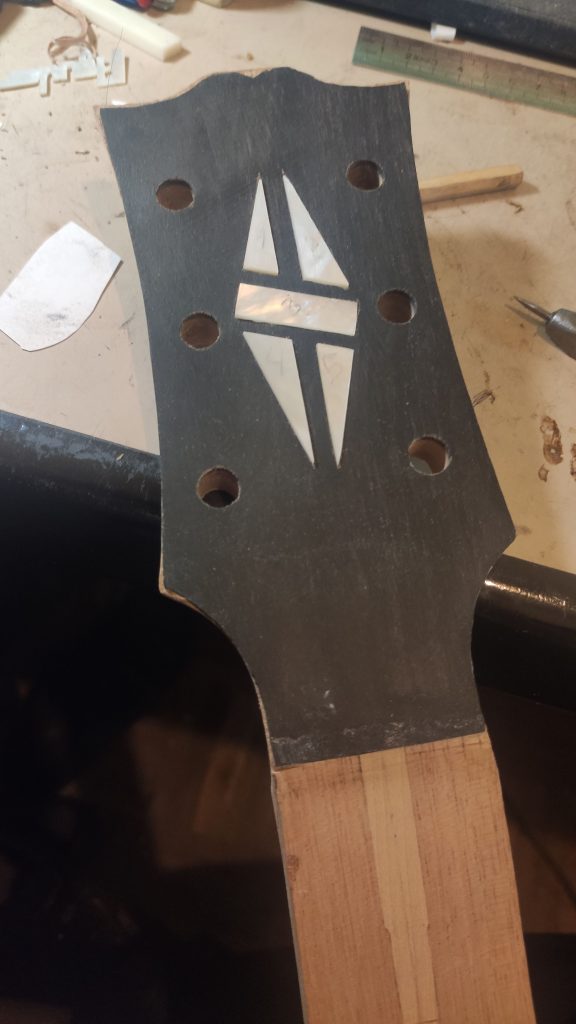
I also saw the mother-of-pearl triangles and fit them into the holes in the cover.
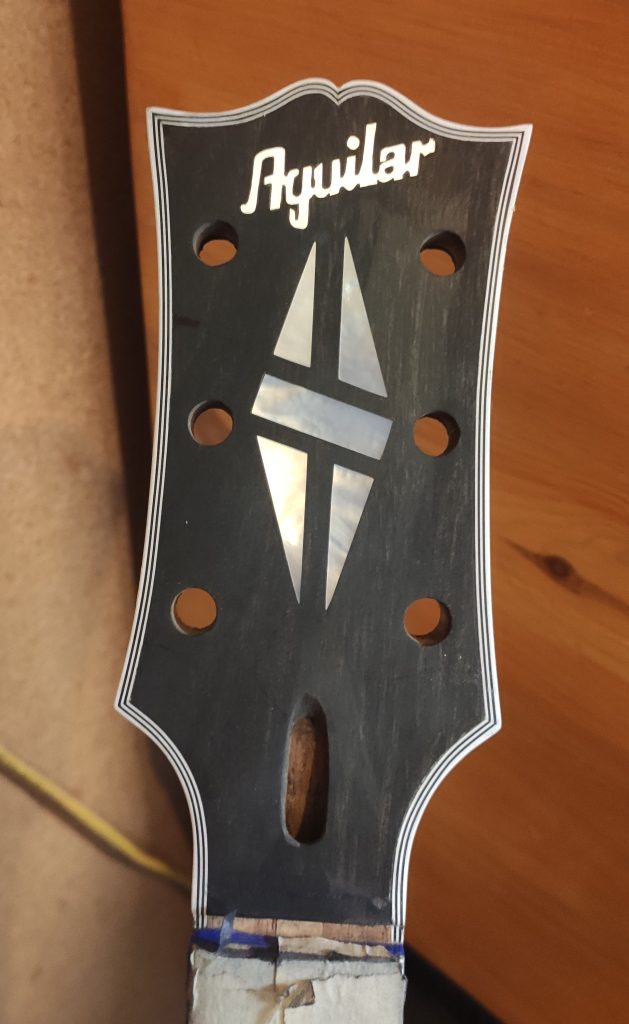
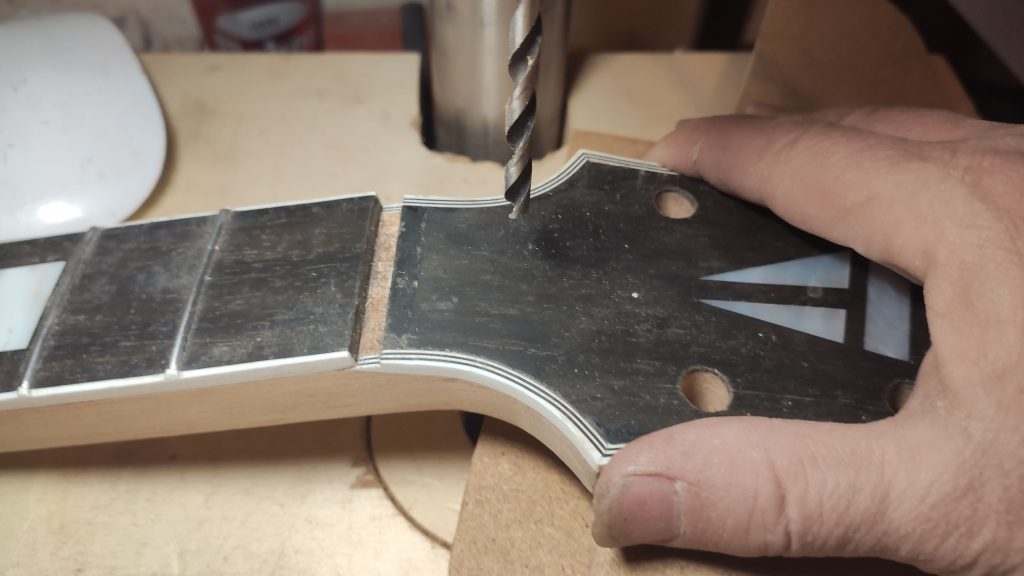
And, as always, I glue the top (hide glue), introduce the mother-of-pearl triangles, drill the holes for the tuners….. And not so bad, it still has a long way to go, but it’s already showing off that headstock
The ebony top was a few millimetres shorter on the sides than necessary, but as the binding channel has to be made later, this is not a problem.
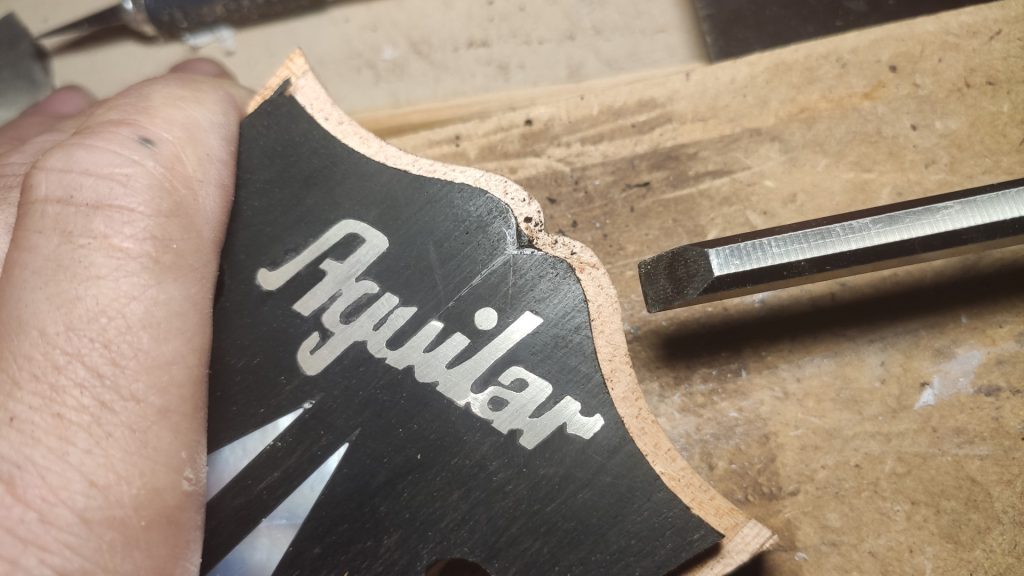
THE LOGO
I’m not going to put the Gibson logo. I would think about it if it was an exact replica of the model, absolutely faithful even in its historically correct materials (although I would also put my signature somewhere). But it’s not, it’s a hybrid to my taste and pleasure, so putting the gibson logo on it would be a falsification. I have my own logo, from my old company, but on that headstock it looks (as we say in Spain), “como a un cristo dos pistolas”. I decide to put my name so that it doesn’t clash too much.
The first thing is the font type. I can’t find a true type “gibson” font to use… Well, I found one for 30 dollars, but I didn’t trust it. There is out there a pdf with the alphabet in upper and lower case letters similar to the font of the logo. I copied letters in photoshop and joined them together. A mess, especially the ligatures between the letters. But it gave me a base to start from. I transferred the image to rhinoceros and started drawing the lines to vectorize my “custom” logo. It’s not as easy as it looks, it took me a few hours and I’m not really convinced.
Well, it could be worse.
We all know the gibson logo, although it has changed over time:

This is what I achieved:
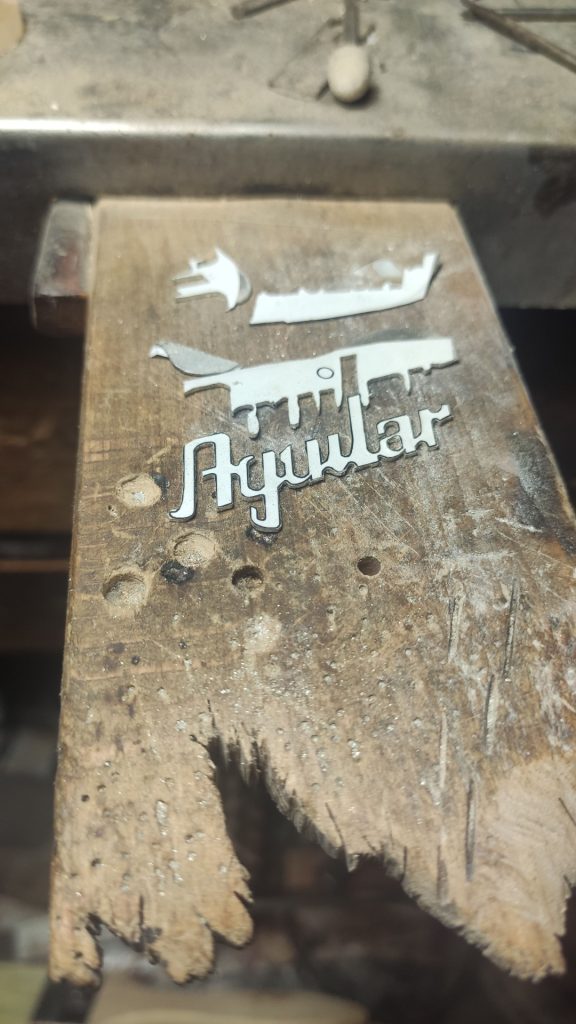
The next thing to do was to turn it into mother-of-pearl. I had a fairly small piece left.
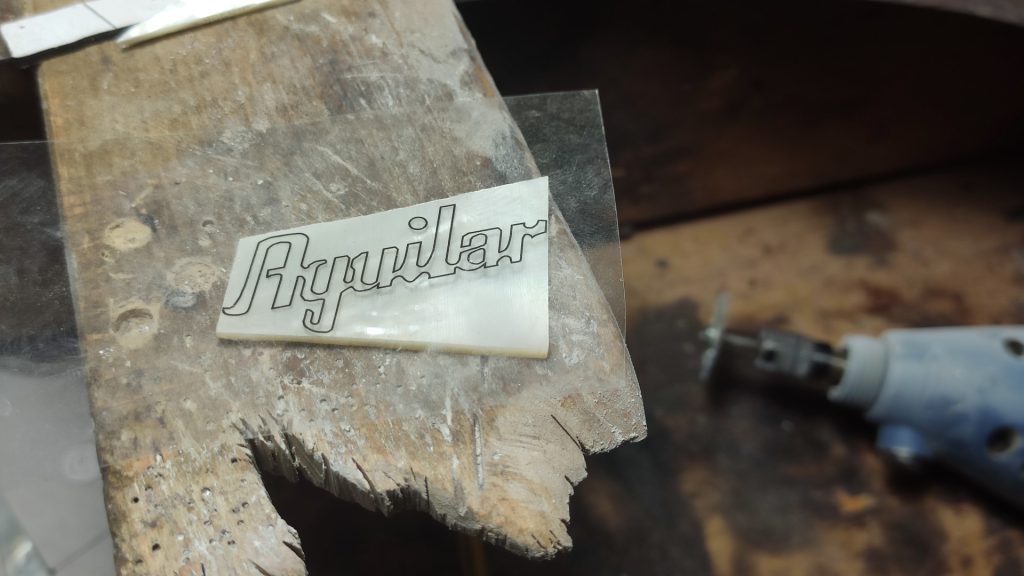
But the fairies were not with me that day, and the piece “shed its leaves”, part of the lower part came off. It became very weak and unusable. I didn’t want to wait another 15 days for a mother-of-pearl plate to arrive from aliexpress. I didn’t know what to do and decided to postpone it. That day I had lunch with my mother and the subject came up. She told me that she had mother of pearl from a broken bracelet and brought me a piece. It was too translucent, I could see my finger through it. I thought about putting a reflective surface behind it (aluminium foil?), like you do with svarosky crystals, for example, to enhance the shine, but that was a bit of a mess. And then (association of ideas), it occurred to me. I would make it out of silver. Once polished, it would go well with the nickel-plated tuners and the headstock wouldn’t lose the elegance of the custom ones. And that way it would be more personalised (more custom, right?).
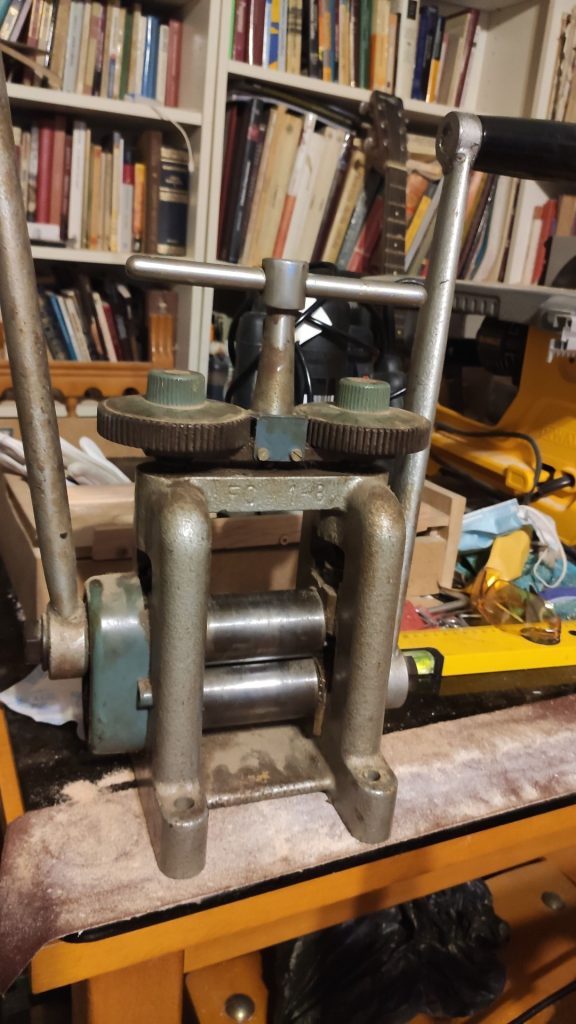
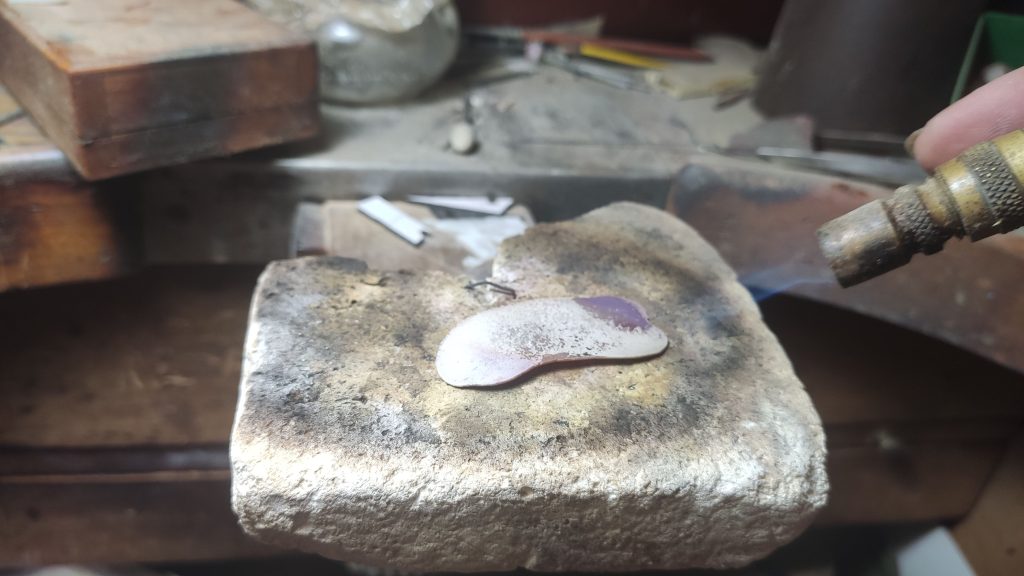
So let’s get to work. I melted some pieces of silver, rescued my laminator from under the bed and made myself a plate. You have to turn it red every few passes to be able to continue laminating.
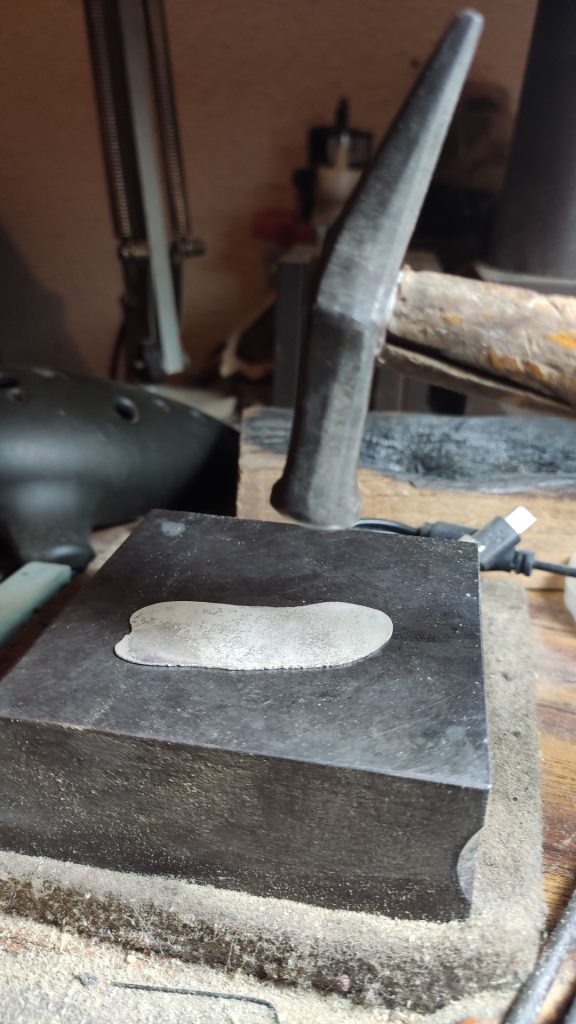
I flatten it afterwards. They are not vertical strokes, which would mark the sheet metal, but “sliding” ones.
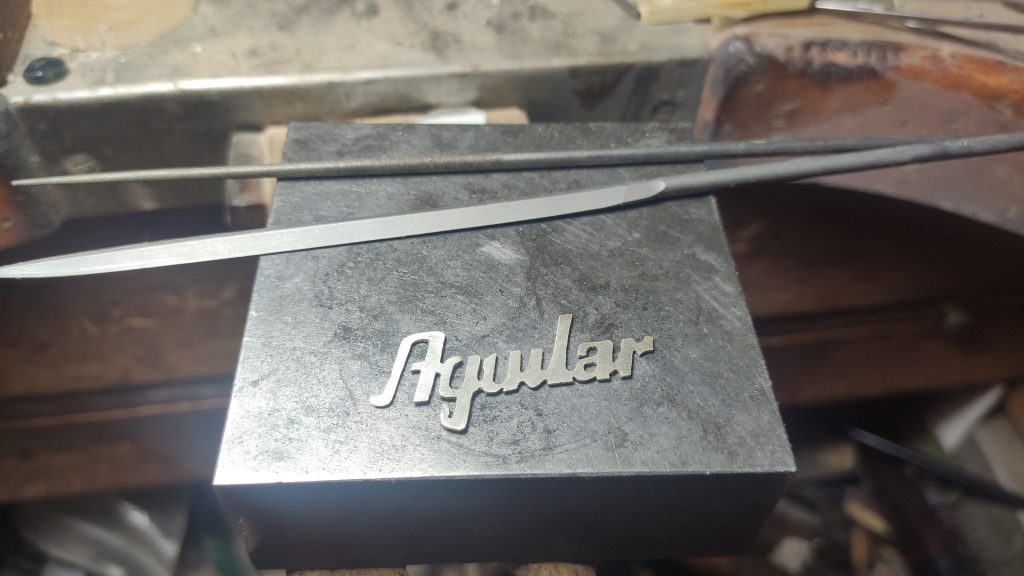
I had several logos already printed on stickers to cut out on the mother-of-pearl, so I use one for the plate and get on with it.
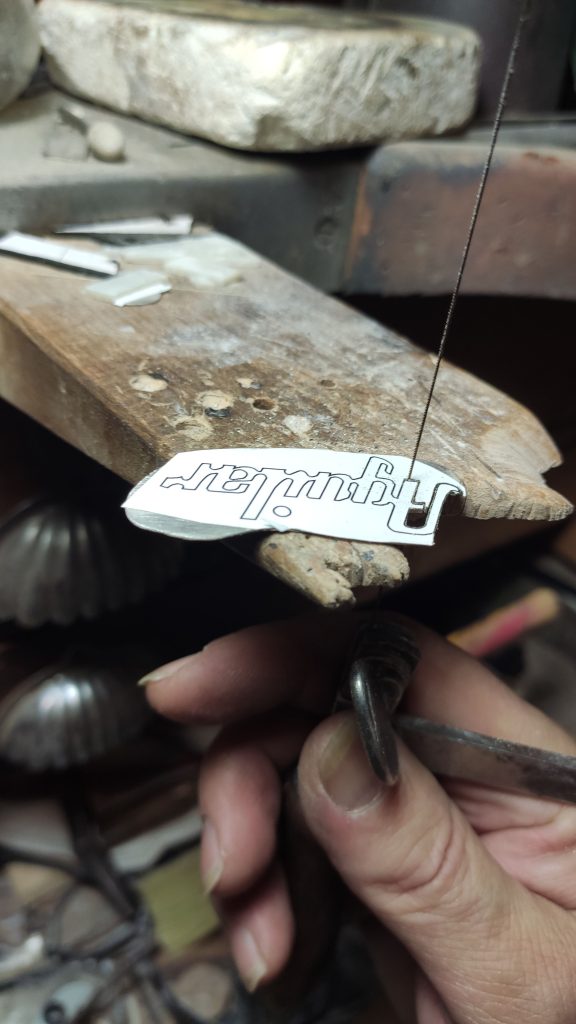
I file over it and it starts to take shape
Now comes the carving of the hole in the headstock to inlay it, you already know how it goes.
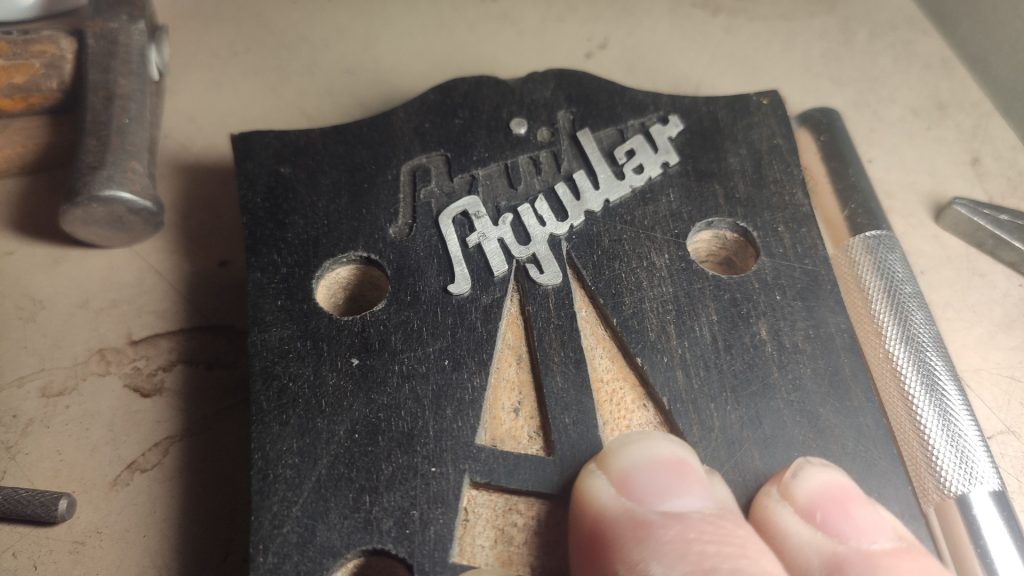
I take the chance to mill the binding channel of the headstock. The peak of the “moustache” has to be done with a chisel because the milling cutter doesn’t fit. Mmm, I should have put the logo after making the binding channel. I centred it by eye and the binding is too wide, maybe it’s too close.
It seems silly to worry about the logo when there is still a lot of guitar to be made and a thousand things can happen, we are all too human. But at some point it has to be done.
We are going to start with the vaulting of the body. I follow the instructions in this video https://www.youtube.com/watch?v=v_NDDIP0-us
It’s funny that the video is from someone called “New Creation Reformed Presbyterian Church”, and it’s the only video about guitars, the rest is about the bible and the masses he gives. It is a long and tedious video, but very informative.
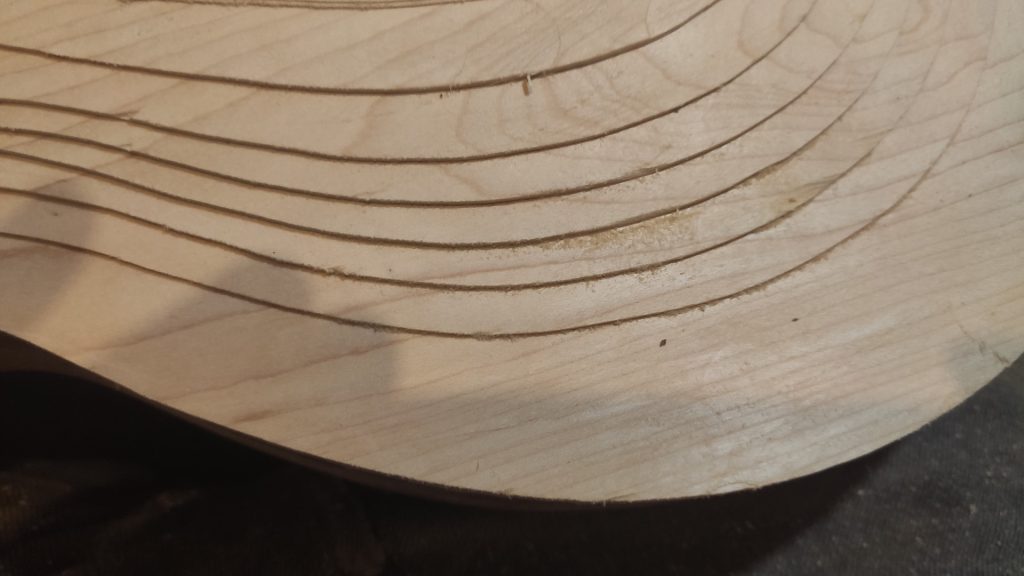
The method is to cut out seven templates which, in theory, would each one follow the level curves of the domed top, like those on a topographical map.

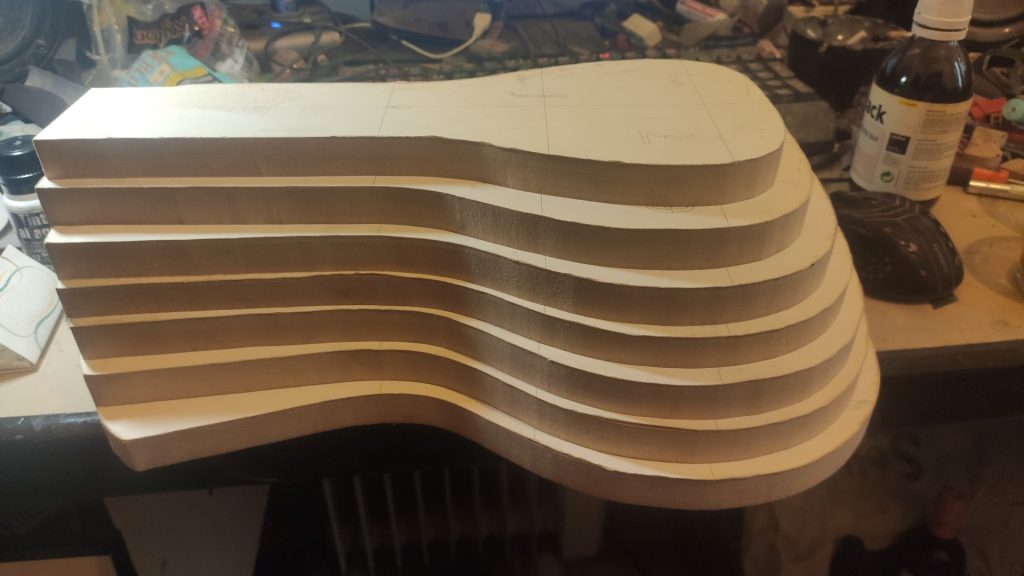
The center line is printed on the templates, which we will match to our guitar one. Which, naturally, is the line of union of the two boards that form the top. It is very important to always have reference lines, as you will have seen in many photos, both on the body and on the neck, it is easy to get lost if you don’t do it.
The first cut is the hardest one, you have to eat more than a centimetre vertically and much more horizontally, you have to do it in several passes, gradually lowering the cutter to the required depth. It was in this step that I broke the first cover. The mechanism is the same as always, cutters with a bearing that follows the template to copy its shape in the wood. The first step starts about 5 mm from the joint line of the mahogany and maple. Then you go up 1/16″ (1.58 mm) on each template, making the top” staggered”. Gauges are used to raise the cutter at each step.
Like that
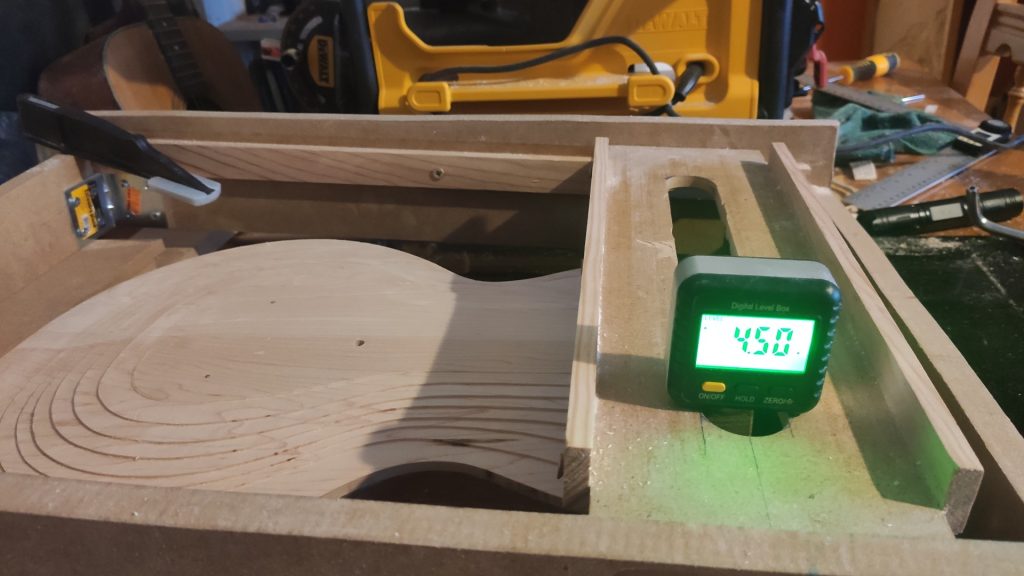
Now we cut the angle of inclination of the “box” where the tenon of the neck will be inserted. In LP’s the neck is not parallel to the body but has an inclination, in this case of 4.5 degrees. I use the same sled as before for the milling machine, but tilted by those degrees.
Still the top is a couple of millimetres wider than the body. The reason I haven’t matched the contour of the top and body yet is that it’s easy to get a splinter when milling the steps, a problem that would disappear when trimming the top afterwards. Not to mention that the binding channel still needs to be cut. Besides, it is much easier to sand five millimetres of hard maple (which is the height after “stepping”) than 16 millimetres.
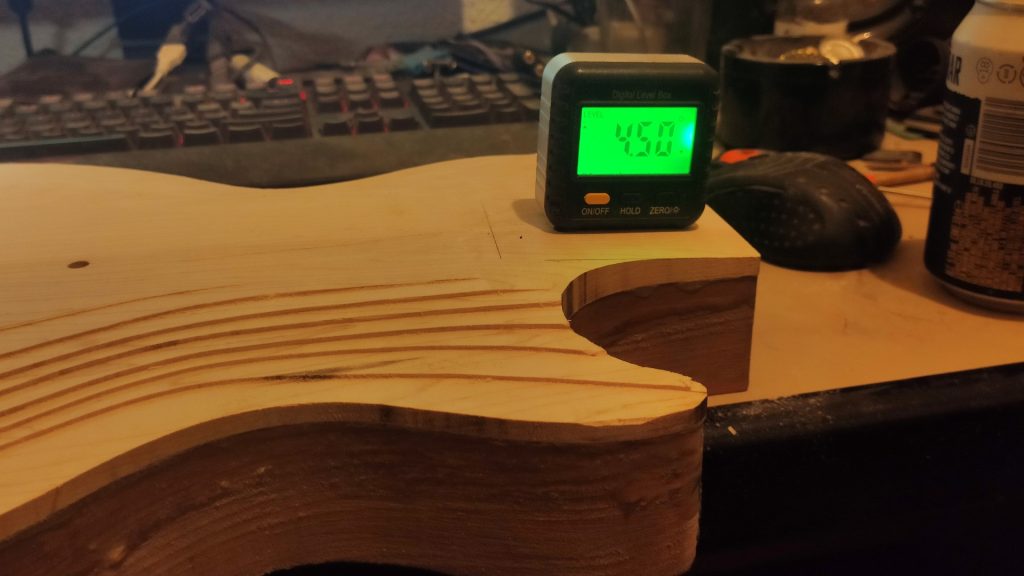
Then you cut the plane of the pickups in the top, in this case a light, one-and-a-bit degree. It goes from just over a millimetre after the end of the cut we just made to… well, as far back as it goes (no photo).
A knot has appeared on one side, I hope it will go away when the carving is finished.
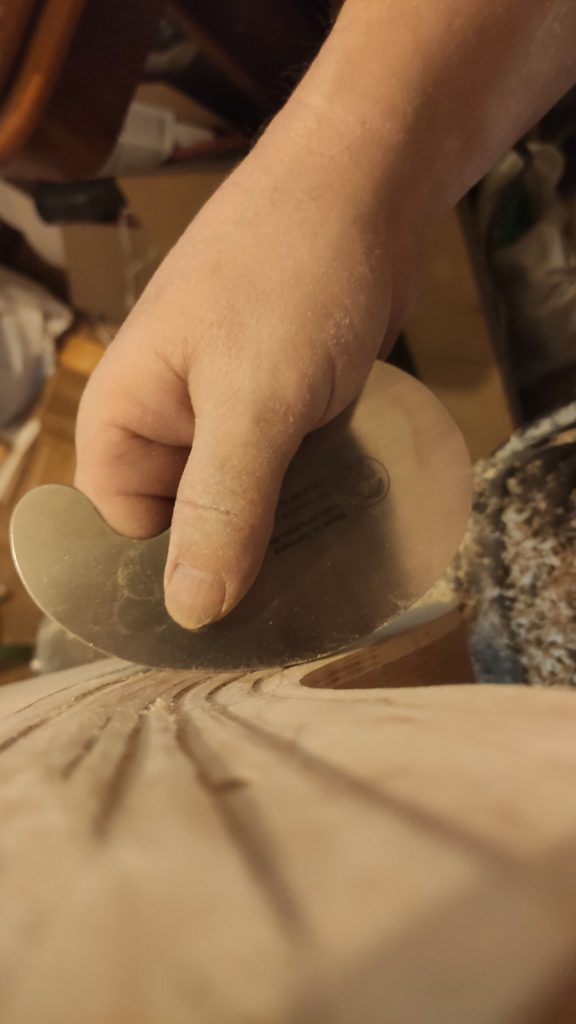
Now we match the top to the body and clean the glue residues. Some seasoned reader will notice that, in the end, I bought a more professional “robosander”.
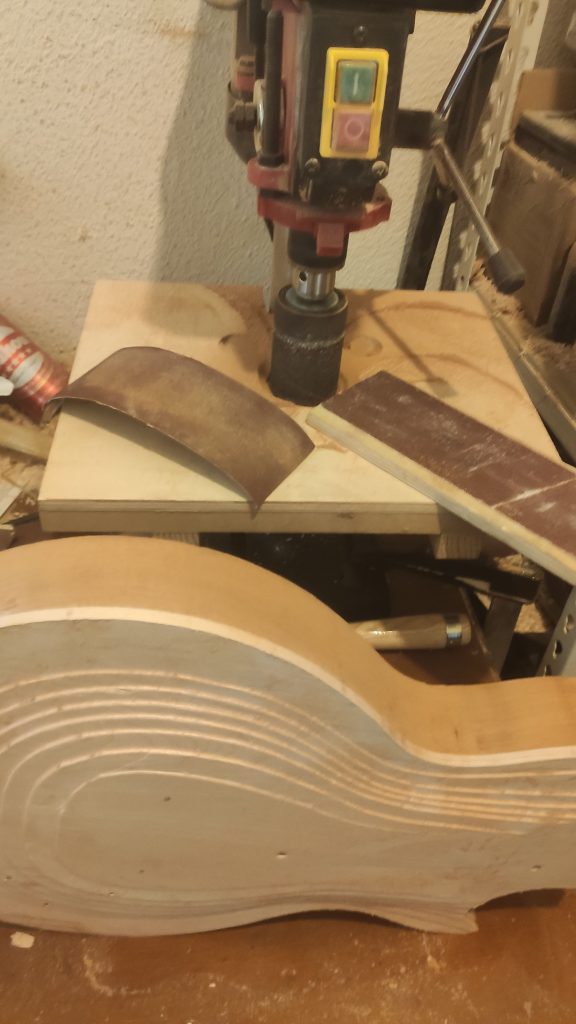
We have to make the steps disappear. I have one of those violin-making planers with a curved bronze bottom that I treasure for jobs like this. But I can’t find it anywhere. It’s probably at the bottom of a box from when I moved the workshop. So I take some of it off with a blade and then work with the orbital sander.
And that’s the end of the second part. After the binding there is another milling about a millimetre deep all around, which forms another step in the wood that has to be sanded to give it its final shape, but it doesn’t look bad at all. The plane cut to accommodate the tenon is kept protected with tape so as not to alter it in the carving.
Back to the neck
The operation is tricky now. Well, all of them are, but this one in particular, we have to shape the tenon.
As the neck is inclined with respect to the body, the first cuts have to be at 4.5 degrees. I prepare a piece of wood to be used as a guide.
And I make those cuts. I start with a rib saw that I bought for the occasion, but I don’t like the feel of it and continue with my Japanese saw.
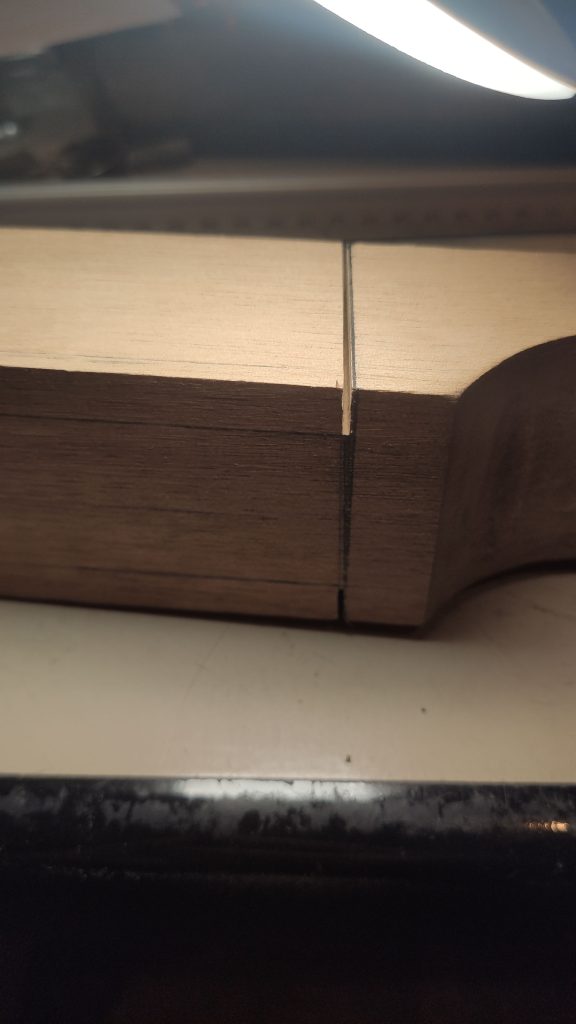
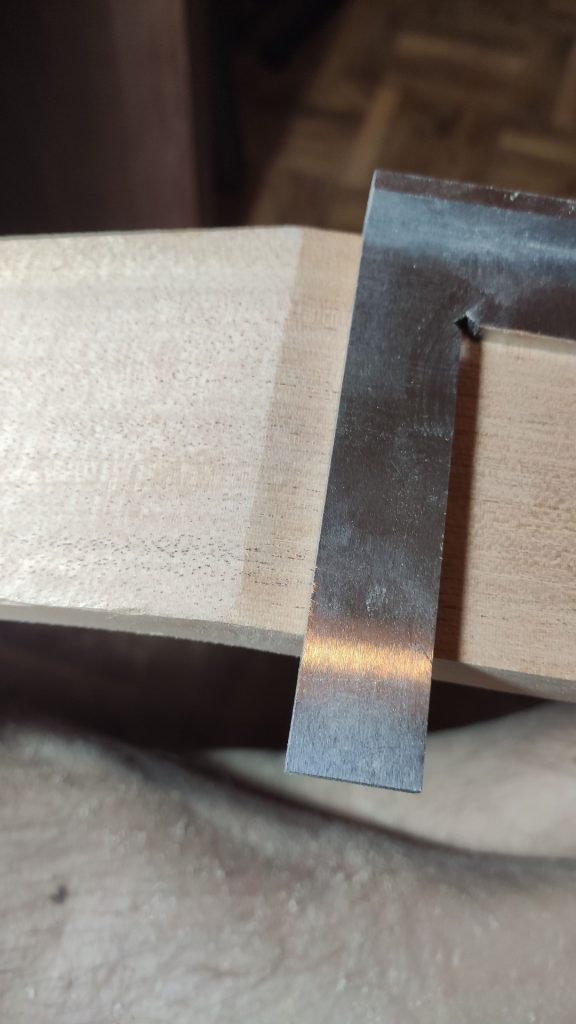
Then I cut the sides, leaving a couple of tenths to give me room to sand them later. I check that they are square
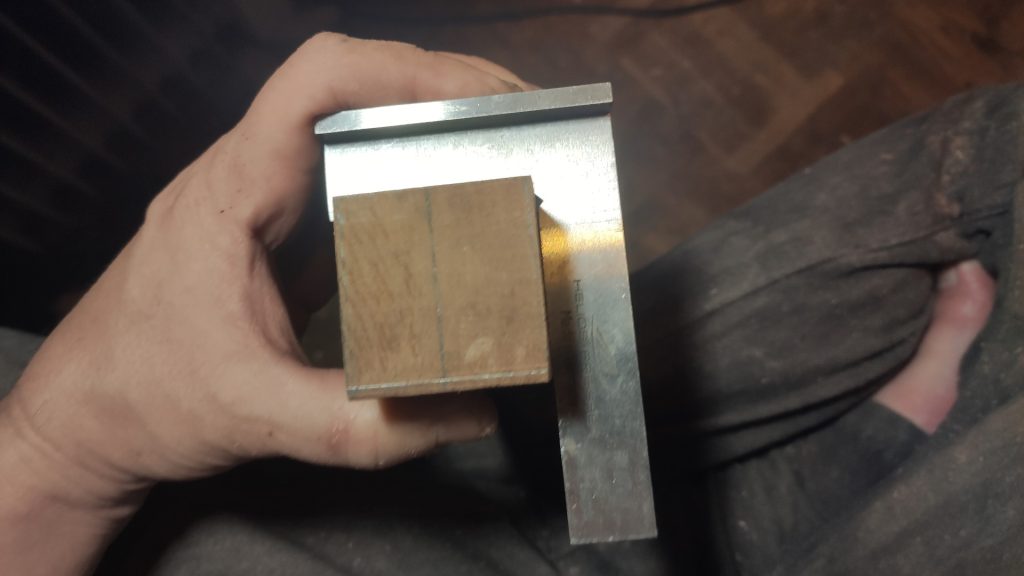
I finish by sharpening the corners with a chisel.
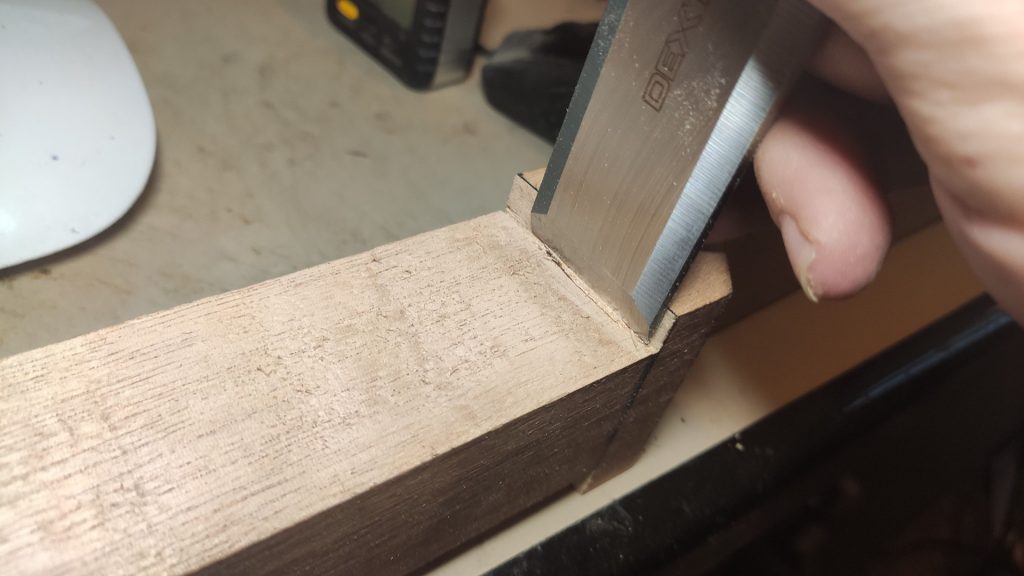
The bottom side remains to be done. It has to be perfectly parallel to the face where the fingerboard goes. I take advantage of the fact that I have the disc saw very well adjusted, and I start the cut with it to use that surface like a guide. I can’t finish the cut with the disc, of course.
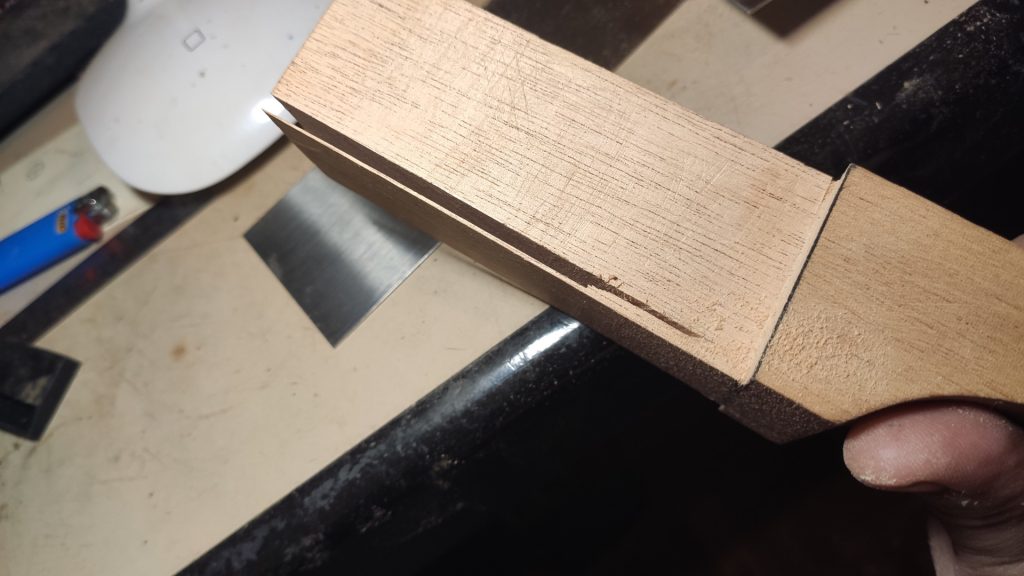
I finish it by hand and sand it to its exact measurements. The end and bottom edges must be rounded. It looks “de puta madre”, (even if it’s ugly for me to say so). I put the fingerboard to see the effect.
I now prepare the template to cut the tenon socket in the body and clamp it, making sure that it is well levelled horizontally and following the 4.5 degrees in the longitudinal direction. The template must be longer than the body to be able to support the router without juggling.
And I do the milling. Then I present the neck and the micro-adjustments are made.
Until it is flawless, without any gaps
And perfectly flush with the body

The fingerboard can now be glued to the neck and rounded, but first I will do the binding of the body.
Section: Five-layer binding!
This is the process that has given me the most trouble. There are parts that I had to repeat, and sometimes I cursed myself for having chosen such a complicated binding instead of a simple one-layer one. In the end you get the hang of it.
On custom model everything has a binding, the body of the guitar, both the top and the bottom, the headstock and, of course, the neck, which we have already seen. At least the neck is only one layer.
I am joining the plastic strips with acetone.
We started with the headstock, which I had already made the channel.
For the “moustaches” I make a small jig to shape them with the hot air gun.
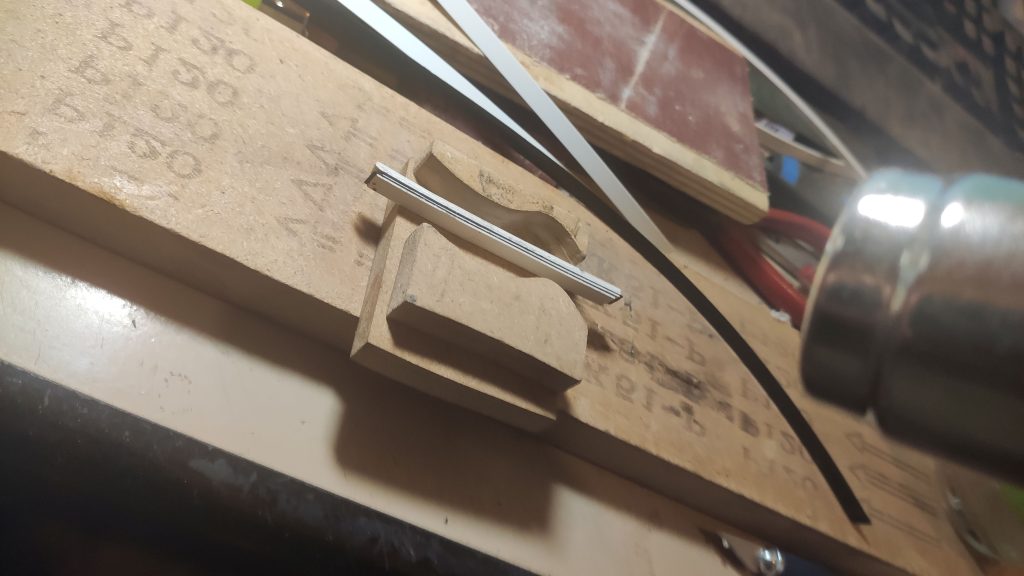
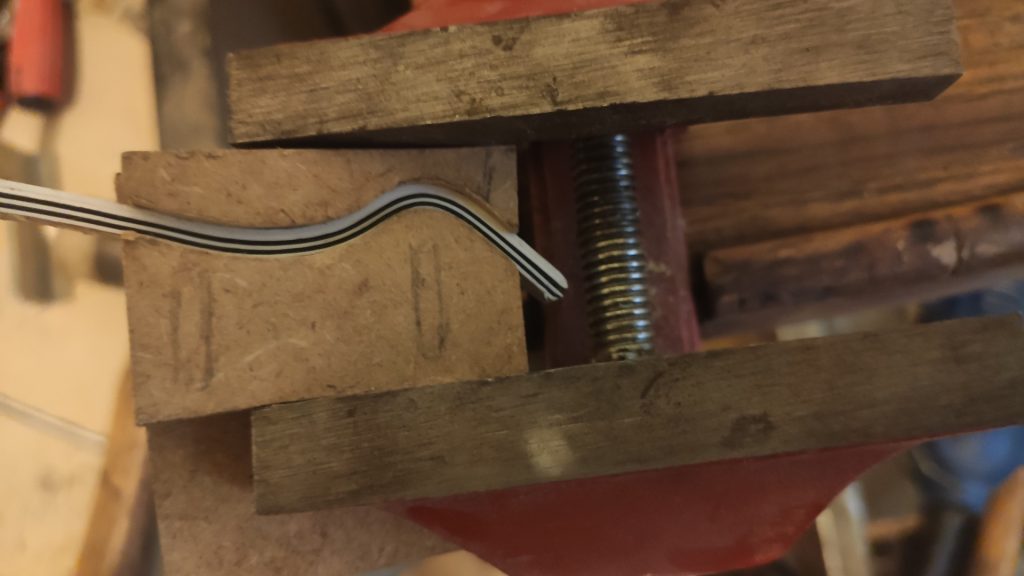
But it is not enough and I have to push the central curve a bit harder.
You have to make precise cuts for the joints, which are then hidden by soldering the parts with acetone. A piece of binding can be dissolved in acetone and used as a filler material, if necessary. I don’t need it for now.
Headstock almost finished, just need to give the last sanding to match everything flush and polish. It’s not a perfect binding, but it works for me. I’ve seen much worse old gibson custom photos
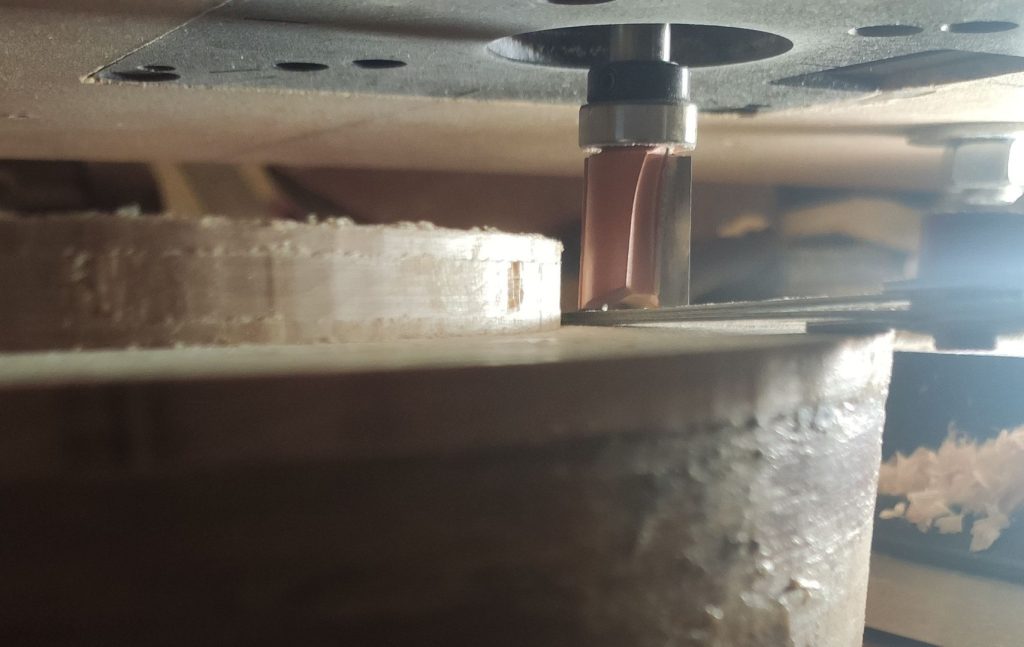
Let’s go with the body. The back channel is easy, because it’s a flat face. It is done on the router table, we raise the cutter to the desired height and use the makita trim guide accessory for the width stop. I don’t like the binding too wide, I calculate it so that the outer layer is more or less double that of the inner ones
I put the binding on the bottom side. I immediately regret having made the channel so narrow, you have to peel a lot of material from the outer layer, and it’s hard to keep the width regular. That can be fixed later, but it’s a pain.
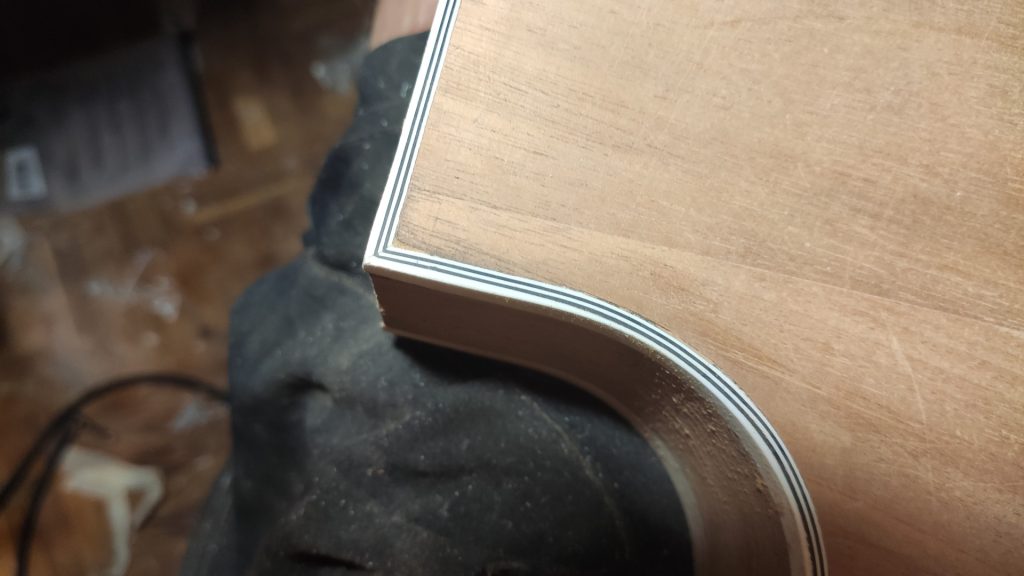
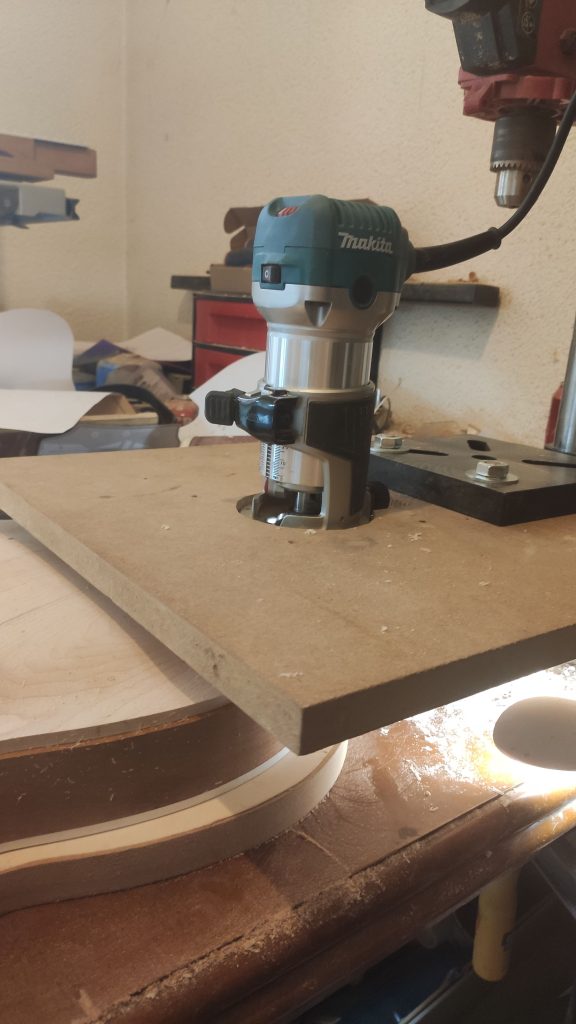
For the top I can’t use the milling table to support the workpiece because the face is not flat, so I turn the table around to attack from above.
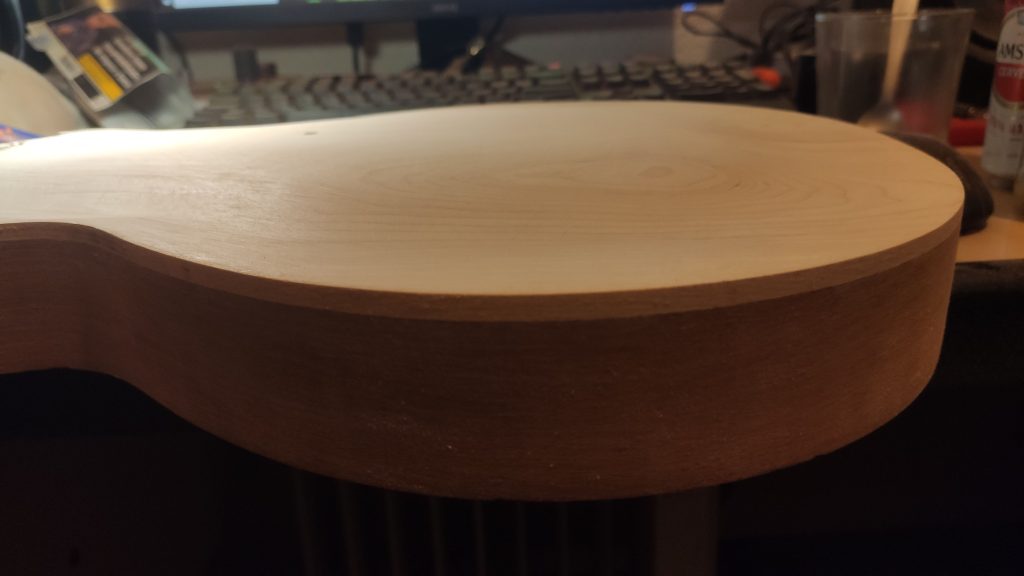
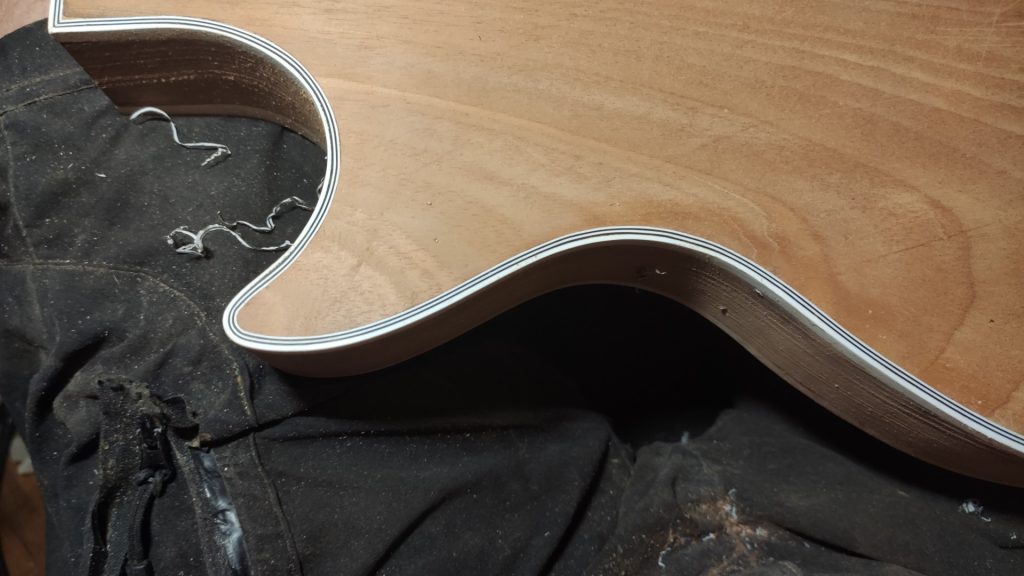
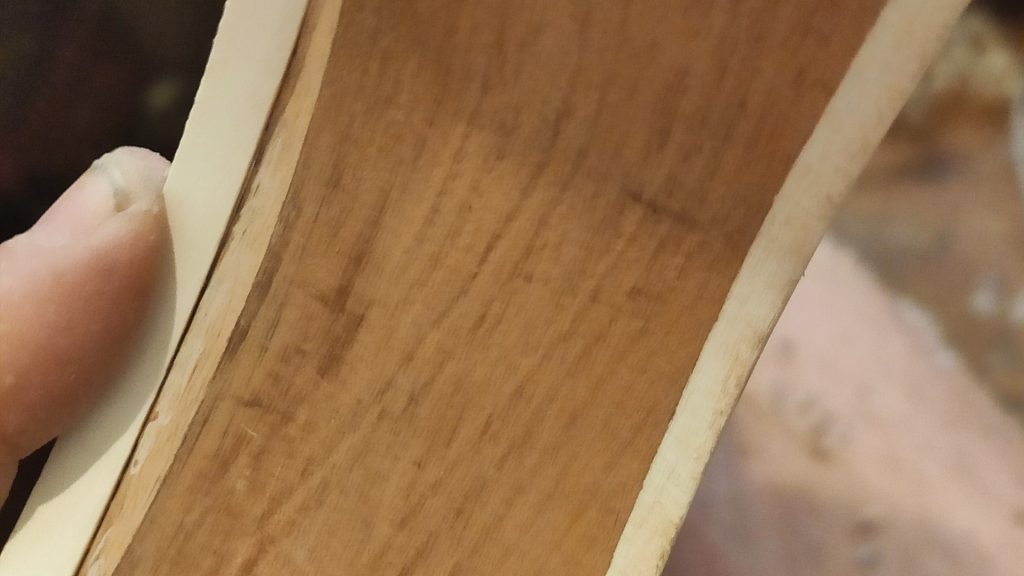
This way the whole channel is milled up to the peak of the horn where the curve of the single cut begins. From there the milling does not maintain the height, it has to go up the curve following the arch of the top and back down to where the body joins the neck. That’s why on well-made maple top LP’s you can see a bit of maple under the binding at that point (and only at that point). Shame and damnation to those who continue the milling at the same height as the rest and use a much higher binding in that area. You can see in the photo the part of the maple visible after the milling:
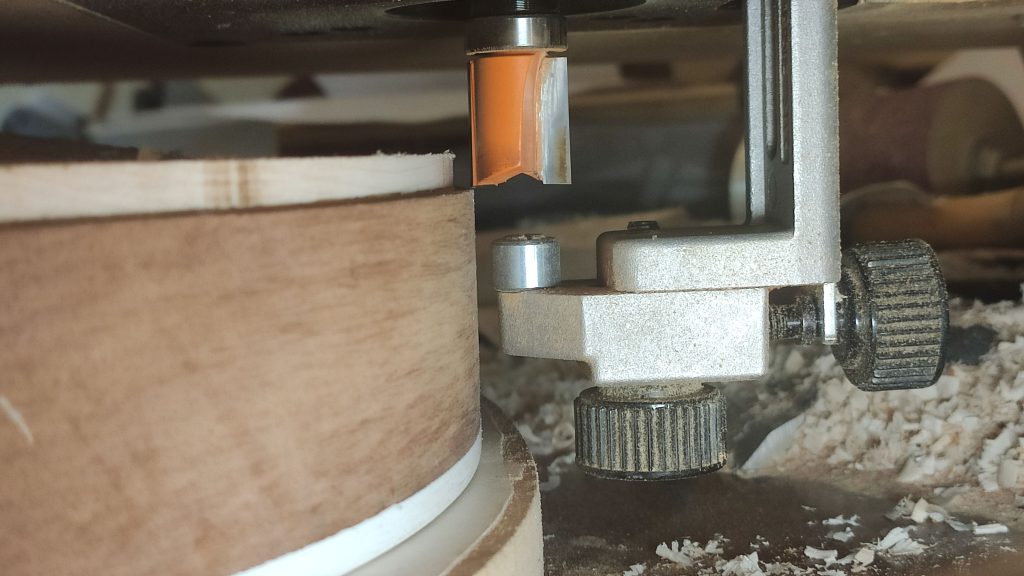
To mill this part, there is a very nice tool available, in which the router rests directly on the edge of the guitar to always mill the same depth of channel, but it can move freely along the vertical axis. The support surface of the router is curved, so as not to “hit” the vaulted top, it only rests right on the edge of the guitar. The router reads the height of the top all the way to the end, maintaining the width and depth of the cut.
But I don’t have one, and I’m too lazy to build it or spend more money, so I have to do it by hand. It’s a delicate cut, where you should never tilt the router towards the guitar, it should always be perpendicular to the tangent of the point of the curve through which it passes. It came out well, but you have to be very careful.
Then we glued the strips of the binding (which is quite tricky) and peeled it down to its width.
As I said at the time, I now mill from the top about a millimetre along the entire contour of the top binding. I do this with a 19 mm diameter milling cutter. That leaves it all at the same height and the same thickness as the binding below. This also carves the wood, and the orbital sander is used to join this carving to the curves of the vault, leaving the dome with its definitive shape. The part of the single cut is not milled, of course, it is adjusted by hand.
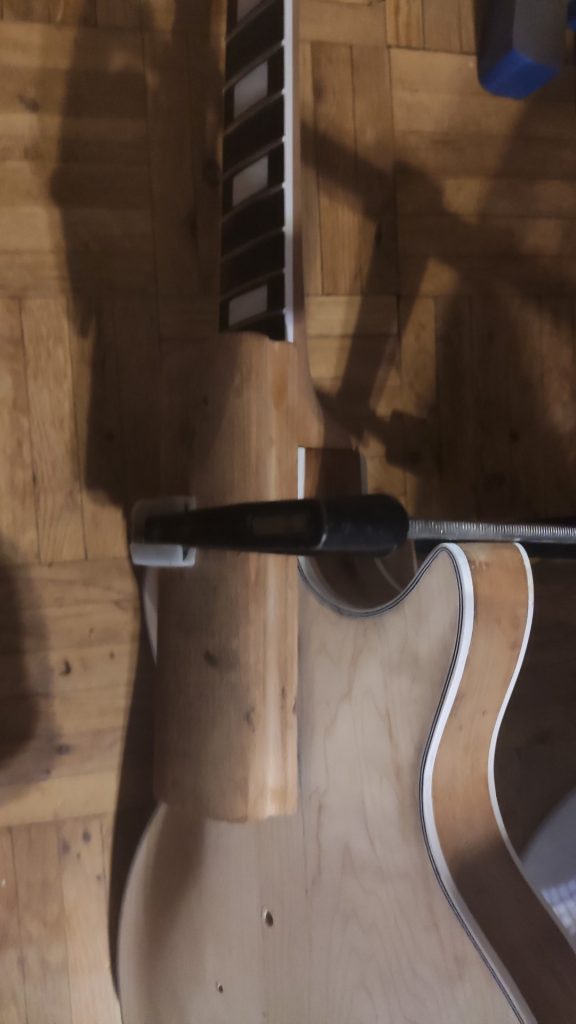
Next, I provisionally mount the neck (without gluing it yet) with the two E tuners on, the first and the sixth string. I put two old strings to establish the definitive position of the bridge and tailpiece. Although the bridge and tailpiece positions are marked on the plans, they should always be checked on the actual piece. Remember, the drawings are a reference, measure 10 times, drill one
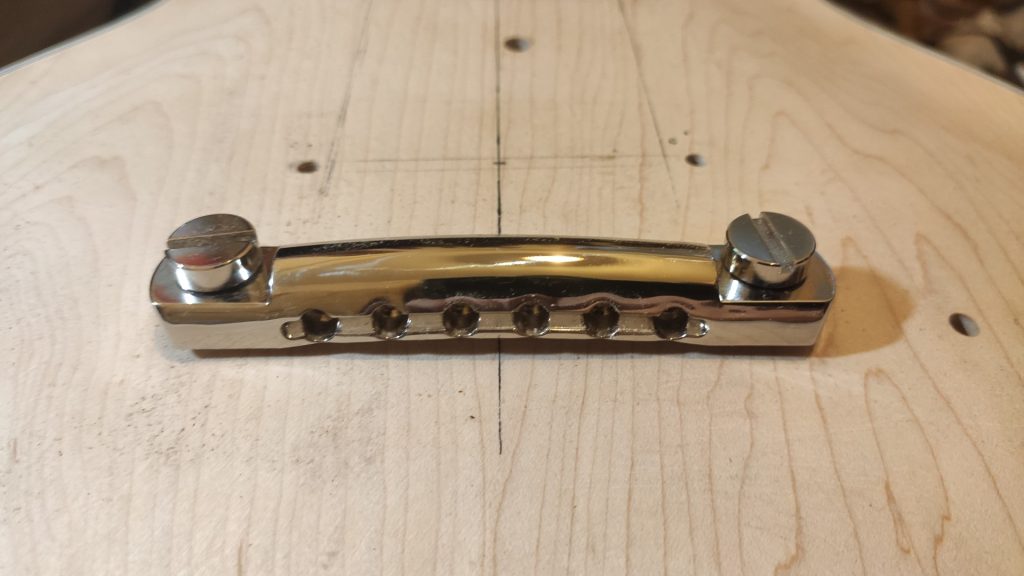
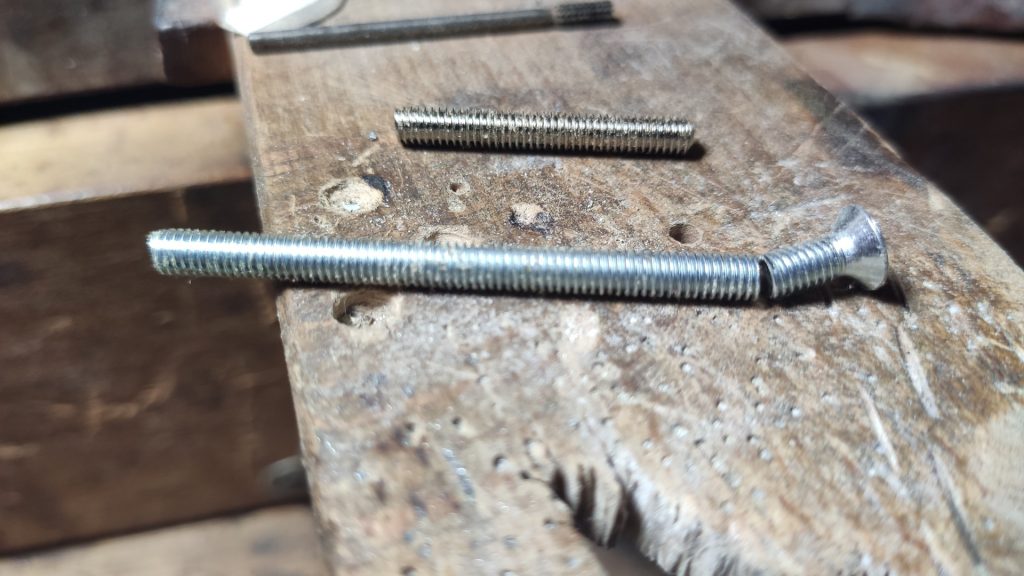
The bridge is an ABR-1, as it was in ’59. It doesn’t have bushings embedded in the wood like the current ones, but just some rods threaded directly to the top. I prepared some screws longer than the standard ones by cutting the heads of some Leroy Merlin screws. Here you can see the original one and the new one, which has no nickel plating and is much longer so that it fits well in the mahogany. Both are M4 threaded, both are attracted by a magnet, neither is stainless steel. I have a brass threaded rod as well, maybe I will experiment in the future.
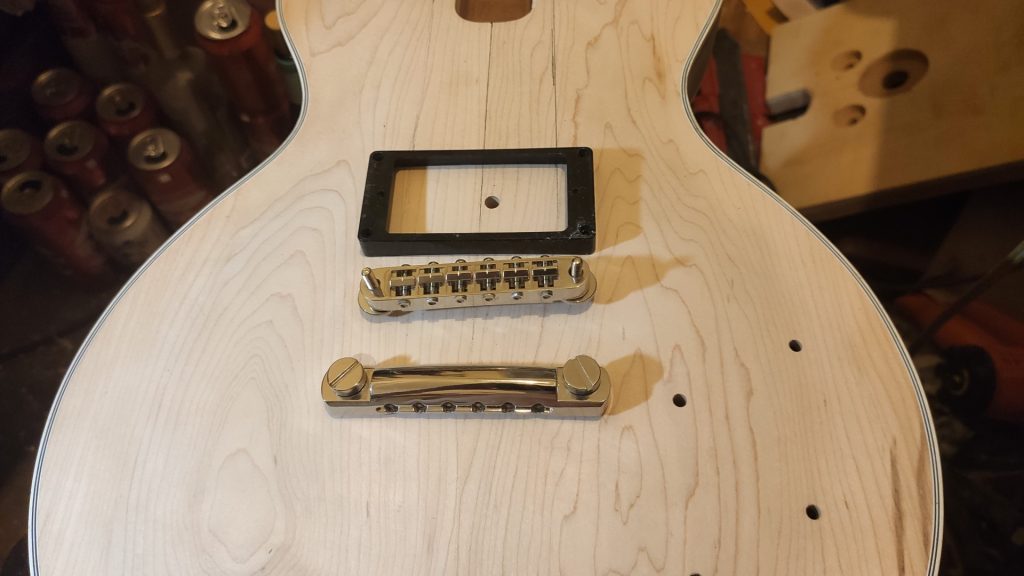
I can’t help but start presenting things
Let’s finish the neck.
Once the exact position of the fingerboard has been determined, I flush fit four points of the neck so that I can glue some simple pieces of wood that, together with the nut, act as a stop and immobilise the fingerboard without allowing it to move. I heat the pieces, apply the hide glue, place the fingerboard and quickly roll a thick bicycle inner tube applying a lot of pressure, which completely glues the fingerboard in all its points. Without stopping for a moment, I remove the nut and put on the blocks and clamps before the hide glue cures.
Now that I remember, I did this before fixing the position of the bridge and the tailpiece, sometimes I don’t remember the exact order in which I did things, sorry.
The next day I check that it has been well glued and I realise that I didn’t open the access hole to the truss rod before gluing the cap to the head. My mistake. Now I have to find it blindly, and it is very narrow. But I know where it is and I find it without problems
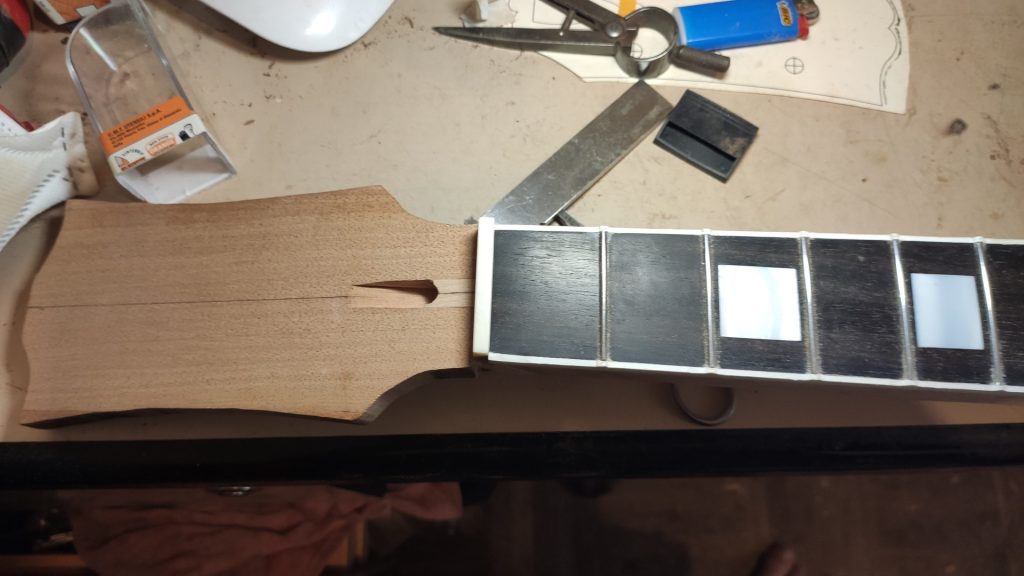
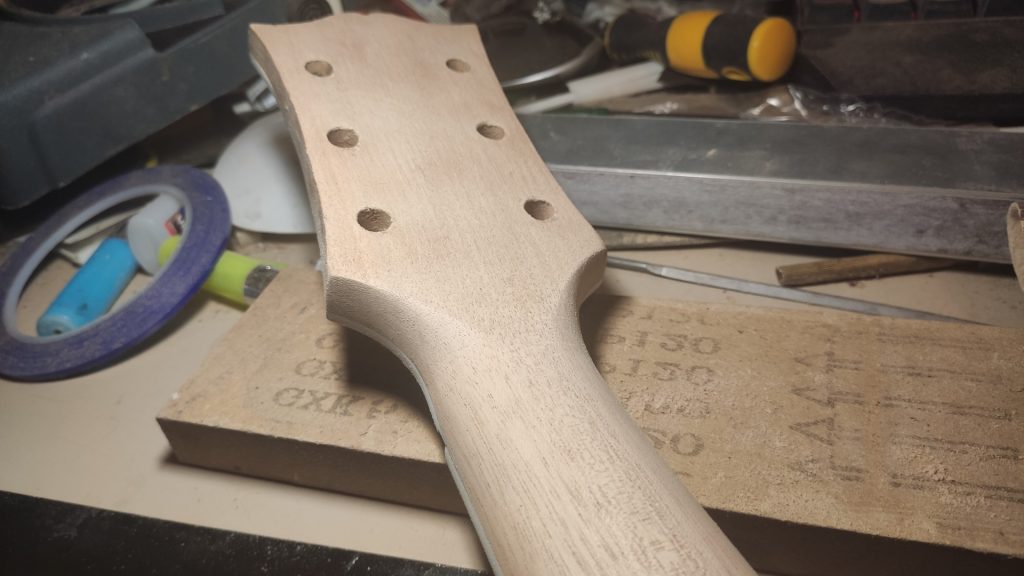
Then I finish flushing the neck to the shape of the fingerboard, giving it its definitive width.
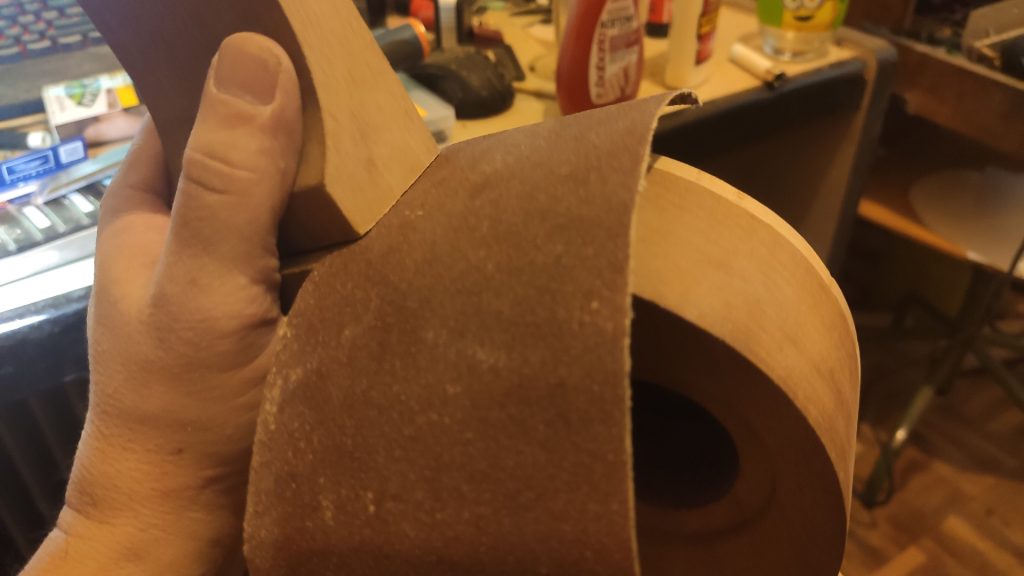
The neck of a standard ’59 is rounded in the shape of a perfect ellipse, varying its major and minor axis along the way. To trace it, we draw dividing lines between the edge and the centre line. A line is also drawn down in the middle of the sides.
Then, facets are made delimited by these lines with a Japanese rasp that eats the mahogany like butter. You can’t see it well in the photo because of the light, but the first side, on the right, is already done.
You continue painting lines and making faces a few more times, until it makes more sense to work directly by eye. You have to be careful from here on, it is better to make many light strokes than to sink the wood. I have one of those needle curve copiers, to check that the curve of the neck is symmetrical (there are no photos of this). And every now and then you have to imitate a heavy guy at a concert in the eighties and do “air guitar” and run your hand all over the neck to detect any irregularity. The centre line is not touched with the rasp, the final thickness is already established and verified to be completely straight. We don’t want to change that. If the template was made well and its shape was copied well, those measurements should be correct without having to modify them.
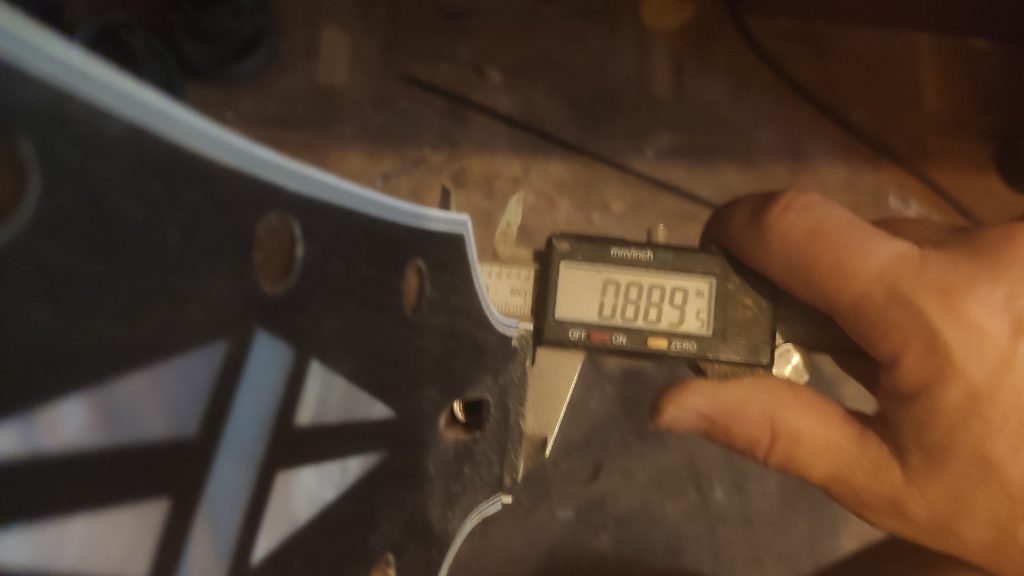
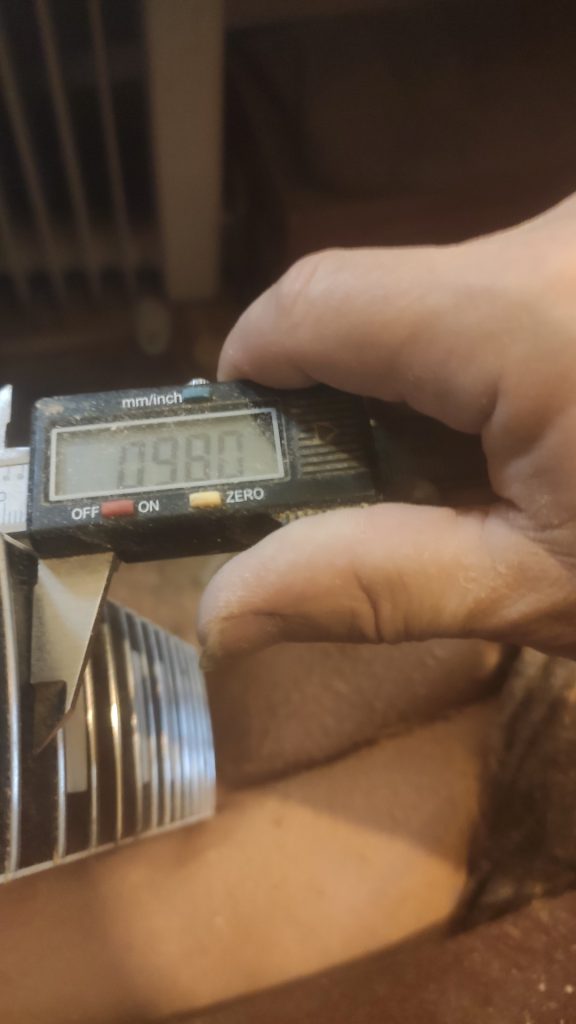
The thickness of a standard 59 LP neck is easy to remember if measured in inches: 0.89″ at the first fret and 0.98″ at the eleventh fret. It misses by five ten thousandths of an inch at the first fret:
But I hit on the 11th fret
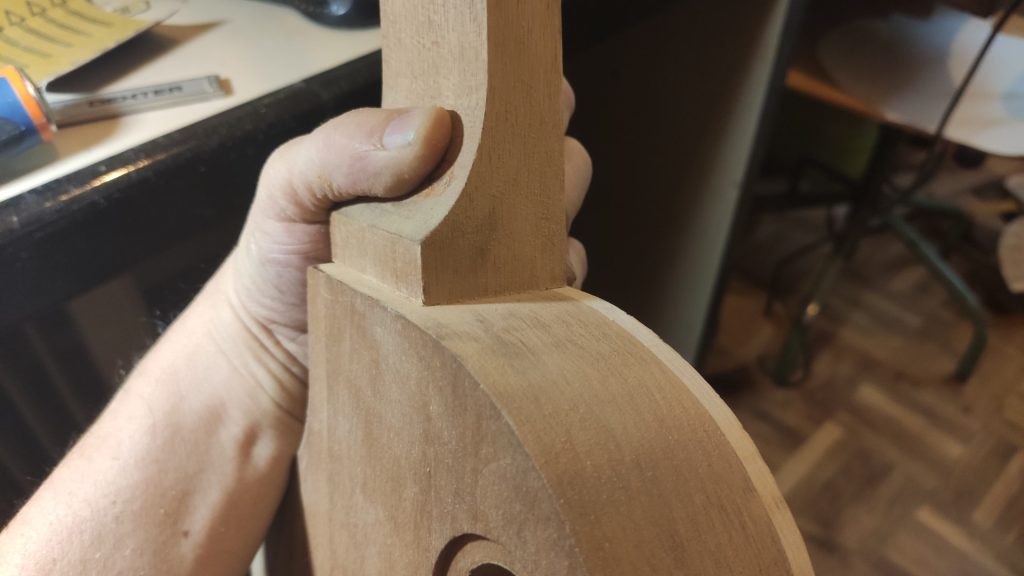
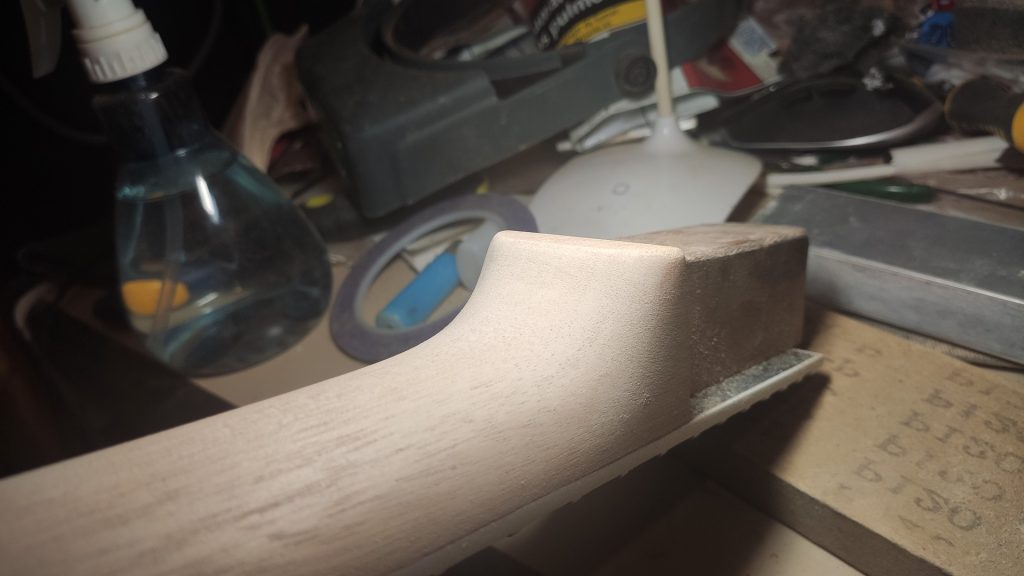
Let’s make the curves connecting to the heel and headstock.
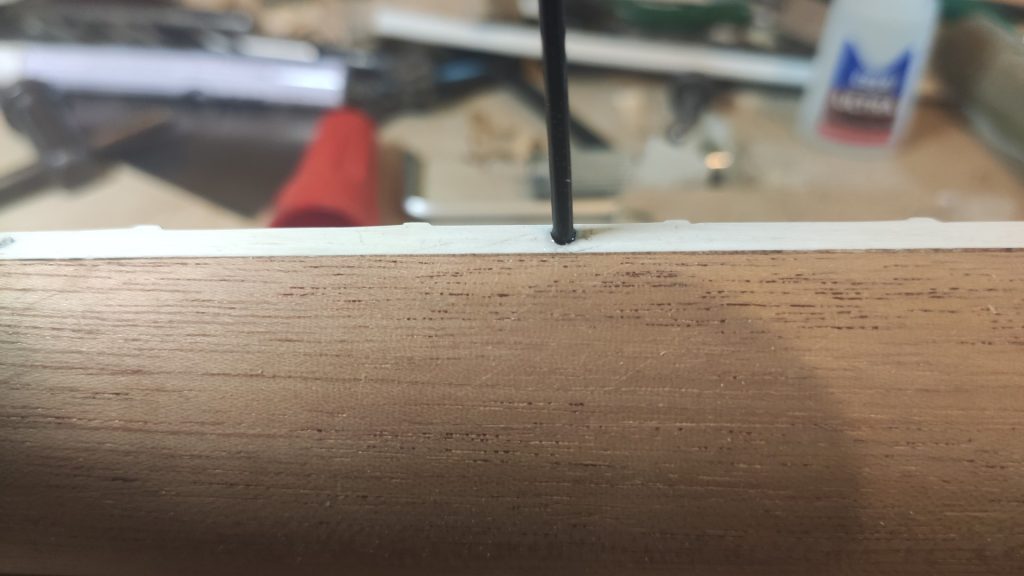
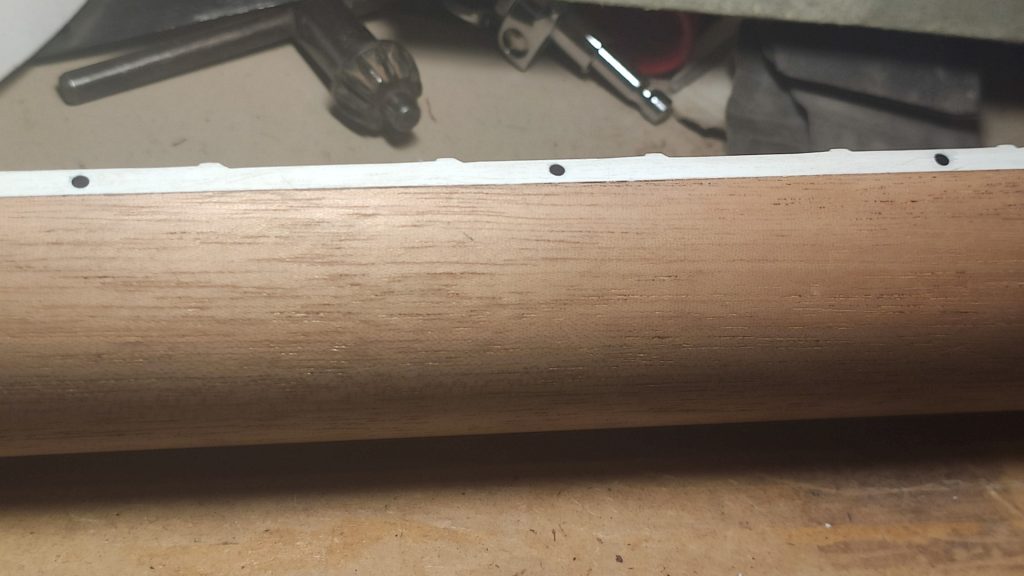
The points on the binding. I drill the holes by hand, it takes very little time and is safer.
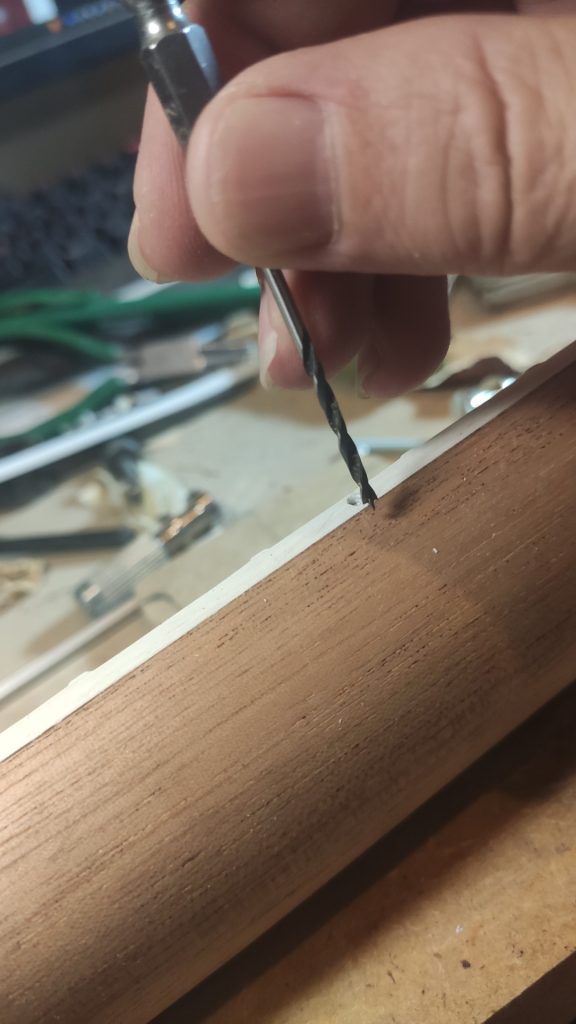
The material cylinder is embedded with glue.
And it is cut and flushed
All that’s left is to glue the neck to the body. The old-fashioned way, a lot of hide glue and a clamp.
I’m going to mill the holes for the pickups, and with that the guitar will be ready for finishing. The end of the project is near, I can already smell it. It seemed infinitely far away when I started.
First I mill the template I’m going to use, I have a methacrylate model to make it.
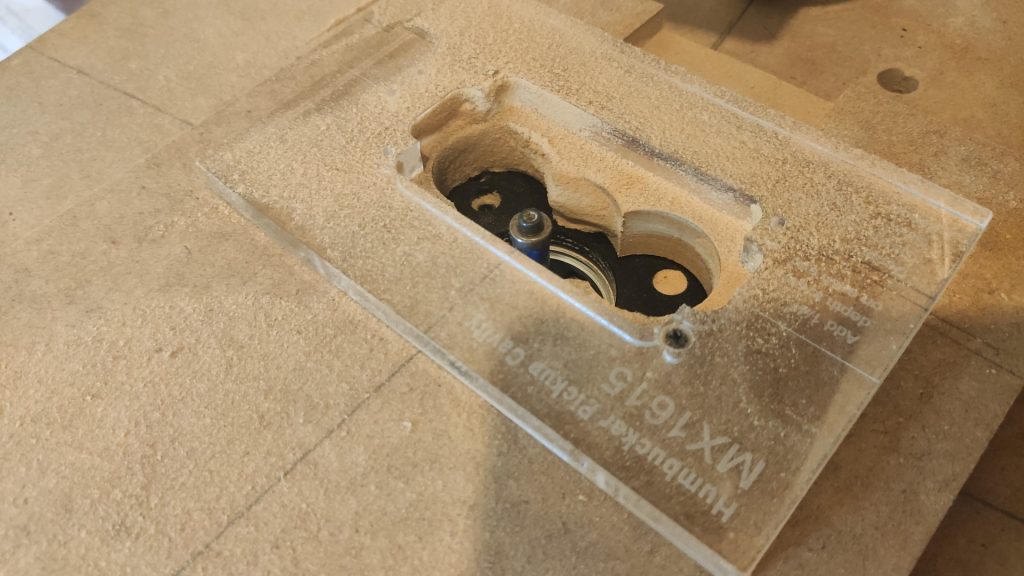
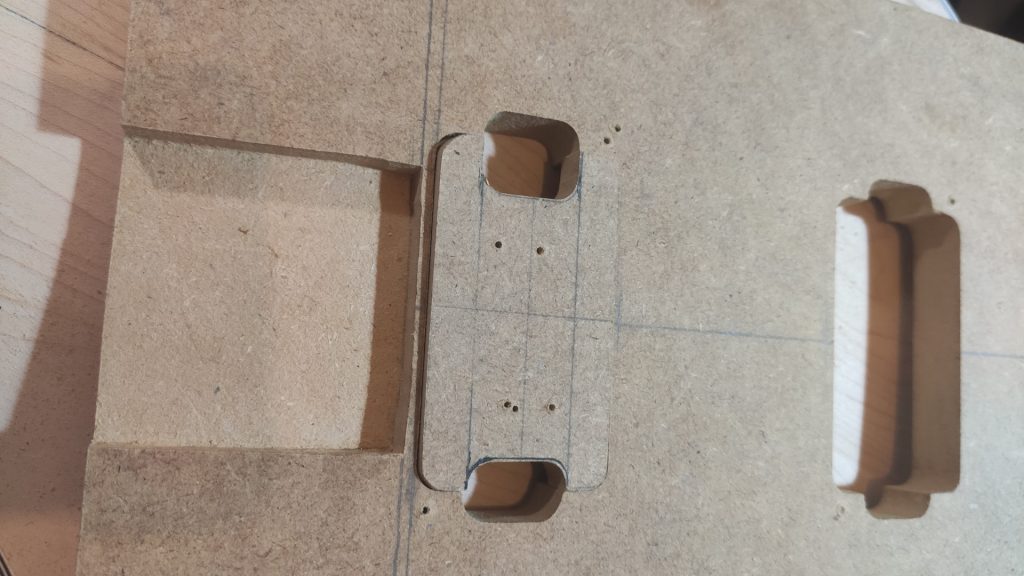
I also have to mill a space in the MDF of the template where the protruding fingerboard will fit, in order to be able to place it well against the body without it getting in the way. The hole will also serve as a guide to place it well. I also prepare a removable piece to make the typical “ears” of the LP, which are milled a quarter of an inch deeper than the rest. Traditionally, I would mill the ears first and then the rest of the hole, but I don’t have cutters with which I can do it that way, so I’ll leave the deepening of the ears for the end. I’ll mill first with the piece removed.
And I’ll make the ears with the removable piece on, in the position I need. There is one hole a bit wider than the other, and you can turn it around, because one ear is wider at the bridge pickup.
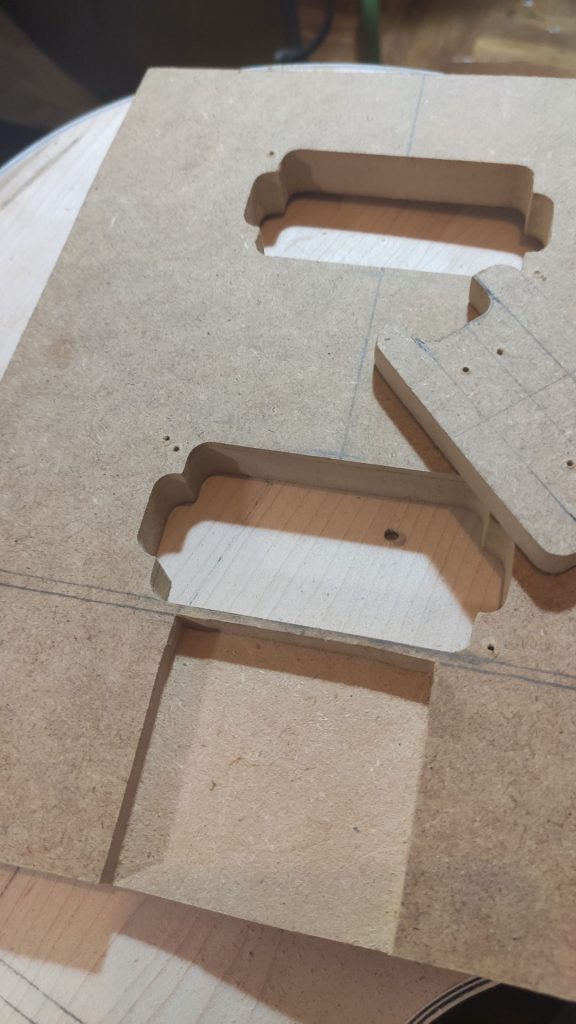
The problem is that, when milling from above, I have to use copy milling cutters with the bearing in the base, and none of them have the necessary diameter to enter well into the curves, which have a smaller radius. So first I do an initial milling, leaving the curves unfinished, as shown in the photo.
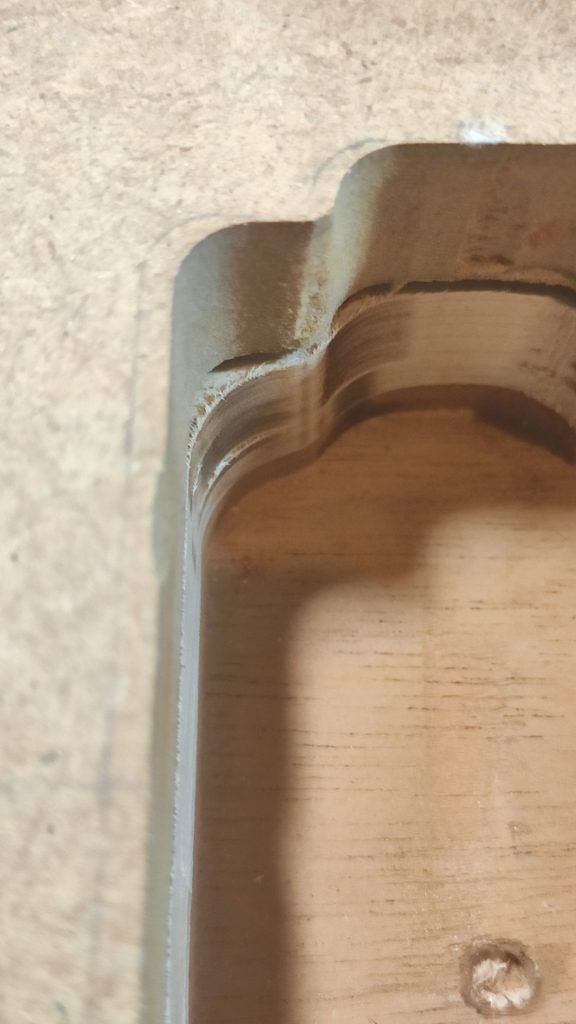
And then, when I reach the desired depth, I put a long straight milling cutter and use its smooth side to copy the final curves of the template and finish deepening the ears. Be careful that only the smooth part of the cutter touches the mdf.
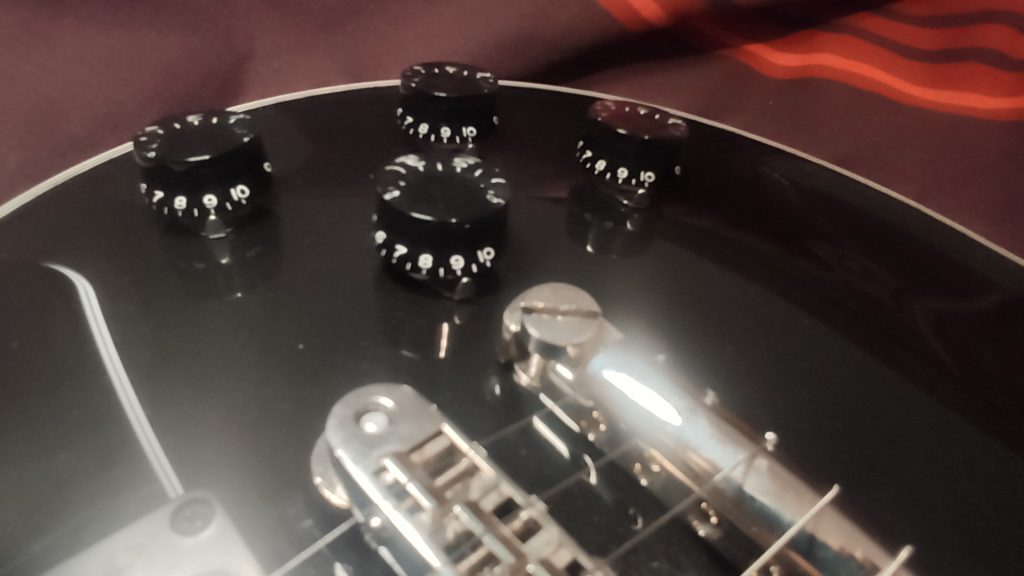
As someone later observed, this could have been solved by drilling holes in the corners with a drill bit of the desired radius, and then milling normally. Other problems can arise, though. The template is set at the angle of the plane of the pads, a little more than one degree, and drilling the holes at that exact angle would be complicated. But the important thing is to solve the problems that appear, and that’s what I did. It’s not my best milling, but it’s functional. There are other necessary milling operations that I had forgotten about. The potentiometers and the pickup change switch don’t go flat, the wood need to be angled so that the knobs are perpendicular to the dome, not verticals. I did it by hand with a forstner bit in the benchtop drill and holding the guitar, I don’t remember if any of them were by hand. I did it by eye and it came out fine
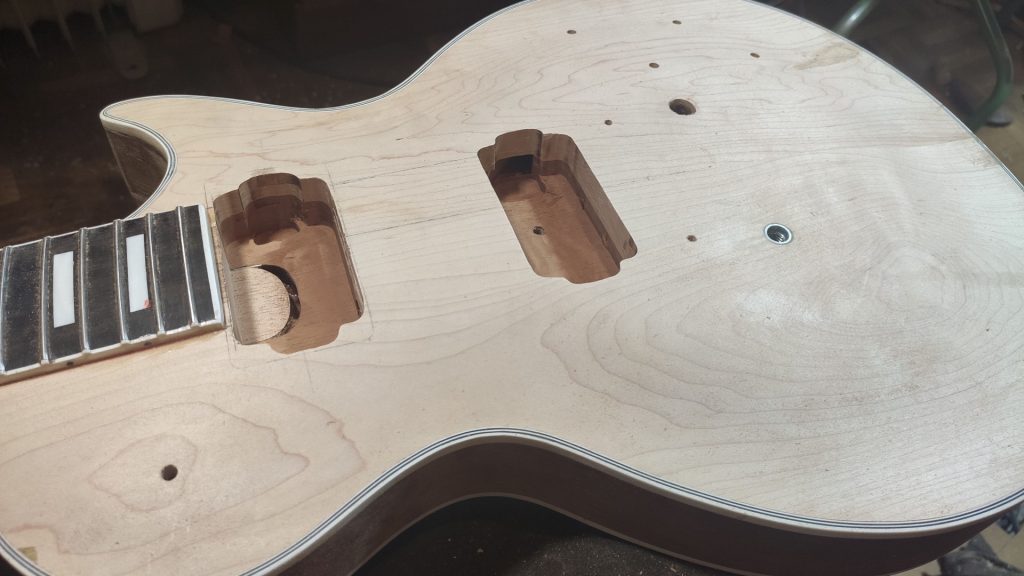
Well, that’s the end of this phase. No more milling. I drill the jack hole with a forstner bit, which I had forgotten. When milling the neck pickup, we milled part of the tenon. You can see in the picture the typical gap that LP’s leave between the tenon and the body, which is a relief for the extra glue to escape. I haven’t yet put one of the metal pieces where the stop tail posts are screwed, because there must be a ground wire connected to the circuit before putting it in. I have to do a small drill between the electronics cavity and that hole.
It is important to have got to this point. Now the only thing that can go wrong is the staining and varnishing, it is an important border.
I apply primer, water-based grain filler and sand it.
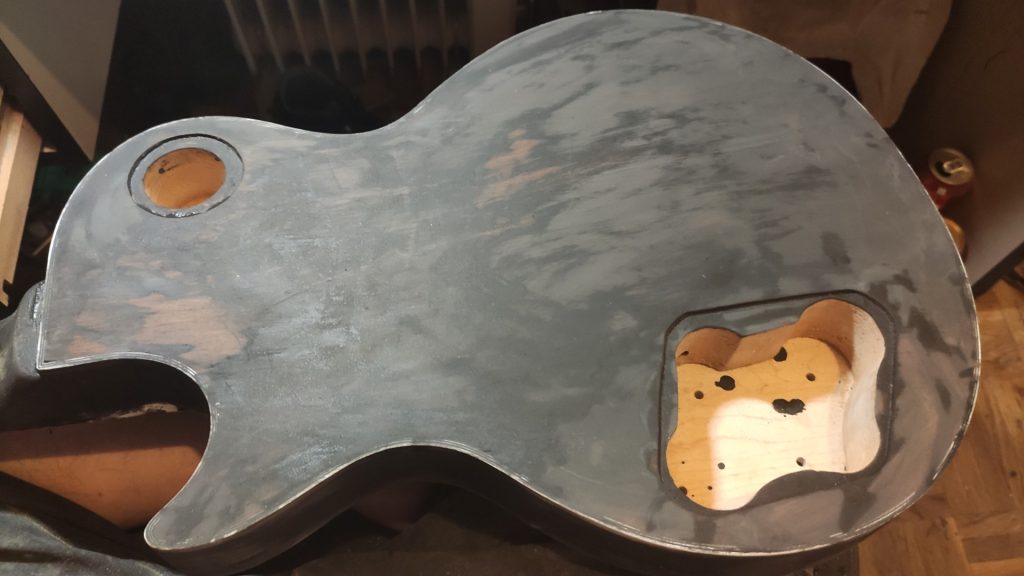
Only the necessary amount of filler should remain in the pore, no more.

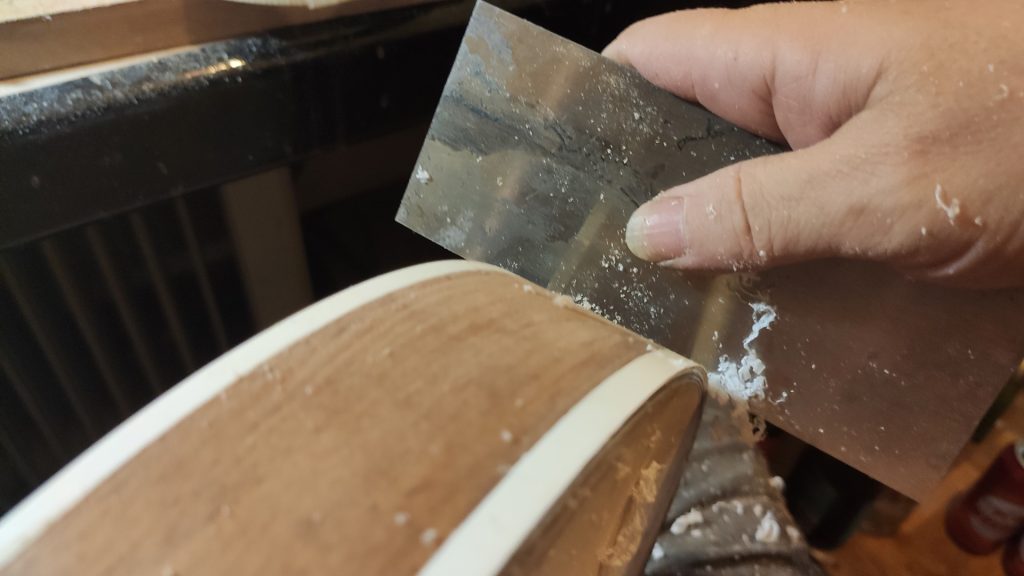
Now comes the dyeing. At first, I used water-based dyes and alcohol because I wanted to make a gradient between the black on the outside of the top and a dark violet in the middle. In theory, it was not a complicated job. After dyeing, the bindings should be cleaned well of dye to give the final transparent lacquer. Some parts (e.g. the neck) are easy to protect, but most parts are more complicated. To clean the bindings you use a sharp blade, I used scalpel tips. They are dragged along the plastic with the edge almost vertical, and a very thin film is lifted from the binding, which is then renewed. The length of the blade is adjusted by adjusting it with your fingers. It looks complicated, but you get used to the system quickly,
But it is summer. The hottest I can remember. I work in shorts and my whole body is damp with sweat. The water-based dye runs just by looking at it. When I finish cleaning a part of the binding I see that the beginning has stains again. It’s impossible to clean it with anything, rubbing spreads it, only the blade works. I try to work with a cotton glove on the left, but I can’t keep the whole binding clean, and on a custom there is binding everywhere.
In the end I get fed up. I desist from the colour gradient, sand the whole guitar to remove the dye and apply a spray of black nitro. Running the blade over it afterwards is child’s play, what a joy. I wait a few days and give it a few coats of clear nitro. I have to wait three weeks to polish, so I take advantage of the time and go on holidays.
And, on the way back, I start fine sanding from 800 to 2000 and polish quietly.
But not everything is as pink as the velvet on the case. I tried to speed up the polishing with jewellery polishing rollers. Big mistake, I started on the outside of the horn and the roller didn’t burn the varnish, but it made a “water” on it. I stopped immediately, but it marked it. It’s hardly noticeable, but it needs to be fixed. I didn’t have the strength to order another can of nitro and wait another three weeks to polish, so I kept working with what I had, finished polishing and put the guitar back together. It sounds great, thank goodness, after so much work. But with daily use, I’m discovering small defects in the finish that are not visible at first sight. Like little dye stains on the binding of the headstock, areas with less shine and things like that, I worked too fast before I went on holiday.
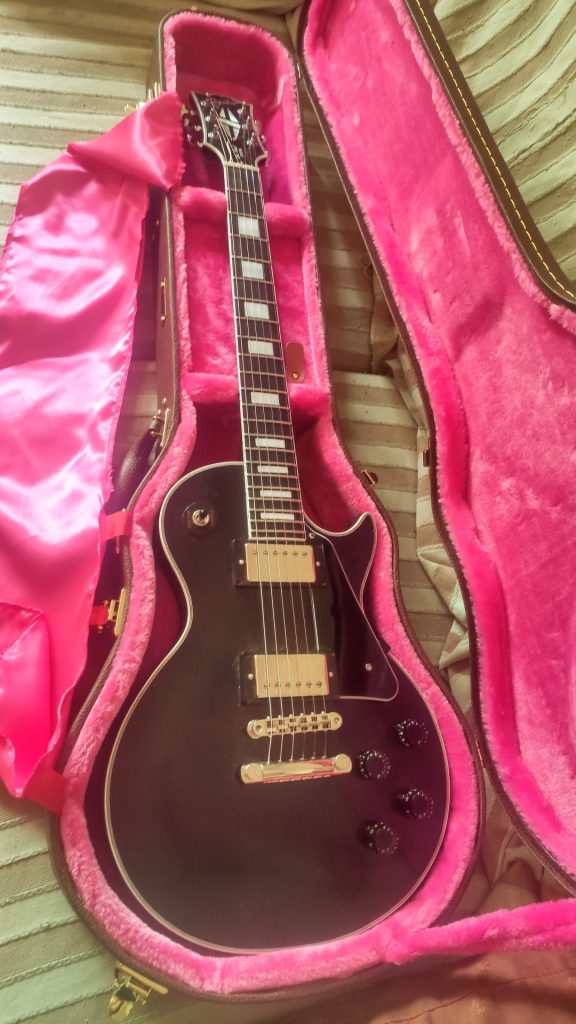
So two months later, now calm and unhurried, I disassemble the guitar and start to correct all those little faults. Then I give it nitro, wait for it to heal and polish it almost like a mirror before assembling it. A marvel, I have a guitar at the height of the best, I play it every day, 100% fulfilled objective.
The hardware is gotoh, nickel-plated aluminium tailpiece and abr-1 bridge. Electronics to match, with 500 kohm CTS potentiometers logarithmic on the volume and linear on the tone. The pickups are gibson 57 classic on neck and 57 classic Plus on bridge. The nut is made of bone. Schaller safety fittings for the strap. The circuit has the wiring from the 50’s, not the current one. The difference is the order in which the signal passes through the potentiometers. With the modern wiring the tone is altered when using the volume, if you turn it down the sound becomes darker, and very high pitched if you turn it up. This makes it more difficult to use the volume knobs to saturate, for example, the amp on a solo and then return to a clean sound. On the wiring of the 50s, of course, the opposite is true. Touching the tone knobs also alters the volume. If you turn down the treble you can hear the sound decrease in volume, and the opposite happens if you turn up the treble. I prefer it, because I adjust the tone knobs once and don’t touch them anymore, I play more with the volume knobs.
I’ve spent about 750 euros on materials, the lion’s share of which has been taken up by the pickups and the mahogany. In wood alone it has been more than 200 €, an outrageous amount. American mahogany and ebony have their own identity card number and traceability from the moment the tree is cut down, and that makes it very expensive. In 2011, more than 100 species of wood were included in CITES (Convention on International Trade in Endangered Species of Wild Fauna and Flora), including many of those used in luthiery.
Gibson knows this all too well, having suffered federal inspections and timber embargoes. Just a year later, in 2012, he had to pay a fine of $300,000 (plus a donation of another $50,000 to the National Fish and Wildlife Foundation) for an ebony that had cost him some $250,000. And which, moreover, was not returned to him. But that in itself doesn’t justify a custom LP costing $2000 more than a modern standard, even if it has an ebony fingerboard and a more complicated binding (well, OK, among other things). Gibson no longer uses American mahogany, at least on their standard models. But for an individual, the difference between the best mahogany and an Indonesian substitute is not that much. I mean, what can you save, a little more than 100 euros on a project you are going to spend so many hours on? That’s why I bought the best mahogany I could find, which is no longer used even in the gibson “custom factory”, or whatever it’s called.
I’ve spent more on tools, I don’t even want to do the calculations, but it’s something that I’ll always have and that I’ve wanted to buy for ages, so this was the perfect excuse.
And that’s all, I hope you enjoyed this adventure.